I wrote this article some years ago, it’s great to look back at things to see how we have progressed. That’s a good reason to blog because it is a historical reference, at least from the way I experienced it. Azure DevOps was called VSTS way back then.
Configure Visual Studio Team Services in Visual Studio, deploy to Azure App Service
Here are the steps I followed in the order I followed them.
- Create a new Project in Azure DevOps
- Setup Visual Studio 2022
Create a new Project in Azure DevOps
I already had an account and Organization, so all I needed to do was create the Project by clicking the + New project button from the Organization into which you want to place the source code. Here are some instructions to get you started from scratch.
Figure 1, Azure DevOps Visual Studio 2022 add new project
Setup Visual Studio 2022
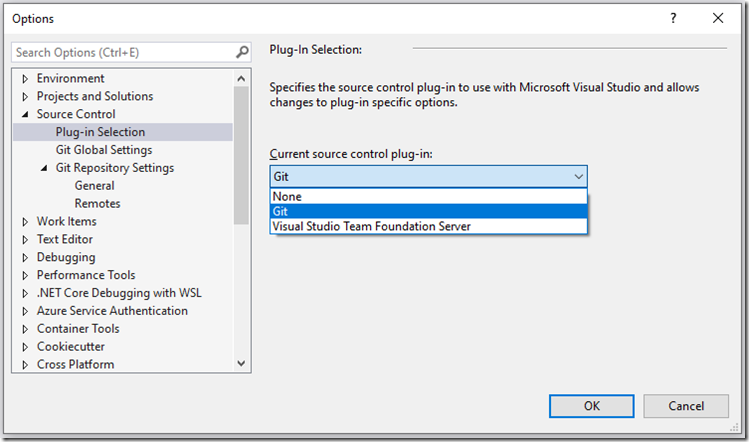
First I would recommend that you check out your Source Control options. Tools –> Options… –> Source Control. Those settings are very dependent on what you need, but have a look through them and make sure it all looks right to you. Also, you might not be starting from scratch like me which means you have to work around other, preexisting scenarios and constraints. Good luck, your can work around them. I will be using Git.
Figure 2, using Git, Visual Studio 2022 and Azure DevOps
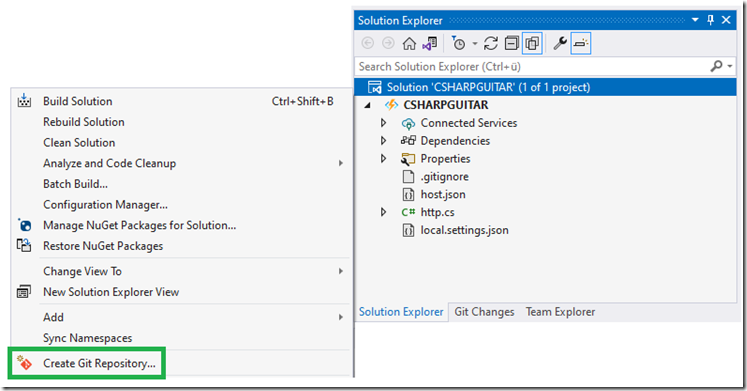
Next I want to connect Visual Studio 2022 to the Azure DevOps project I created in the previous step. With my Solution open, right-click on the Solution and select Create Git Repository. Note: I removed / deleted the existing .git directory which was in a root location. That caused some issues. What I think it that when you are creating a brand new project like this, do it from a brand new machine/workstation. Once the code is in the repository, then you can clone and download it into your current environment.
Figure 3, Visual Studio 2022 and Azure DevOps Git
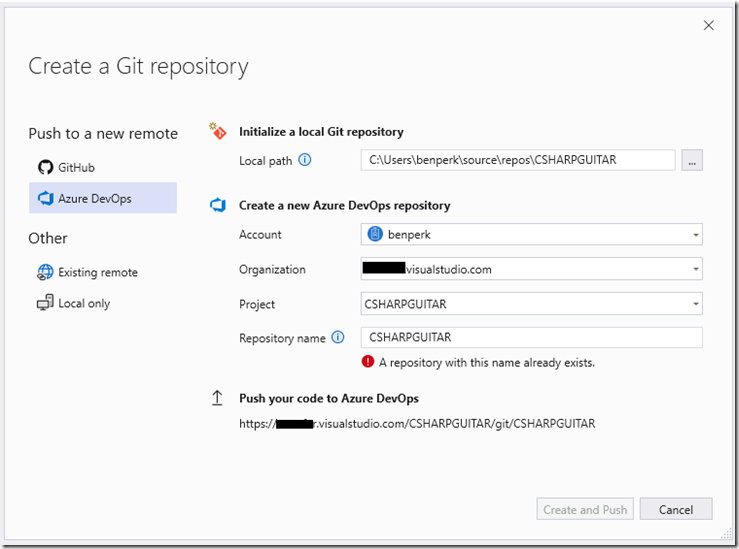
When I did this I received this popup. Notice the error “A repository with this name already exists”.
Figure 4, Visual Studio 2022 and Azure DevOps Git
To get past that I followed these instructions and renamed the existing repository, it was empty and new so no problem.
After the rename of the Repo on Azure DevOps, closed and reopened opened the Create a Git repository window and the Create and Push button was enabled.
That was that. Source code was added to the Azure DevOps repository.
Figure 5, Visual Studio 2022 and Azure DevOps Git
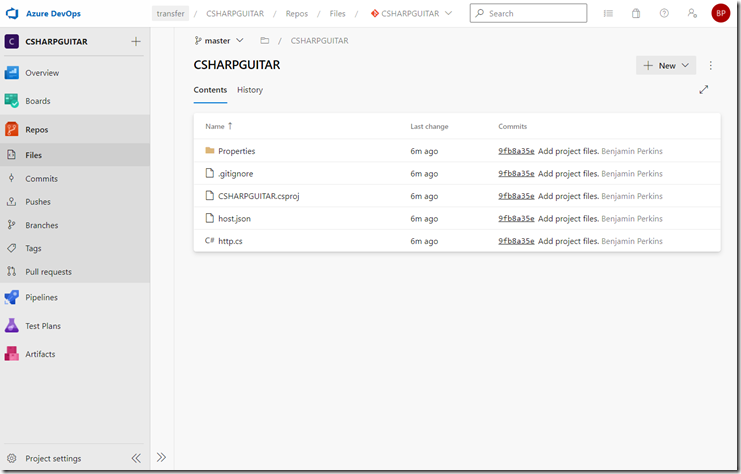
You can also see the files in Azure DevOps.
Figure 6, Visual Studio 2022 and Azure DevOps Git
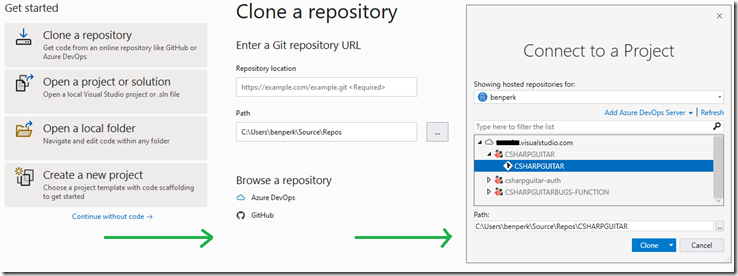
Lastly, on a different machine or remove the local repository named CSHARPGUITAR, I opened Visual Studio 2022 and select the Clone a repository option, then I browsed my Azure DevOps repository and selected the CSHARPGUITAR project.
Figure 7, Visual Studio 2022 and Azure DevOps Git
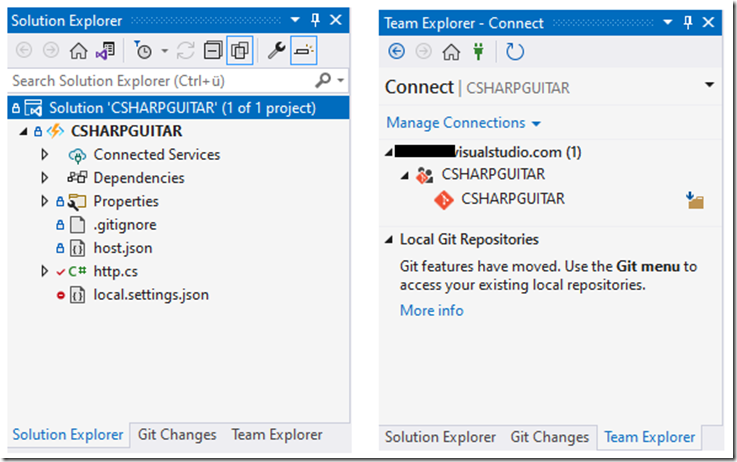
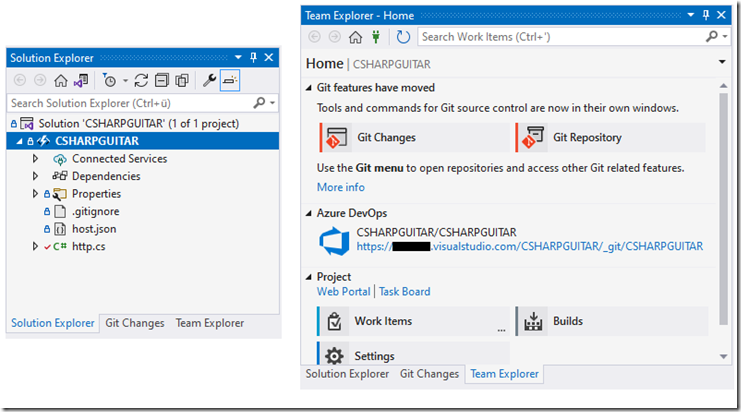
I was then able to see the code and the connection in Visual Studio 2022.
Figure 8, Visual Studio 2022 and Azure DevOps Git
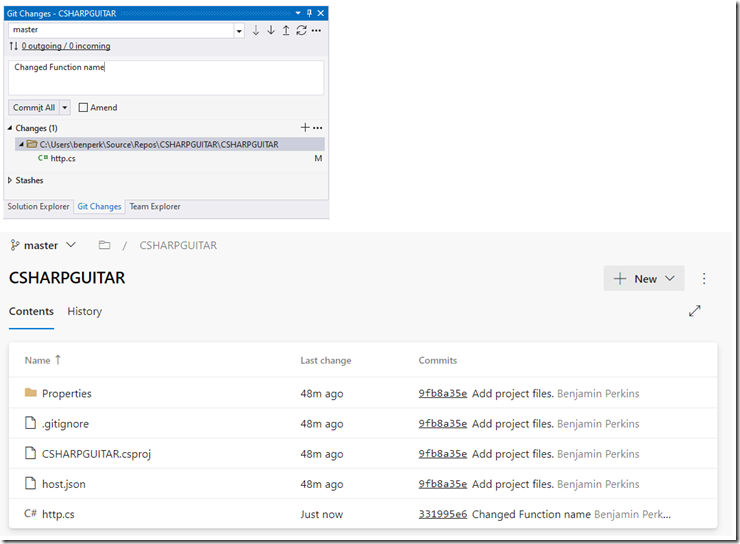
After committing the change, I push it to the Azure DevOps repository.
Figure 9, Visual Studio 2022 and Azure DevOps Git
Now I will use this process and learnings and implement CI/CD with an Azure Function connected to a VNET with a Private Endpoint. That is discussed here, but just getting this part done today was an accomplishment.

