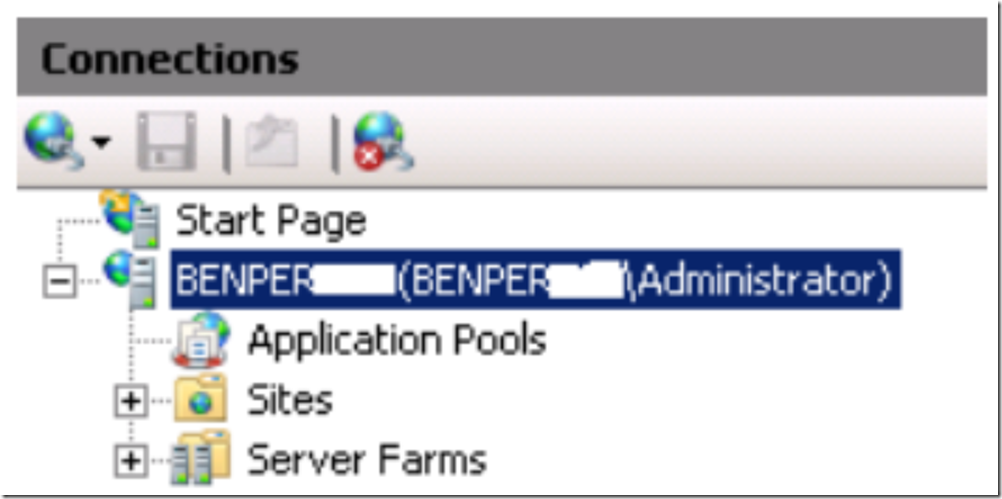
Not all IIS logging properties are selected by default. Some of them, which are not selected by default can provide some valuable information when troubleshooting performance or availability issues. To modify the properties which IIS 7 logs, first open IIS Manager, then select the top level server as show in Figure 1.
Figure 1, display the properties of the Default Web Site
Next, in the Feature View pane (center) double-click the Logging Icon as shown in Figure 2.
Figure 2, Logging Icon
If the icon is not present, it means that you have not installed the Logging Tools Role Service found within the Web Server (IIS) Role. To see how to do this read the top portion of my other blog here.
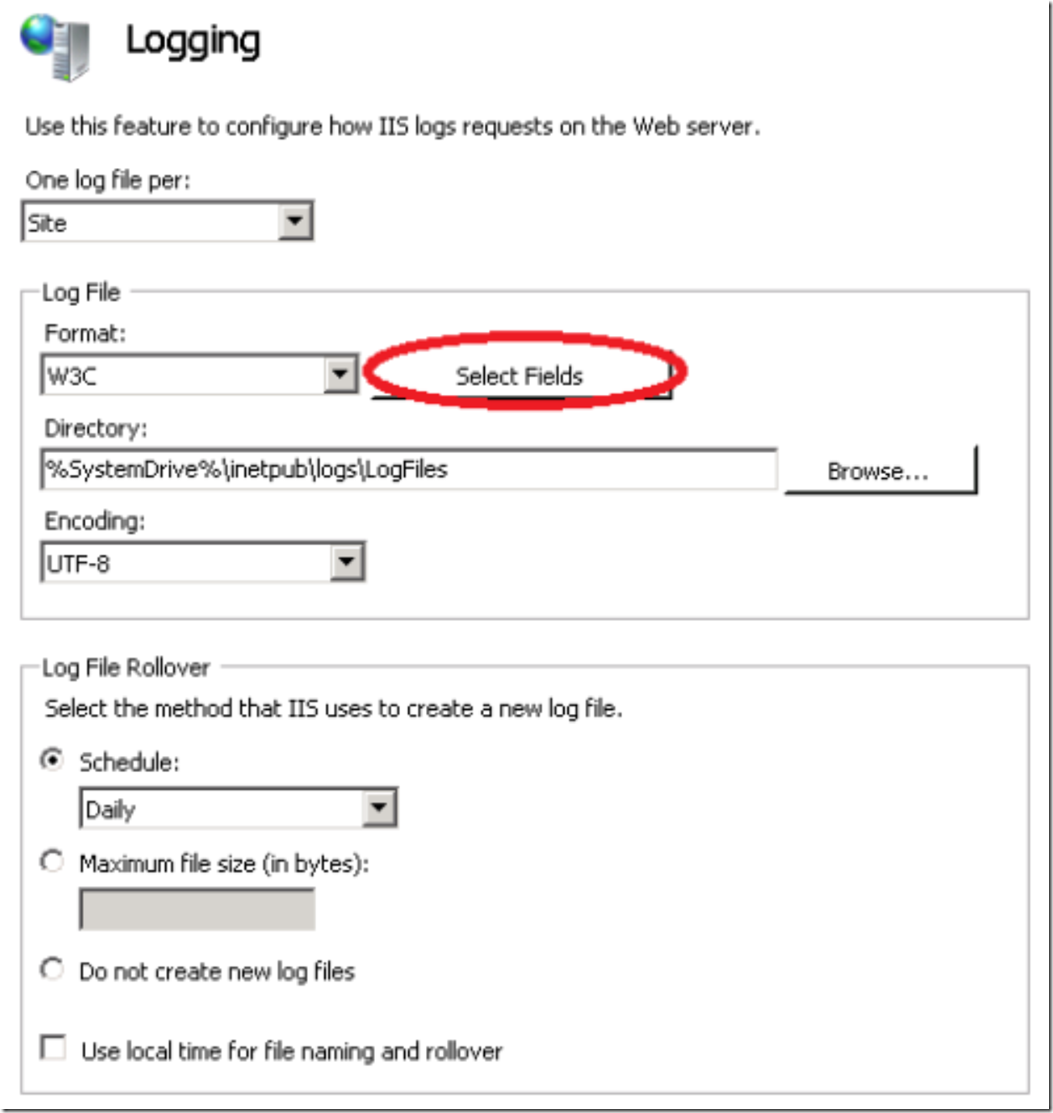
After double-clicking on the Logging Icon, select the Select Fields button as shown in Figure 3.
Figure 3, IIS 7 logging enabled and IIS 6 log file properties button
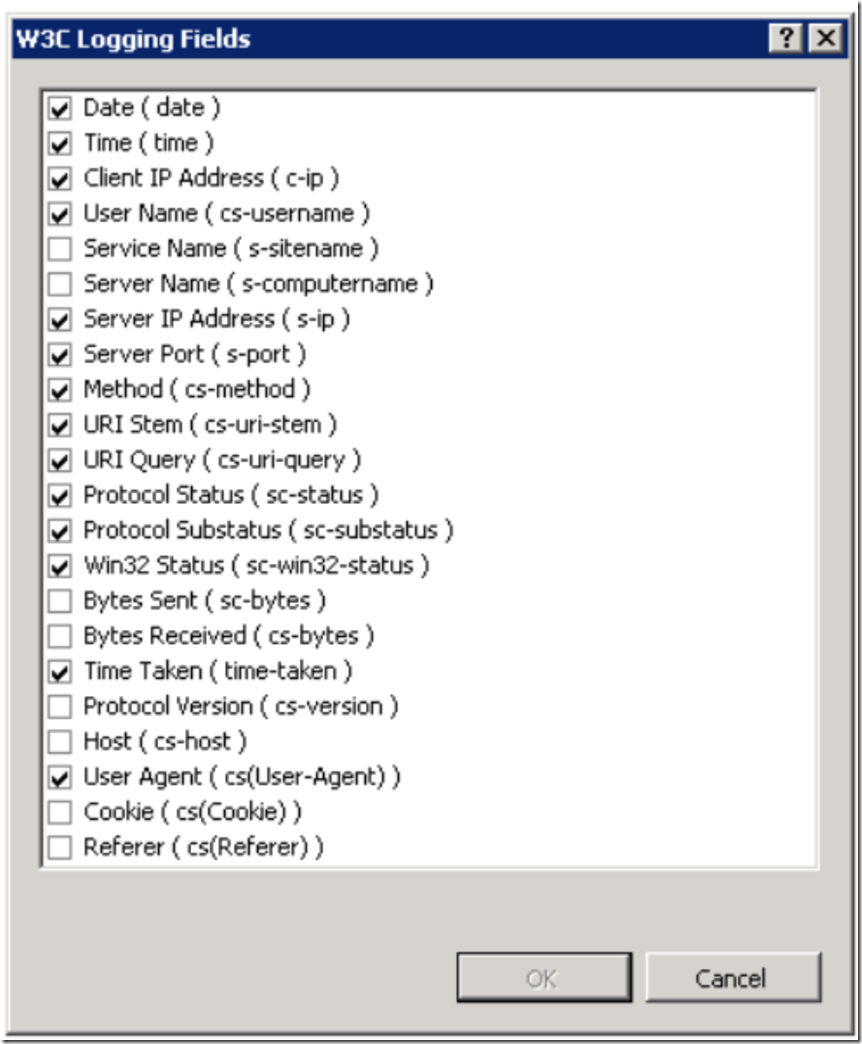
Then select the properties you want IIS 7 to log for each request. Figure 4 displays the window and properties list.
Figure 4, IIS 7 Logging Properties window
Make the modifications, I like to store all the possible information, then select OK and Apply found in the Actions pane (on right) to apply the changes.
The modifications will take effect immediately and no restart of IIS is required.
Once logging has been enhanced, you can then use the additional data to troubleshoot the current problem. Be sure to manage your log files as the size and removal schedule may itself cause an impact on performance.
NOTE: A command I use to write the IIS logs on demand is “netsh http flush logbuffer”. A full list of netsh http commands exists found here.


