There are numerous articles about this which are posted here, but I thought an update was in order. To configure a custom domain for your Azure App Service, the following steps are required: (Note: you can also purchase a custom domain right from within the portal itself, as described here. If you do that, many of these complexities are removed.)
- Create a CNAME with your DNS provider
- Add the custom domain to your Azure App Service
That’s it, read the details below.
Create a CNAME with your DNS provider
You need to first add a CNAME record with your DNS provider, most of them provide an Internet accessible interface for that. I will end up looking something like this, Figure 1.
Figure 1, add a CNAME for your custom domain azure app service
Add the custom domain to your Azure App Service
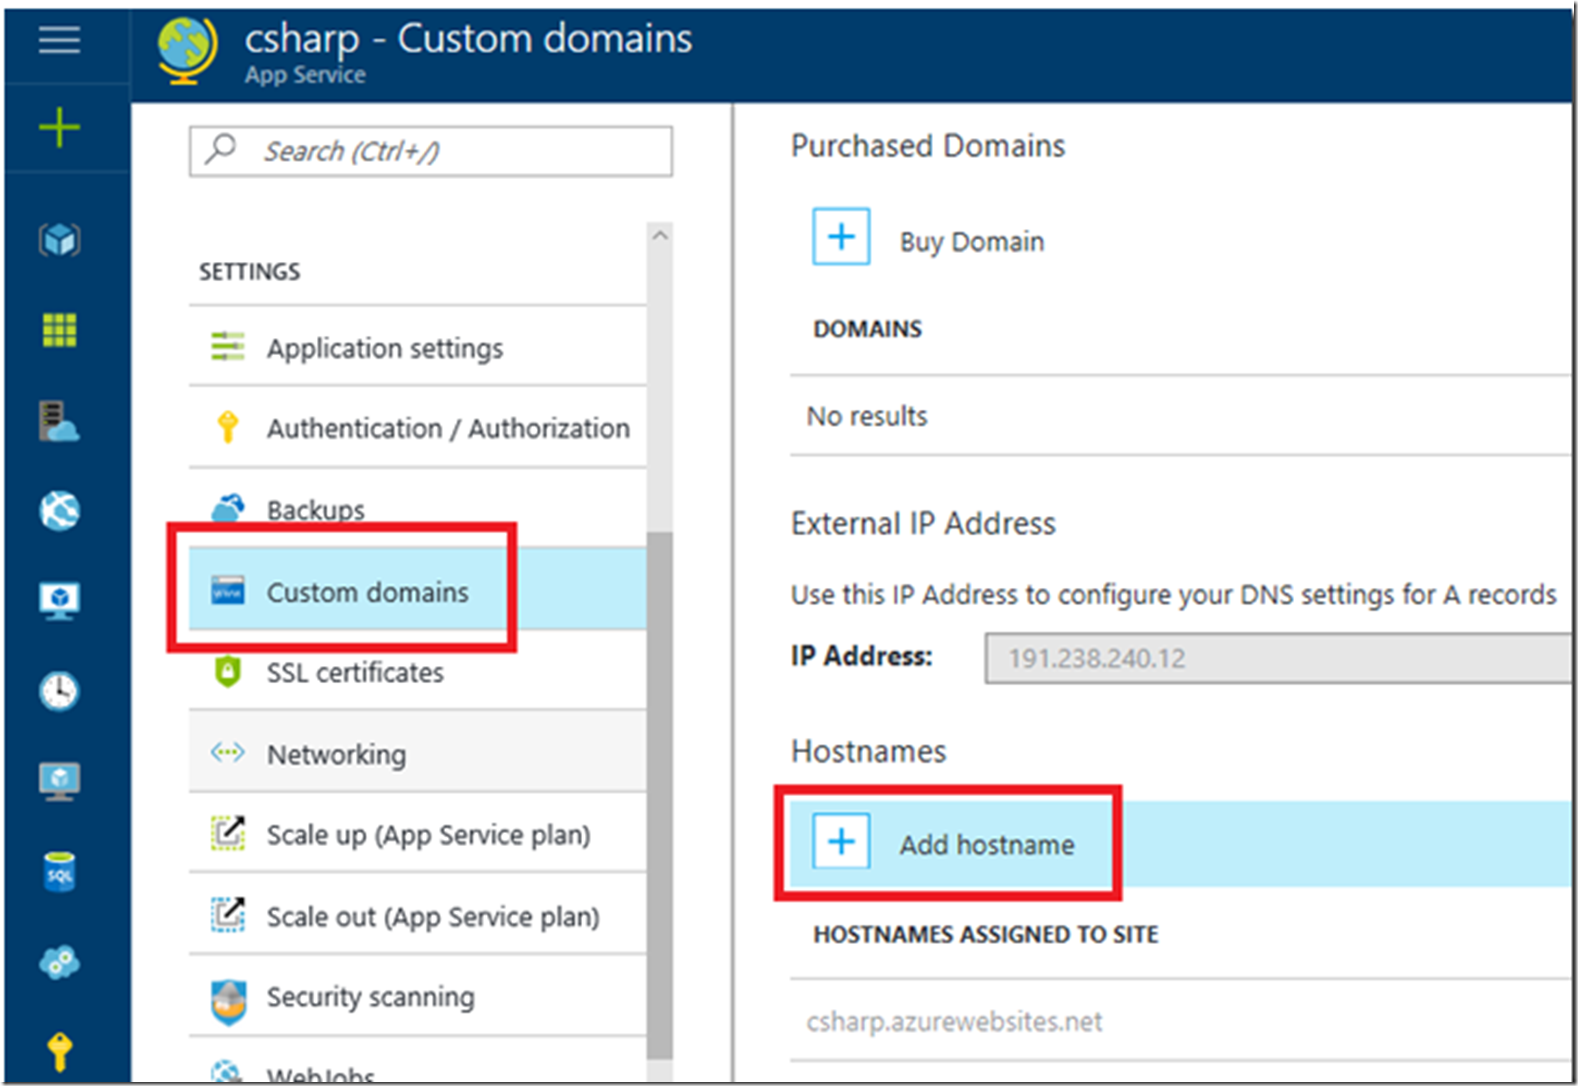
In the portal, navigate to the Azure App Service you wish to configure the custom domain to and select the Custom domains link and then the Add hostname as shown in Figure 2.
Figure 2, add the hostname, custom domain to your App Service
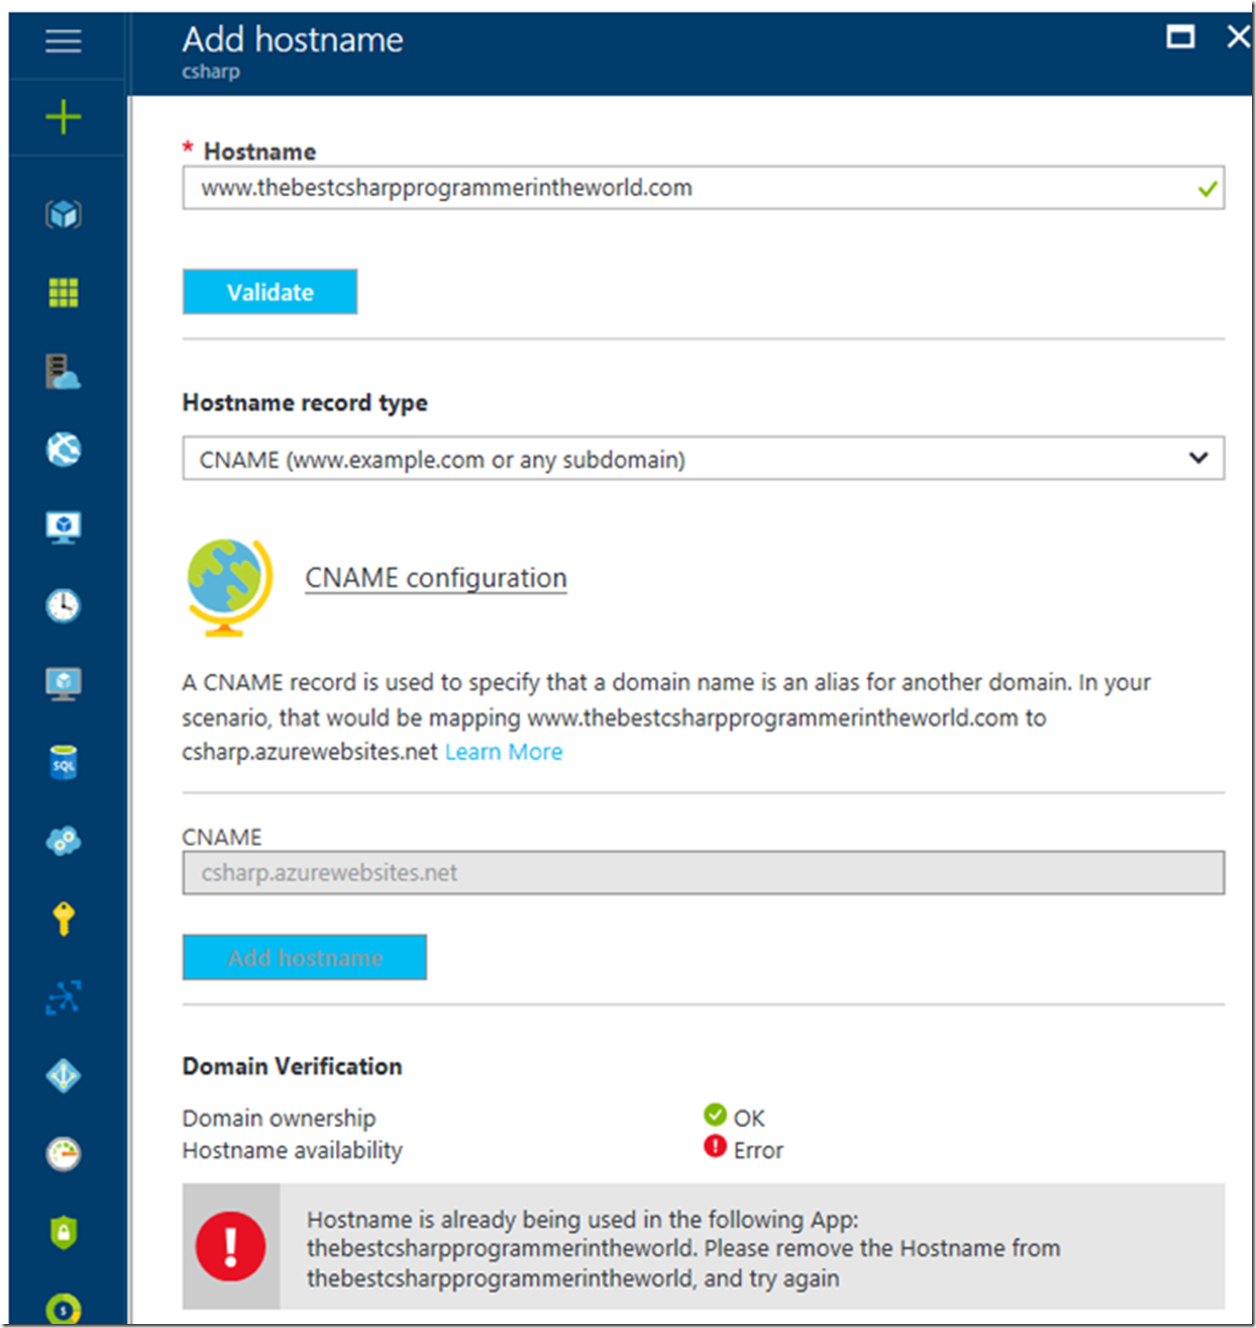
Enter the hostname and click the validate button. When I did this initially, I had it still bound to a previous Azure App Service Web App and got this error, as shown in Figure 3.:
Hostname is already being used in the following App: WEBAPPNAME.

Please remove the Hostname from WEBAPPNAME, and try again
Figure 3, error when configuring hostname, custom domain for an App Service
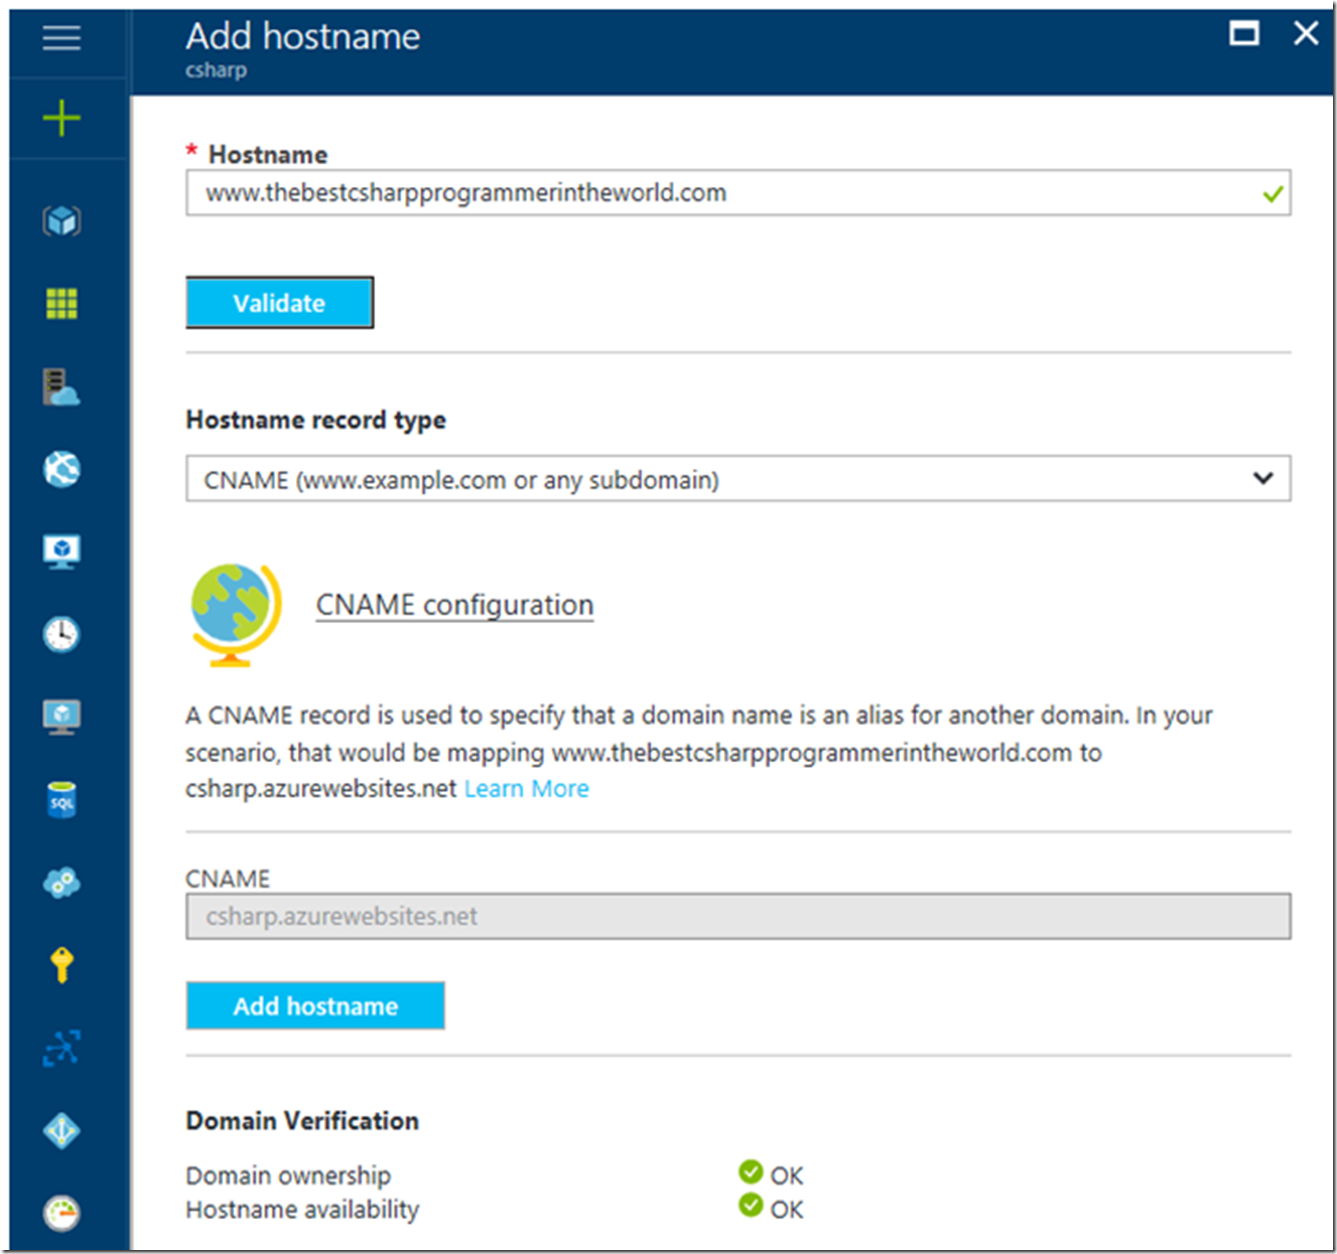
There may be some downtime when you delete the custom domain from one Azure App Service and configure it on the new one. Just make sure you know the steps so the time is limited. Nonetheless, I removed if from the old Azure App Service Web App and configured it on the new one, the result was that shown in Figure 4.
Figure 4, configure custom domain with an Azure App Service
After a few moments, accessing the custom domain is routing to the new Azure App Service.


