I am writing numerous posts about IIS on Nano with my intent to get an ASP.NET Core application up and running on it. There are already instructions for this shown directly below, but I like to do the exercise myself and document my experiences and lessons in addition. #ASPNETCORE #Nano #IIS
- What’s new in IIS 10
- How to list Packages available when creating a Nano server
- How to install IIS and Tracing on a Nano for Windows Server 2016
- How to copy files or deploy code to a Nano Server
- How to connect and configure IIS running on Nano
- IIS on Nano server
- ASP.NET Core with IIS on Nano Server
- Microsoft IIS Administration on Nano Server –> important for manage.iis.net, working on that one too
This first thing I struggles with was how to make a deployment once I get my test ASP.NET Core application built, and also how to configure and install the ASP.NET Core binaries. Becuase up to now all I have seen is the ability to remote manage my Nano IIS server with PowerShell. I am sure I will learn and progress further. Regardless, I found this trick neat to copy or put files on the Nano IIS server. I did try to get FTP to work and obviously Web Deploy wouldn’t work (out of the box) because both require some server side configuration. I ultimately found that I can create a share and just move files like that.
Here are the steps to create the file share to copy files to the Nano server
- Create the folder to share
- Enable the Firewall to allow a share to be created
- Create the share
- Access the share
Create the folder to share
As there is no interface to access the Nano server, everything must be done remotely. This is different than Server Core where you have a console to run some configuration while RDPed to the VM, but not with Nano. Completely remote only, that is kind of cool IMO. Execute the following script after remotely connecting to your Nano IIS server. I describe how to make the remote connection here.
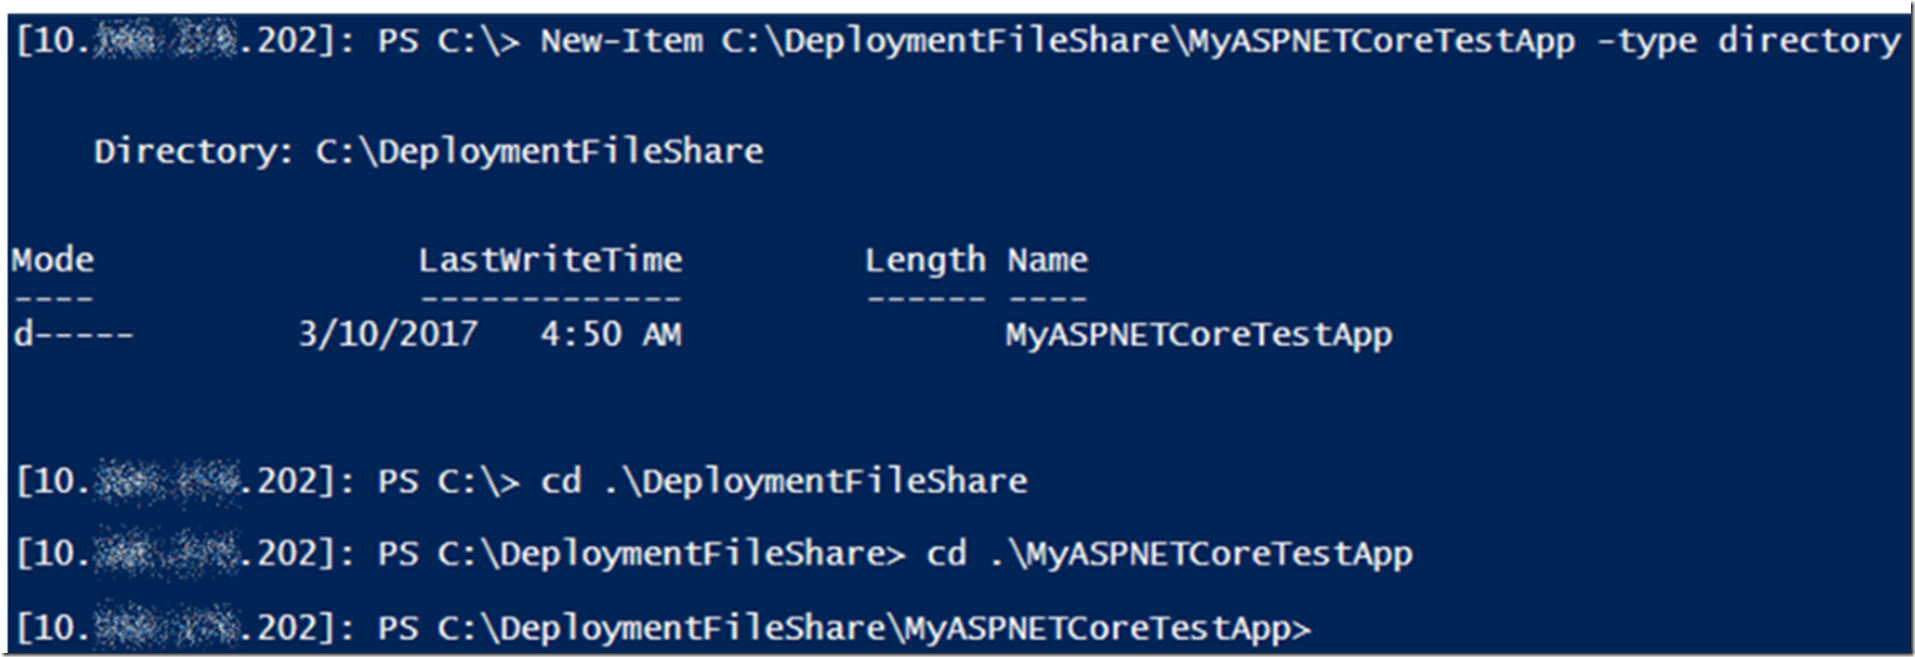
New-Item C:\DeploymentFileShare\MyASPNETCoreTestApp -type directory
The results of the PowerShell command is shown in Figure 1.
Figure 1, how to create a new folder on a Nano server
Enable the Firewall to allow a share to be created
Next, you need to allow or create a firewall rule for “File and Printer Sharing”. This is done by executing the following PowerShell command.
netsh advfirewall firewall set rule group="File and Printer Sharing" new enable=yes
The output of the PowerShell command, is shown in Figure 2.
Figure 2, how to create or enable a firewall rule in Nano Server, Nano IIS
Create the share
Then, create the share using the following PowerShell command.
net share MyASPNETCoreTestApp=C:\DeploymentFileShare\MyASPNETCoreTestApp /GRANT:EVERYONE`,FULL
This results in the output shown in Figure 3.
Figure 3, how to create a file share on Nano server, Nano IIS
Access the share
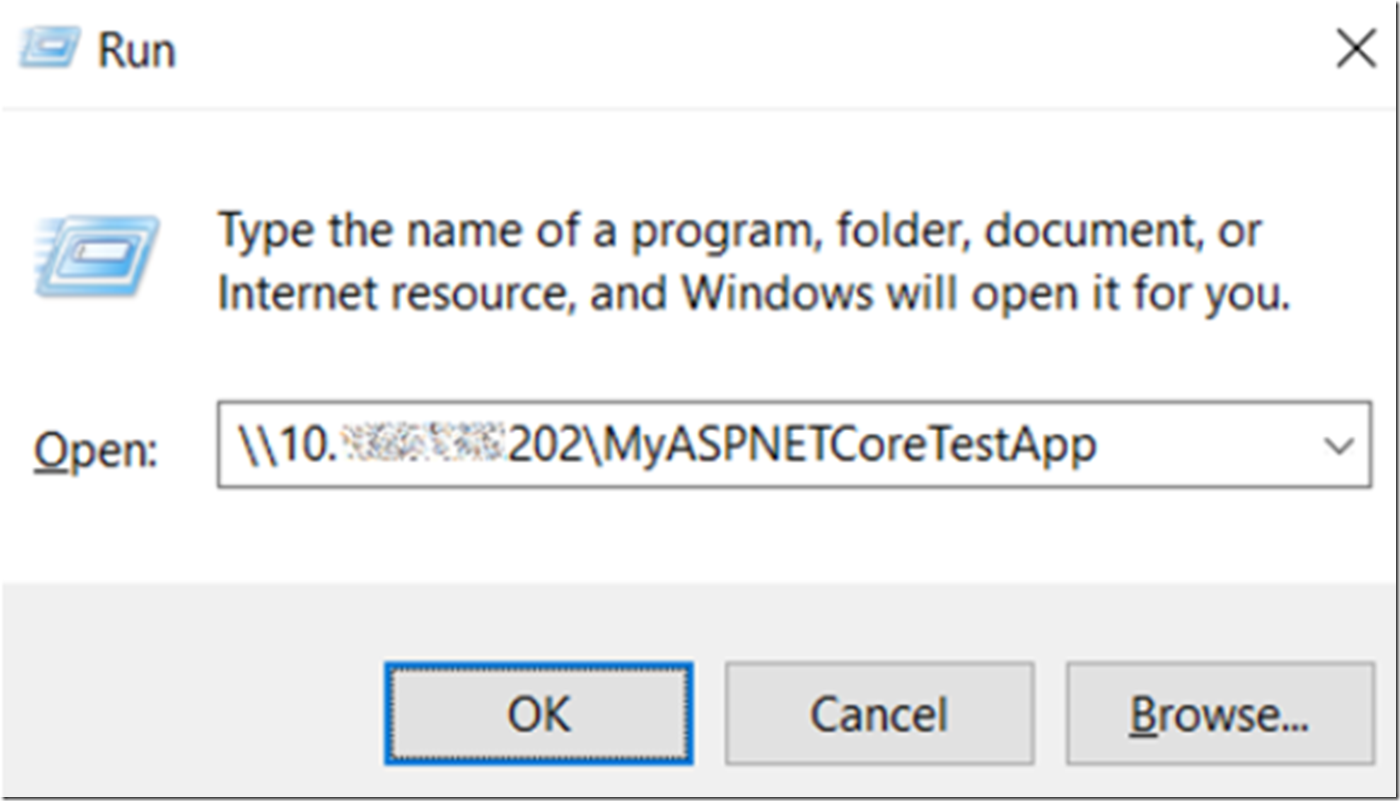
Finally, you can access the share same like any other share either using the WIN+R and entering the path or opening Windows Explorer and entering the same. See Figure 4 and Figure 5.
Figure 4, access a file share on a Nano Server using WIN+R
Figure 4, access a file share on a Nano Server using Windows Explorer
I hope you find the helpful.


