I am so excited about Bots (#Bot) that I can barely control myself. My hands are literally shaking as I write this post. I wrote this post a few months ago that discuses how I got started using the Bot Framework (#BotFramework) with LUIS, it was a little complicated but now with the built in Azure capabilities and the Bot as a Server (BaaS) concept, it is quick and easy to get started.
This is how I did it:
- Create a new Bot Service from within the Azure Portal here
- Setup a Microsoft App Id and add the credentials
- Select the language and template, create the bot
- Test it, look at LUIS
Here are some other more recent articles I have written on this subject:
- Create a Bot using an Azure App Service Bot Service
- Most common chatbot questions and how to answer them
- Publishing a chatbot using Bot Services and LUIS
- How I tested / debugged my chatbot that I created using the Bot Services on Azure
- How my chatbot remained statefull using Azure Bot Services
- C# Bot Builder Samples on GitHub
- Top 10 must have Phrase List Features for your chatbot or any bot LUIS
- 1000 must have utterances for your chatbot using LUIS
- Adding LUIS Entities to my chatbot
- How I improved my chatbot
Create a new Bot Service
Log into the Azure Portal, click on the + New, then search for Bot Service, as shown in Figure 1.
Figure 1, create a bot in the Azure Portal, quick easy
Enter the required details for the bot, they are identical to the required details of an App Service, for example App Name, Subscription, Resource Group and Location. Once entered, similar to that in Figure 2, click the Create button.
Figure 2, create a bot in azure using bot services
Once created/deployed, navigate to the Bot by clicking on the link either from the main page, if you pinned it to the dashboard or open the resource group and click the link.
Setup a Microsoft App Id and add the credentials
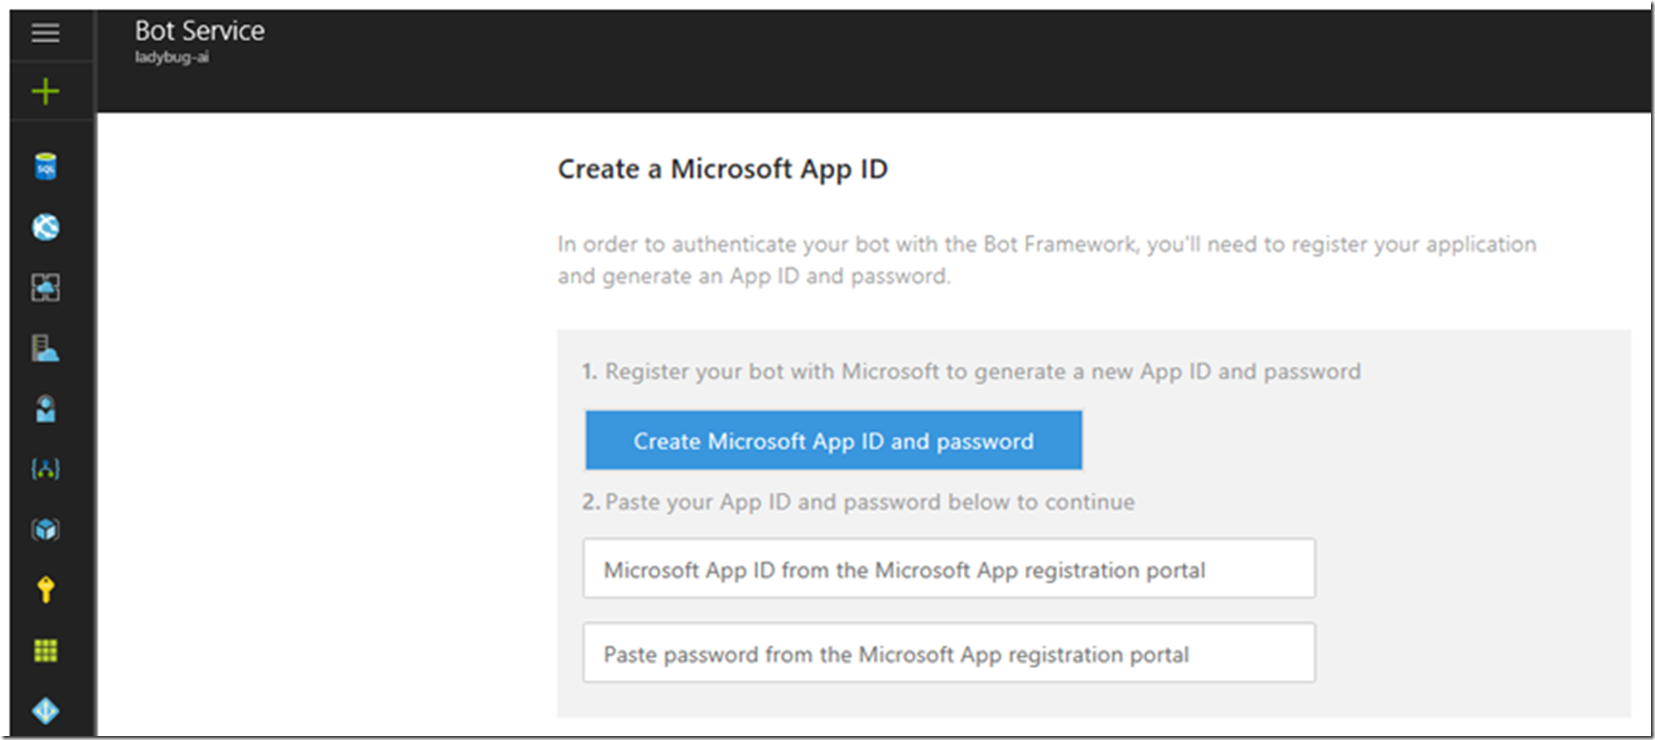
You will be prompted to create a Microsoft App Id, like that in Figure 3. Click the button and capture the App Id and Password.
Figure 3, create a bot and the associated Microsoft app id
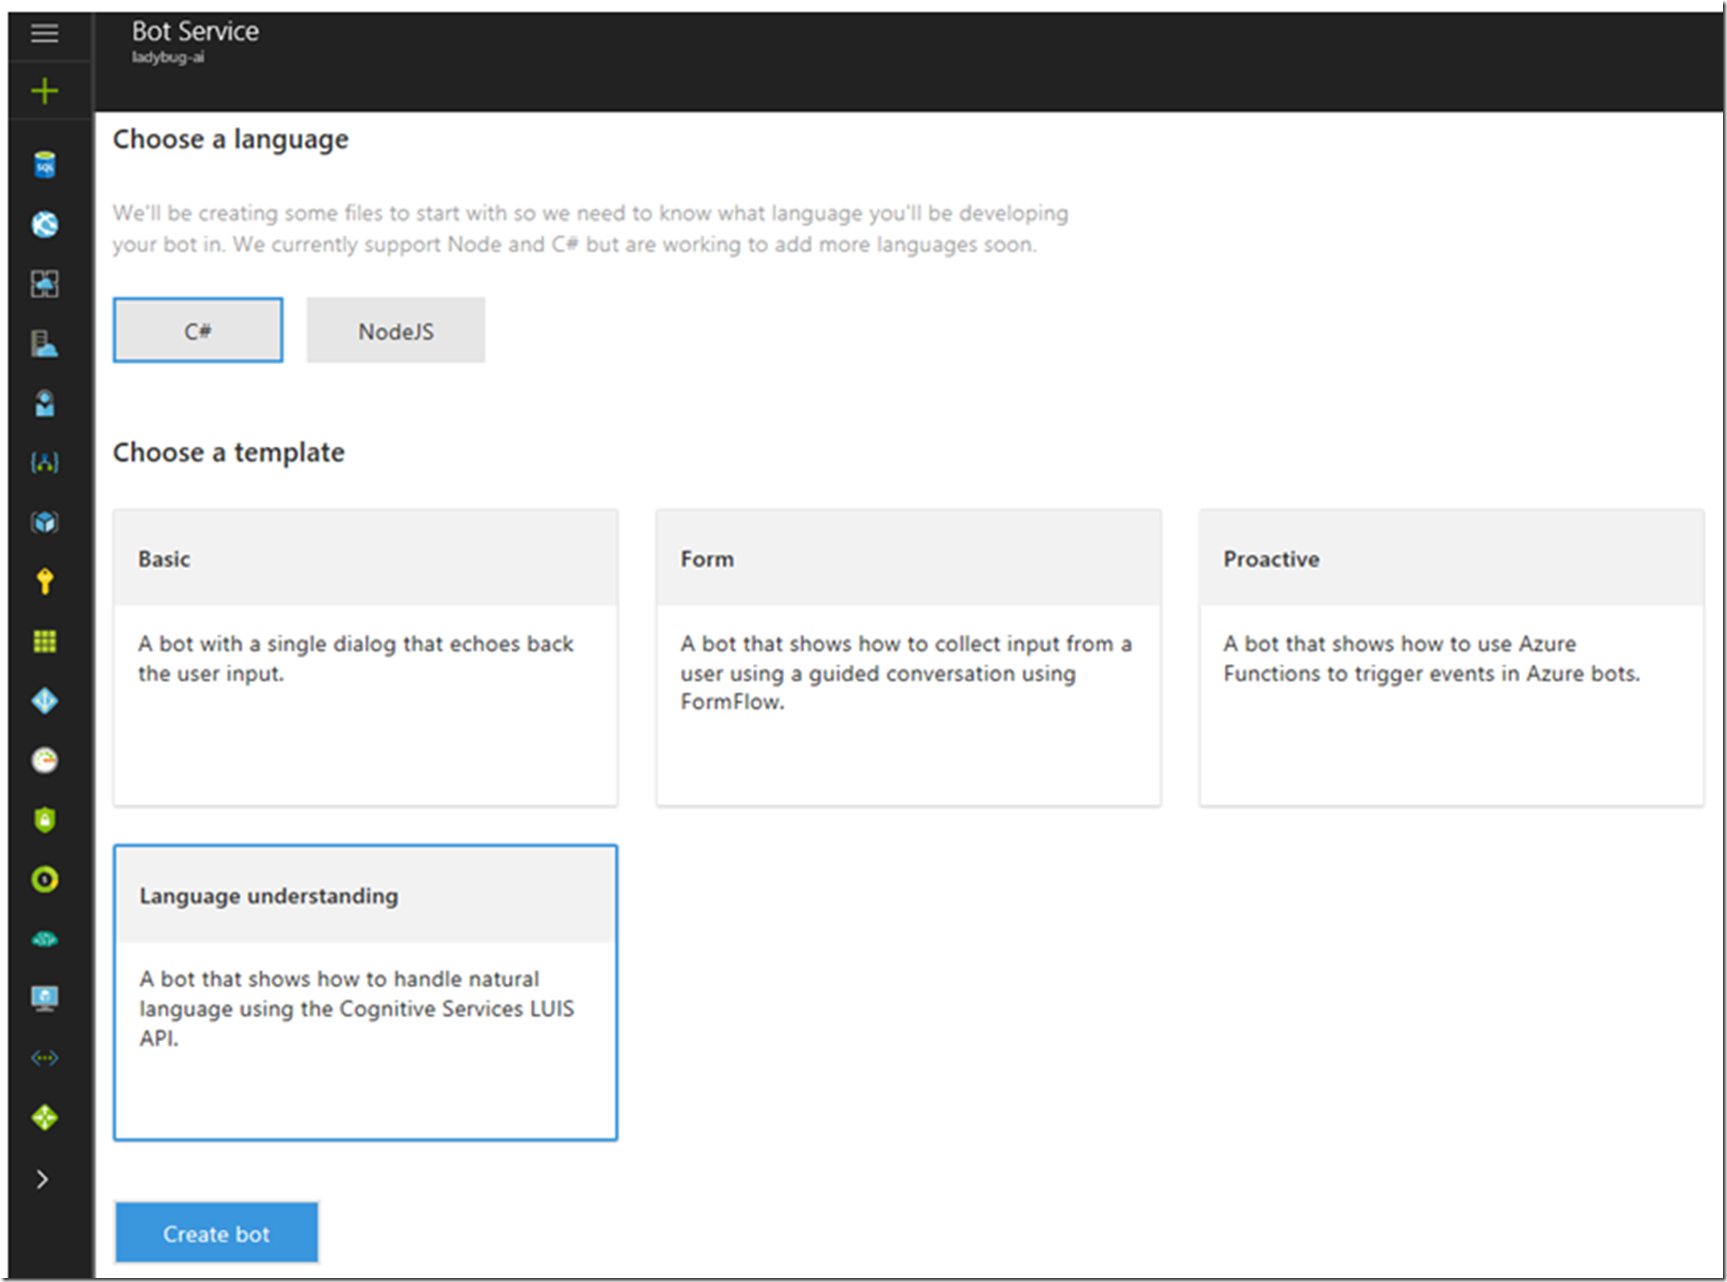
Enter the credentials into the text boxes and then select the language and template, I chose the Language understanding template as I want to use LUIS later.
Finally, click on the Create bot button and the bot gets created, as shown in Figure 4. I did receive an Internal Server Error during the creation and it took some minutes for that to happen. Most likely the request is asynchronous to LUIS and it times out. I just closed down the blade and came back to it. It worked fine from that point. I am sure they are working on fixing that as this is feature is only a few days old.
Figure 4, create a bot as a service (#BaaS) in Microsoft Azure #chatbot
Test it, look at LUIS
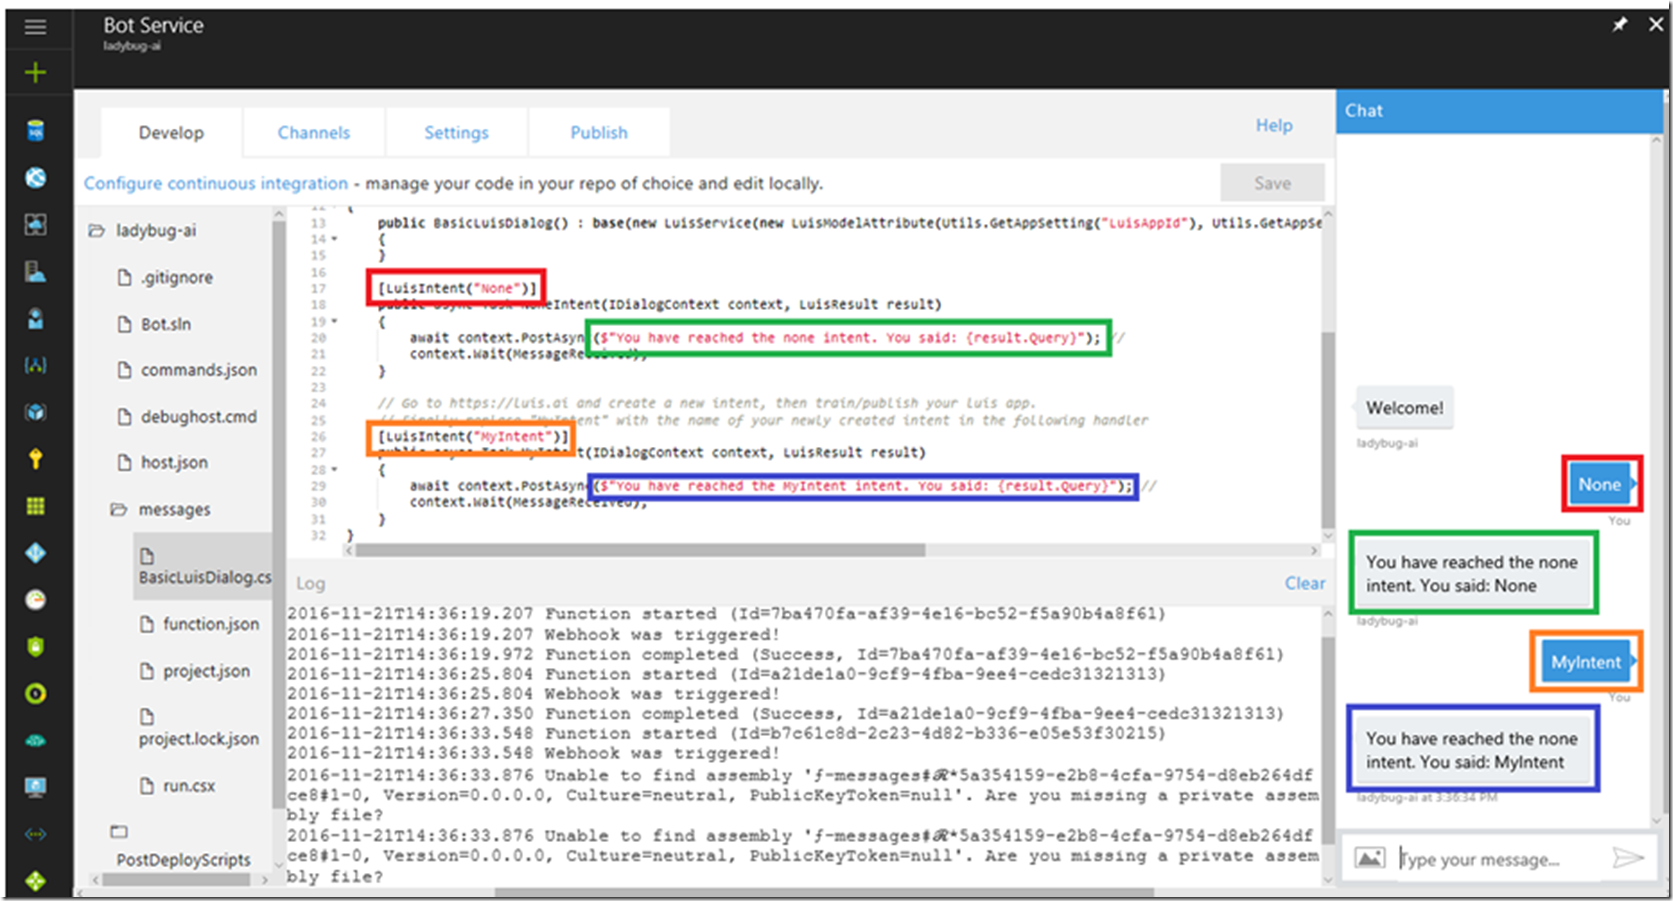
By default there are two LUIS intents, None and MyIntent. I tested them by entering in ‘None’ and ‘MyIntent’ and as you can see in Figure 5, the message which is associated to that intent is rendered back to the Chat window. Now I just need to make my Chat logic more intelligent, and I can do it right in the portal, no more Visual Studio project at all. So awesome!
Figure 5, successful test of the bot service in Azure
Now I can login to LUIS here and add more intents and train my AI to answer more questions. The creation of the Bot using the Language understanding creates a a LUIS application similar to that shown in Figure 6.
Figure 6, the LUIS application create by default from bot service in Azure
Now it’s time to rock


