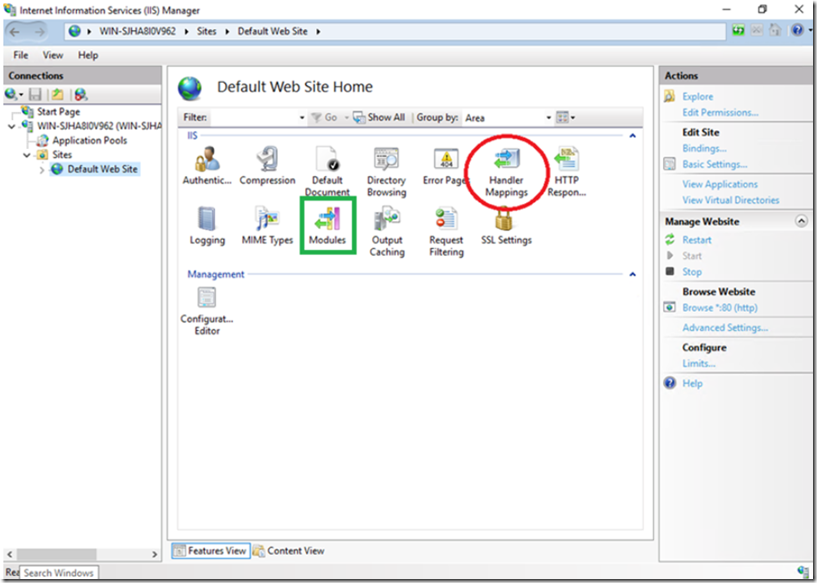
This is a important concept to know and it really isn’t an intuitive one, you need to get into the guts of IIS or configure some 3rd party web based application to ever see or configure modules and handlers in IIS. When you install ASP.NET for example, the handler is installed and configured by default.
References
- Read “Developing Modules and Handlers with the .NET Framework” here
- Read “IIS Modules Overview” here
- Read “Creating a Synchronous HTTP handler” here and here
- Read about the IHttpHandler interface here
- Read about the IHttpModule interface here
Prerequisites
- Install ASP.NET as per Lab 2 here
- Review Lab 7-3 to get a better understanding of the IIS / ASP.NET request pipeline here
- Extra credit, enable Failed Request Tracing and see how the request is managed, as per Lab 4 here
In this lab you will
- Create and configure a custom handler – How to create a custom handler using C# for IIS
- Create and configure a custom module – How to create a custom module using C# for IIS
- Learn the difference between a handler and a module
Lab 22-1
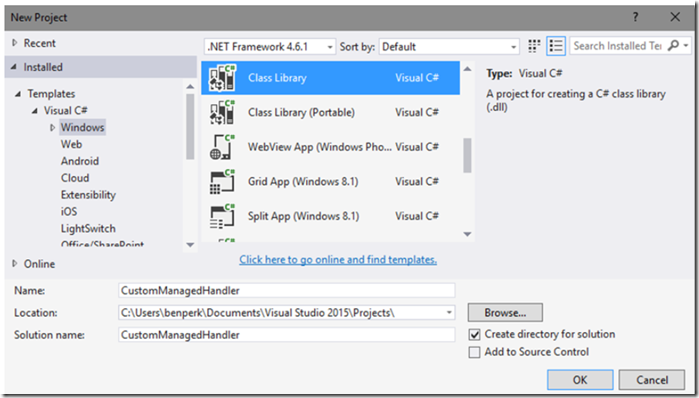
- Create a new project in Visual Studio and name it CustomManagedHandler
Figure 1, Deploy and create a custom Module and Handler
- Rename the Class1.cs file to CustomHandler by right-clicking on the file and selecting Rename from the menu
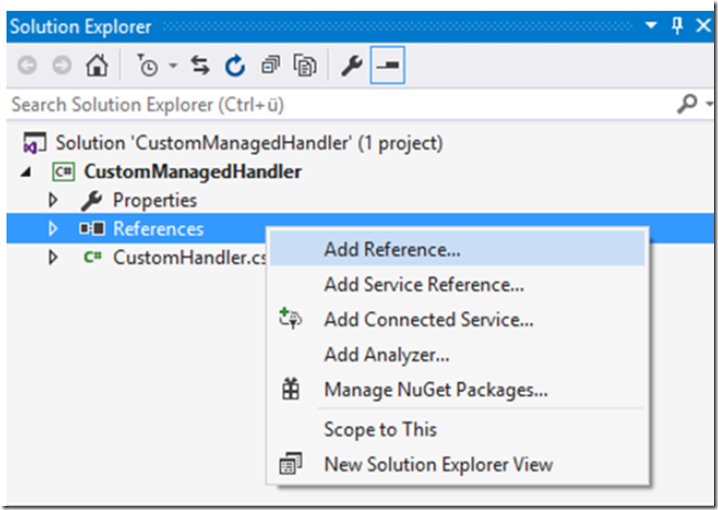
- Add a reference to the System.Web module by right-clicking the References folder and selecting Add Reference. Add the using System.Web to the CustomHandler class file as well.
Figure 2, Deploy and create a custom Module and Handler
- The CustomeHandler.cs file should look something like this, make note of the implementation of the IHttpHandler interface.
using System;

using System.Collections.Generic;

using System.Linq;

using System.Text;

using System.Threading.Tasks;


using System.Web;


namespace CustomManagedHandler

{

     public class CustomHandler : IHttpHandler

     {

         public bool IsReusable

         {

             get { return false; }

         }


         public void ProcessRequest(HttpContext context)

         {

             context.Response.Write("Hello from the CustomManagedHandler handler.");

         }

     }

}
The ProcessRequest() method is the place where you put all the code necessary to handle a request to the file type in the given context. For example, later we will make a request to a file named default.benjamin, when we configure this handler in IIS, it will respond to any request for a file that has the .benjamin extension.
- Compile and build the handler, a file called CustomManagedHandler.dll is created in the /bin/Release folder within the project you created in step 22-1-1.
Lab 22-2
- Access a Windows Server running IIS and open the management console
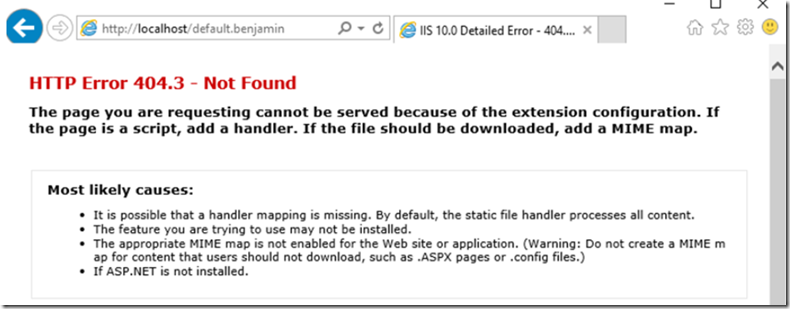
- Make a request to a file named default.benjamin, you will initially get a 404.0, so create one in the root directory of the Default web site C:\inetpub\wwwroot. Once added you should get a 404.3 which means there is no MIME map configured for the file extension. You can map that extension type to an existing handler, or to the custom one in which you just created in Lab 22-1.
Figure 3, Deploy and create a custom Module and Handler
Figure 4, Deploy and create a custom Module and Handler
- Add a /bin directory to the Default web site and place the CustomManagedHandler.dll into the directory
Figure 5, Deploy and create a custom Module and Handler
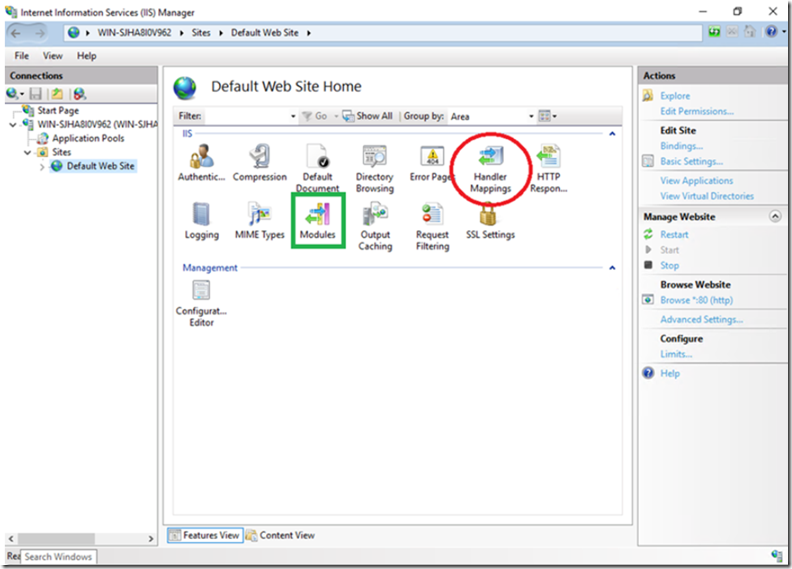
- Configure the handler mapping using the IIS management console, double-click the Handler Mappings feature
Figure 6, Deploy and create a custom Module and Handler
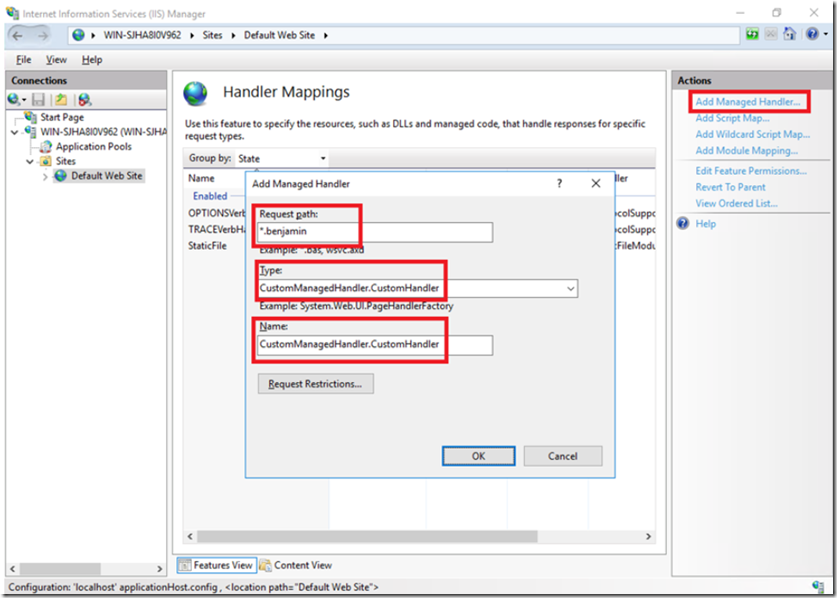
- Click on the Add Managed Handler link in the Actions pane and configure the CustomManagedHandler.CustomHandler to respond to any request to a *.benjamin file.
Click on the Request Restrictions button and review the contents of the tabs:
- Mapping
- Verbs
- Access
Figure 7, Deploy and create a custom Module and Handler
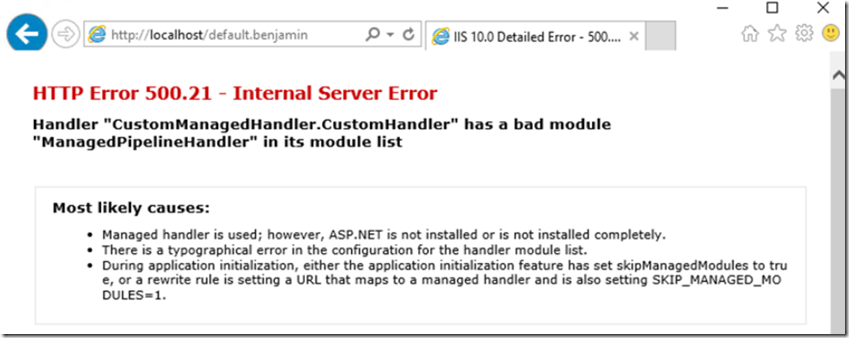
- Access the default.benjamin file again from the browser, if you did not install ASP.NET then you will get a 500.21.
Figure 8, Deploy and create a custom Module and Handler
When successful, you will see the response coded within the ProcessRequest() method.
Figure 9, Deploy and create a custom Module and Handler
Lab 22-3
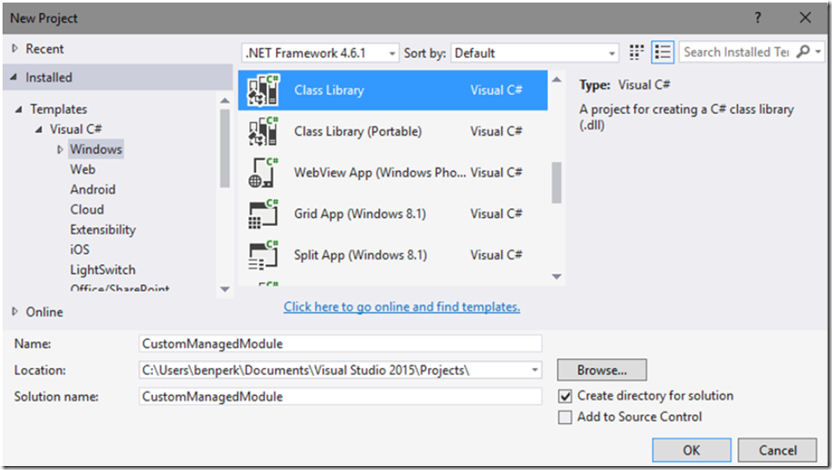
- Create a new project in Visual Studio and name it CustomManagedModule
Figure 10, Deploy and create a custom Module and Handler
- Rename the Class1.cs file to CustomModule by right-clicking on the file and selecting Rename from the menu
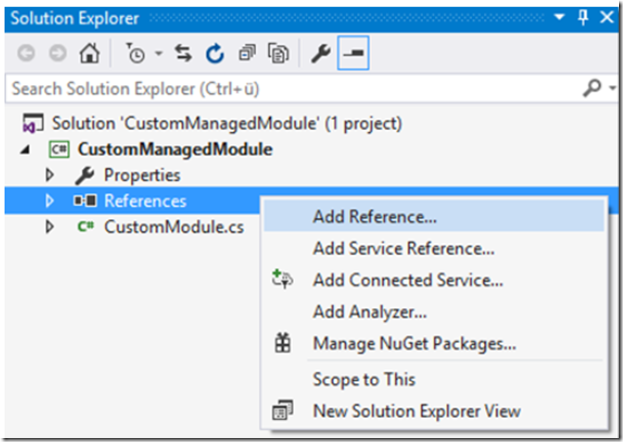
- Add a reference to the System.Web module by right-clicking the References folder and selecting Add Reference. Add the using System.Web to the CustomModule class file as well.
Figure 11, Deploy and create a custom Module and Handler
- The CustomeModule.cs file should look something like this, make special attention to the implementation of the IHttpModule interface
using System;

using System.Collections.Generic;

using System.Linq;

using System.Text;

using System.Threading.Tasks;


using System.Web;


namespace CustomManagedModule

{

     public class CustomModule : IHttpModule

     {

         public void Init(HttpApplication app)

         {

             app.BeginRequest += new EventHandler(app_BeginRequest);

         }


         public void app_BeginRequest(object o, EventArgs e)

         {

             HttpContext context = HttpContext.Current;

             string requestURL = context.Request.RawUrl;

             if (requestURL.EndsWith(".ben"))

             {

                 context.Response.Redirect("default.benjamin");

             }

         }


         public void Dispose() {}

     }

}
In the source code, right-click on the HttpApplication class then Go to Definition. Review all the EventHandlers, for example, AcquireRequestState, AuthenticateRequest, AuthorizeRequest, BeginRequest, etc… these are the events into which you can bind your module to. In this example, the module is bound to the BeginRequest event using the += operator and told to call the app_BeginRequest() method when the HttpApplication.BeginRequest() method is called. In the app_BeginRequest() method I look at the request to see if the extension matches ‘-ben’ and if so, I redirect the request to the default.benjamin file.
- Compile and build the module, a file called CustomManagedModule.dll is created in the /bin/Release folder within the project you created in step 22-3-1.
Lab 22-4
- Access a Windows Server running IIS and open the management console
- Add the CustomManagedModule.dll to the /bin directory of the Default web site , also add a file named default.ben to the root of the Default web site, similar to what you did for the default.benjamin file in step 22-2-2 earlier.
Figure 12, Deploy and create a custom Module and Handler
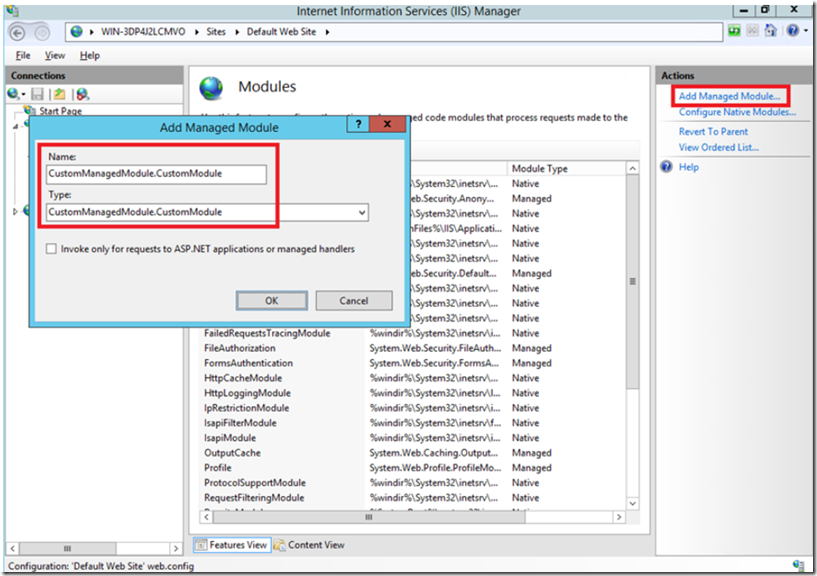
- Configure the module using the IIS management console, double-click the Modules feature
Figure 13, Deploy and create a custom Module and Handler
- Click on the Add Managed Module link in the Action pane to configure the module
Figure 14, Deploy and create a custom Module and Handler
- Make a request to the default.ben and notice that it is redirected to default.benjamin as expected
Figure 15, Deploy and create a custom Module and Handler
Extra credit
A request to default.ben is made
Figure 16, Deploy and create a custom Module and Handler
The request enters into the ASP.NET pipeline, the HttpApplication events start firing, specifically the BEGIN:REQUEST. The CustomManagedModule is triggered and the redirect is performed with a 302
Figure 17, Deploy and create a custom Module and Handler
The request is redirected to default.benjamin as per the code.
Conclusion
A handler executes based on the type of file extension and is responsible for acquiring and parameters past from the client, using those parameters and sending back an HTML response.
A module hooks itself into a request pipeline and executes code when a specific event in the pipeline is triggered. It is not responsible for managing the response.
