In this lab you will learn about the Basic and Advanced application pool settings. The interface to change the behavior of the W3WP.exe process in which the web site runs is provided through these two settings windows.
Lab 5.1 – Basic Application Pool settings
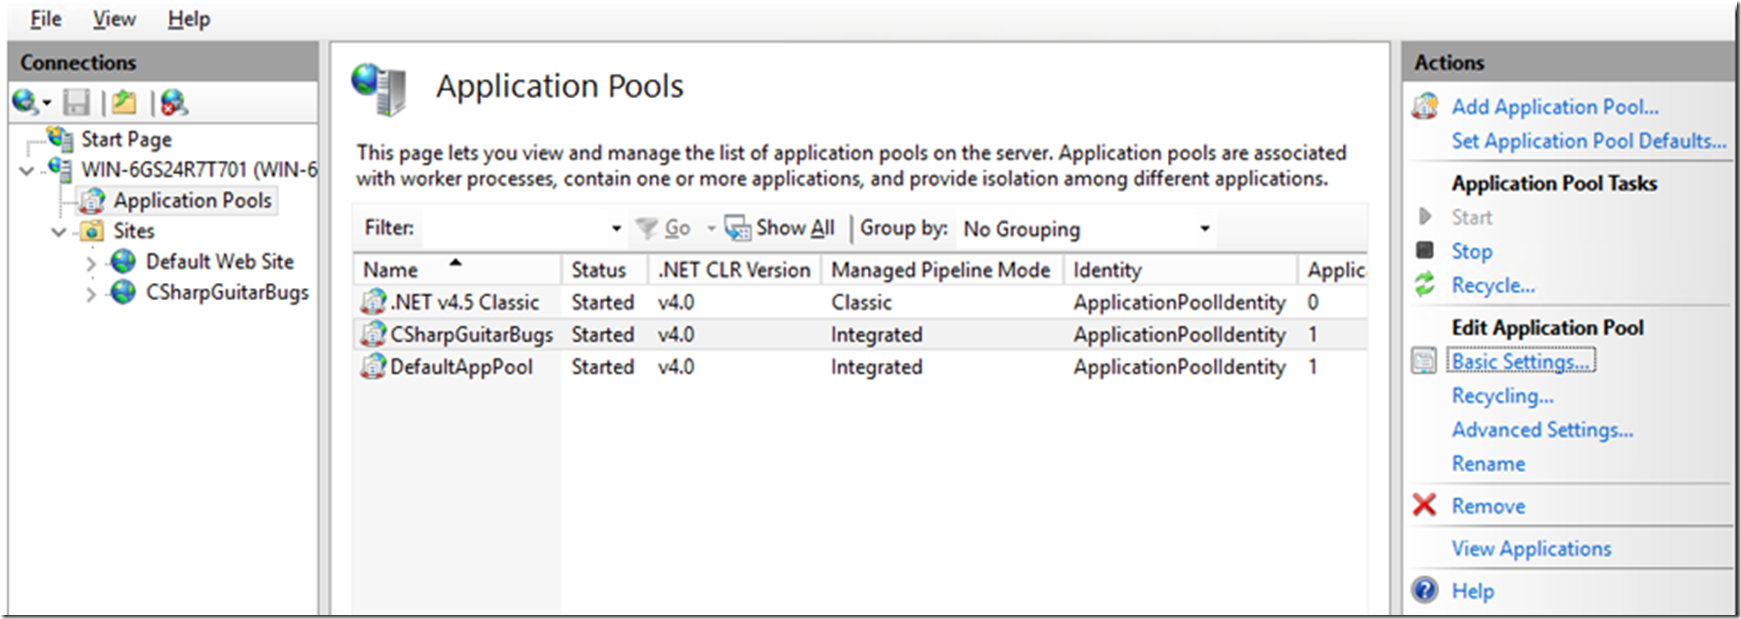
- Click on the Application Pools folder to view the list of existing application pools, as shown in Figure 1
- The name, status, the .NET Framework which the application pool run in, the pipeline mode, the identity which the application pool runs under and how many websites/virtual directories this application pool is bound to.
- When the W3WP process is initially started by WAS (discussed in Lab 6 here), one of the command line parameters sent to the W3WP.exe is the version of the .NET Framework in which the requests are to be managed. You can see the command line parameters using Process Explorer or Process Monitor. This is important because the code being executed within the process will reference the libraries the imbedded framework.
- Q: Why is there only version 2.0 and 4.0 when I also have 3.5 and 4.5 installed on the IIS server? A: As you can see in Figure 1, the application pools all run with version 4.0 of the CLR. This does not mean that the web site code is run against version 4.0 of the .NET Framework, rather this is the CLR version. We have previously installed version 4.5.2 in an earlier lab, the 4.5.2 libraries and C# features contained with CLR version 4.0 are accessible from your web site after you install a new version of the .NET Framework, although the CLR version remains at 4.0. This is commonly referred to as side-by-side installs and in-place upgrades explained in great detail here.
- Q: How do I make sure my application pool uses 4.5.1, 4.5.2 or 3.5 instead of 2.0 and 4.0? A: In the web.config file for the web site you can place the targetFramework attribute to the specific .Net Framework version to run the web site.
- Q: What is the difference between Classic and Integrated mode, does that matter really? A: See Lab 7 here for more detail and yes it matters. Classic mode is commonly referred to as IIS 6 mode where the IIS and ASP.NET request pipelines were separate while the Integrated mode the two pipelines have been merged. There are also other benefits from using Integrated pipeline like the MaxConcurrentRequestsPerCPU. See Lab 7 here for more information.
- Q: Why would you want to run an application pool as a custom identity? A: There are numerous reasons like when you are running a web farm that uses Windows Authentication, if the worker process needs access to a resource protected resource requiring authentication or if the worker process needs to perform an action which is outside the scope of permissions set for the default ApplicationPoolIdentity identity.
- Q: What is the impact of having an application pool bound to multiple websites or virtual directories? A: When a web site is bound to an application pool, it runs within a specific W3WP.exe process. If you have multiple web sites or virtual directories running with the same application pool, then they all run within the same W3WP process. If any of the web sites running the process throw an unhandled exception and the process crashes, then all the web sites are impacted. I recommend a 1-to-1 mapping between web sites/virtual directories and application pools.
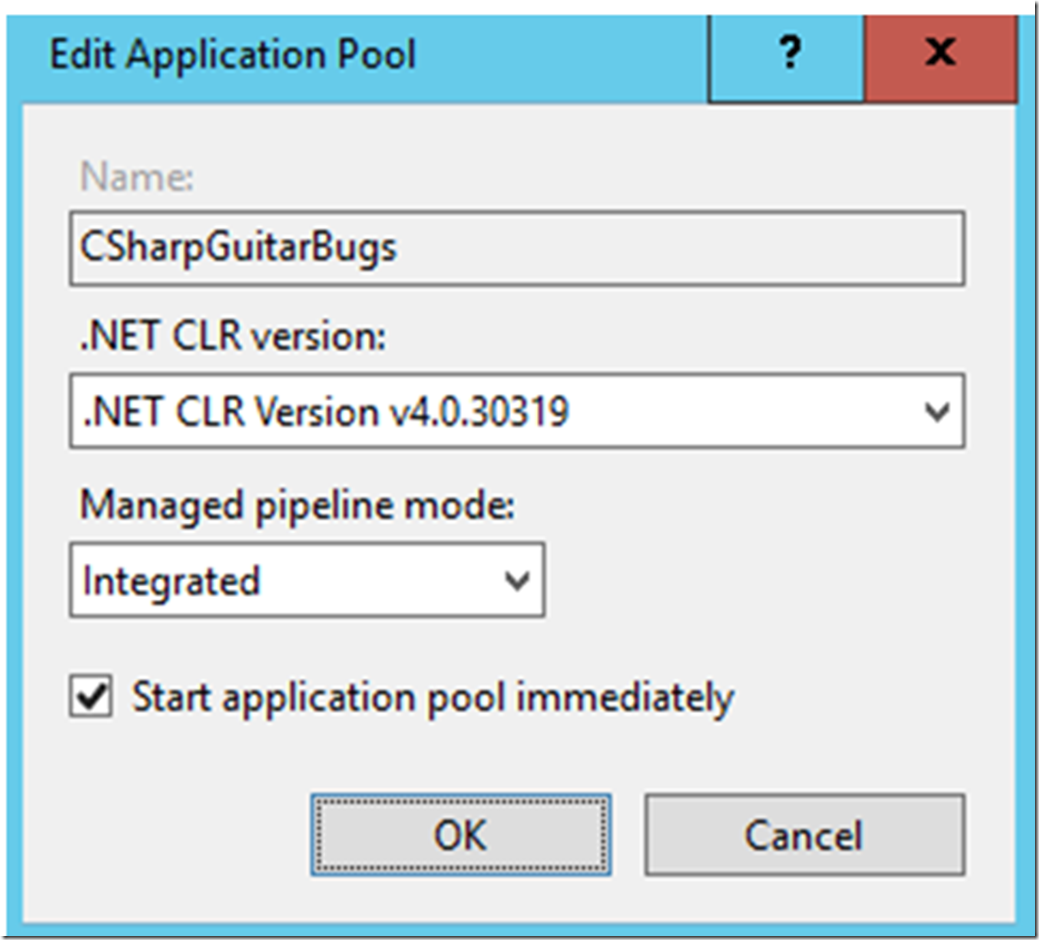
- Select the CSharpGuitarBugs application pool and click the Basic Settings in the Actions pane… or double-click CSharpGuitarBugs application pool and the ability to change its configuration is provided, as shown in Figure 2.
- Q: Will changing any of these setting require an IIS Reset for the changes to be applied? What is the impact of changing these settings on a live production system? A: As mentioned above, the .Net Framework version used in the W3WP process is passed as a command line parameter when the process is created by WAS (discussed in Lab 6 here and therefore if the CLR version of the W3WP process is changed, the process will be restarted. The impact is that requests to the web server will not be served until the process is restarted and the web site recompiled.
Figure 1, List of IIS Application Pools
Figure 2, modify basic IIS application pool settings
Lab 5.2 – Advanced Application Pool settings
There are a lot of setting which you can set on the application pool. Let’s review some of them.
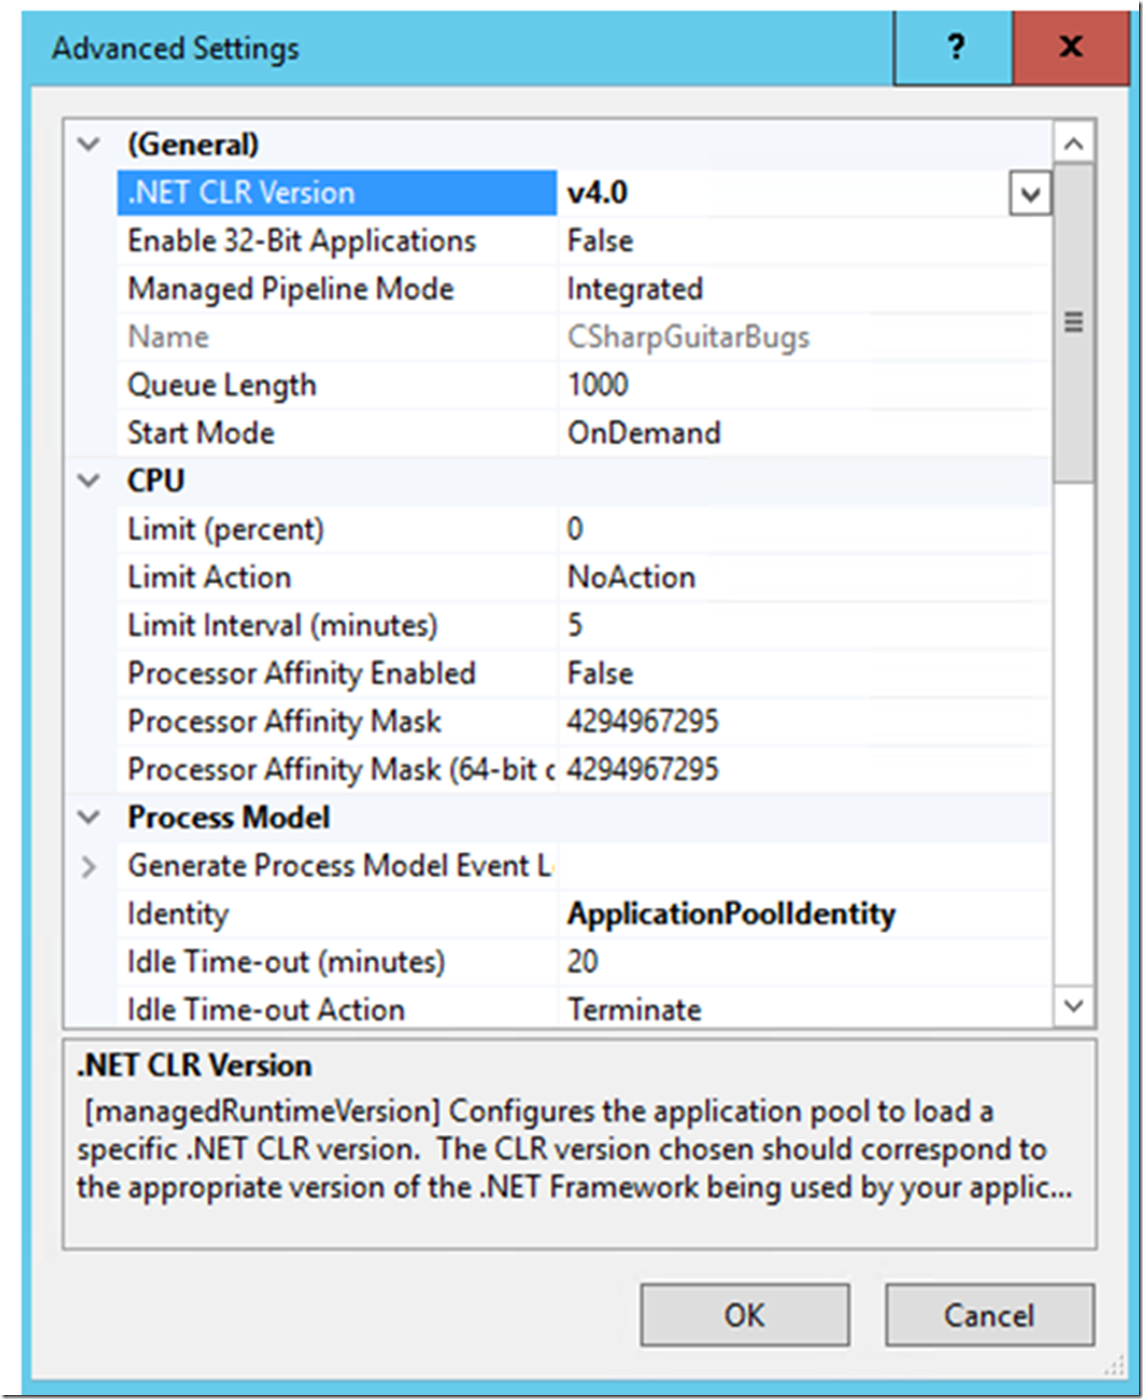
- Click on the CSharpGuitarBugs application pool and then select the Advanced Settings link on the Actions pane. A window that provides an interface for changing the settings is rendered, similar to that shown in Figure 3.
- Click through the settings and notice at the bottom, there is a description of the purpose of each setting.
- The R2 versions of Windows Server 2008 and 2012 are 64 bit. You can run 32 bit process on a 64 bit OS but you cannot do it the other way around, I.e. a 64 bit process on a 32 bit OS. When a program is compiled to run on a 32 bit OS then it needs to run within a 32 bit process. For example there are some database clients or 3rd party libraries that can only run in 32 bit mode. When this is the case, the “Enable 32-Bit Applications” attribute needs to be set to true. This means the W3WP process will be a 32 bit process instead of a 64 bit process which will have a 4GB limit on the memory consumption which the 64 bit process does not have.
- Did you know that when the application pool run in integrated mode that you can increase the Queue Length to 5000, if required? This is discussed in detail in Lab 7 here. In short, in classic mode, each executing request is bound to a thread while in integrated mode this is not necessarily the case.
- The CPU Limit is a cool setting and is important in a multi-tenant environment. The CPU Limit sets a limit on the percentage the given application pool / worker can consume during the time window set by the Limit Interval attribute. Some of the plans offered in the cloud have these kinds of thresholds, for example FREE and SHARED mode has a limit on the amount of CPU that can be used within a given time period, this is how that is managed.
- The autoConfig attribute of the Process Model as described here is a very important concept to understand. The attributes are set in accordance to this KB article here. More details are discussed in Table 1 below.
- Setting Idle Time-out to 0, disables the feature, it will not shutdown, Q: Why would this be a good idea? Why would this be a bad idea? A: It is a good idea for performance reasons, it can take some time to spin up a new W3WP process once it is shutdown, also for web sites that require some time to warm-up shutting down can actually cause some long delays on the first request. It is a bad idea if your are running a multi-tenant environment and have constraints on memory. If the web site is not being accessed, why have a process running? There is a new feature in IIS 8.5 called ‘Idle worker process page-out’ which I describe here where you can control in more detail what happens when the process is shutdown due to an idle timeout.
- Perform the LAB 5.3 – Add Items to Shopping Cart, found within this document to get a better understanding of the Application Pool Identity
- Process Orphaning – when a worker process stops responding, instead of termination the worker process, a new one can be instantiated, leaving the old one active so you can take a memory dump and analyze it.
- Perform the LAB 5.4 – Orphaning, found within this document to get a better understanding of this feature.
- Rapid-Fail Protection – is similar to the orphaning feature but will only fire if the Interval and max failure threshold is breached.
- Recycling
- The worker process will recycle every 1740 minutes which is 29 hours. Setting the value to 0 disables the recycle.
- Recommended to schedule a recycle, if required, to a time outside of usage.
- Worker process recycling help systems which have memory leaks to work better
- Read this article and do the LAB 5.5 – Event Logs, found within this document to get a better understanding of this feature.
Figure 3, modify advanced IIS application pool settings
| Attribute | Description |
| MaxWorkerThreads | Limits the maximum number of worker threads. |
| MaxIoThreads | Limits the maximum number of completion threads. |
| minFreeThreads | Determines how many worker threads and completion threads must be available to start a remote request. |
| minLocalRequestFreeThreads | Determines how many worker threads and completion threads must be available to start a local request. |
| maxConnection | Determines how many connections can be made to a specific IP address. |
Table 1, the ASP.NET process model
Lab 5.3 – Add Items to your Shopping Cart
This lab will show you how to change the application pool identity and why you might want to do that.
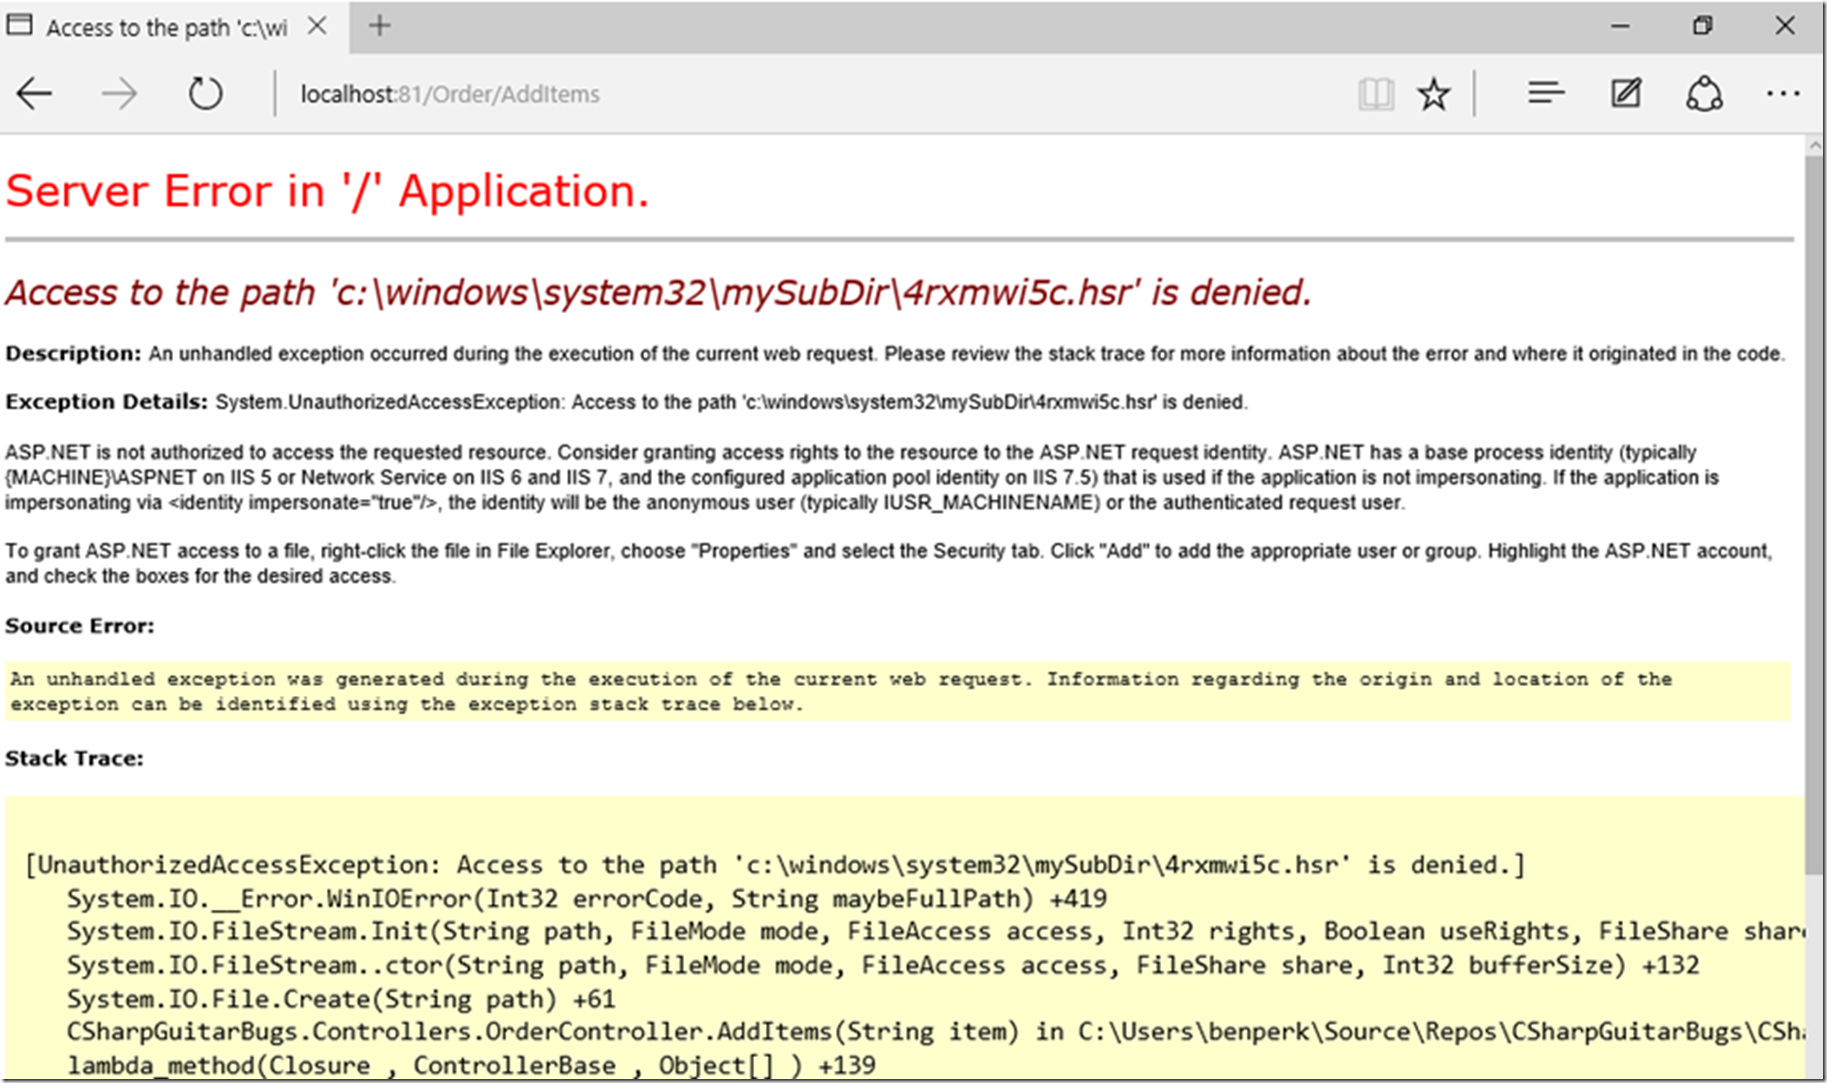
- Make sure the CSharpGuitarBugs website is configured in IIS. When configured correctly, you should receive this result when clicking the ‘Add to Cart’ button after clicking the ‘Add items to your Shopping Cart’ link.
Figure 4, how to change the application pool identity
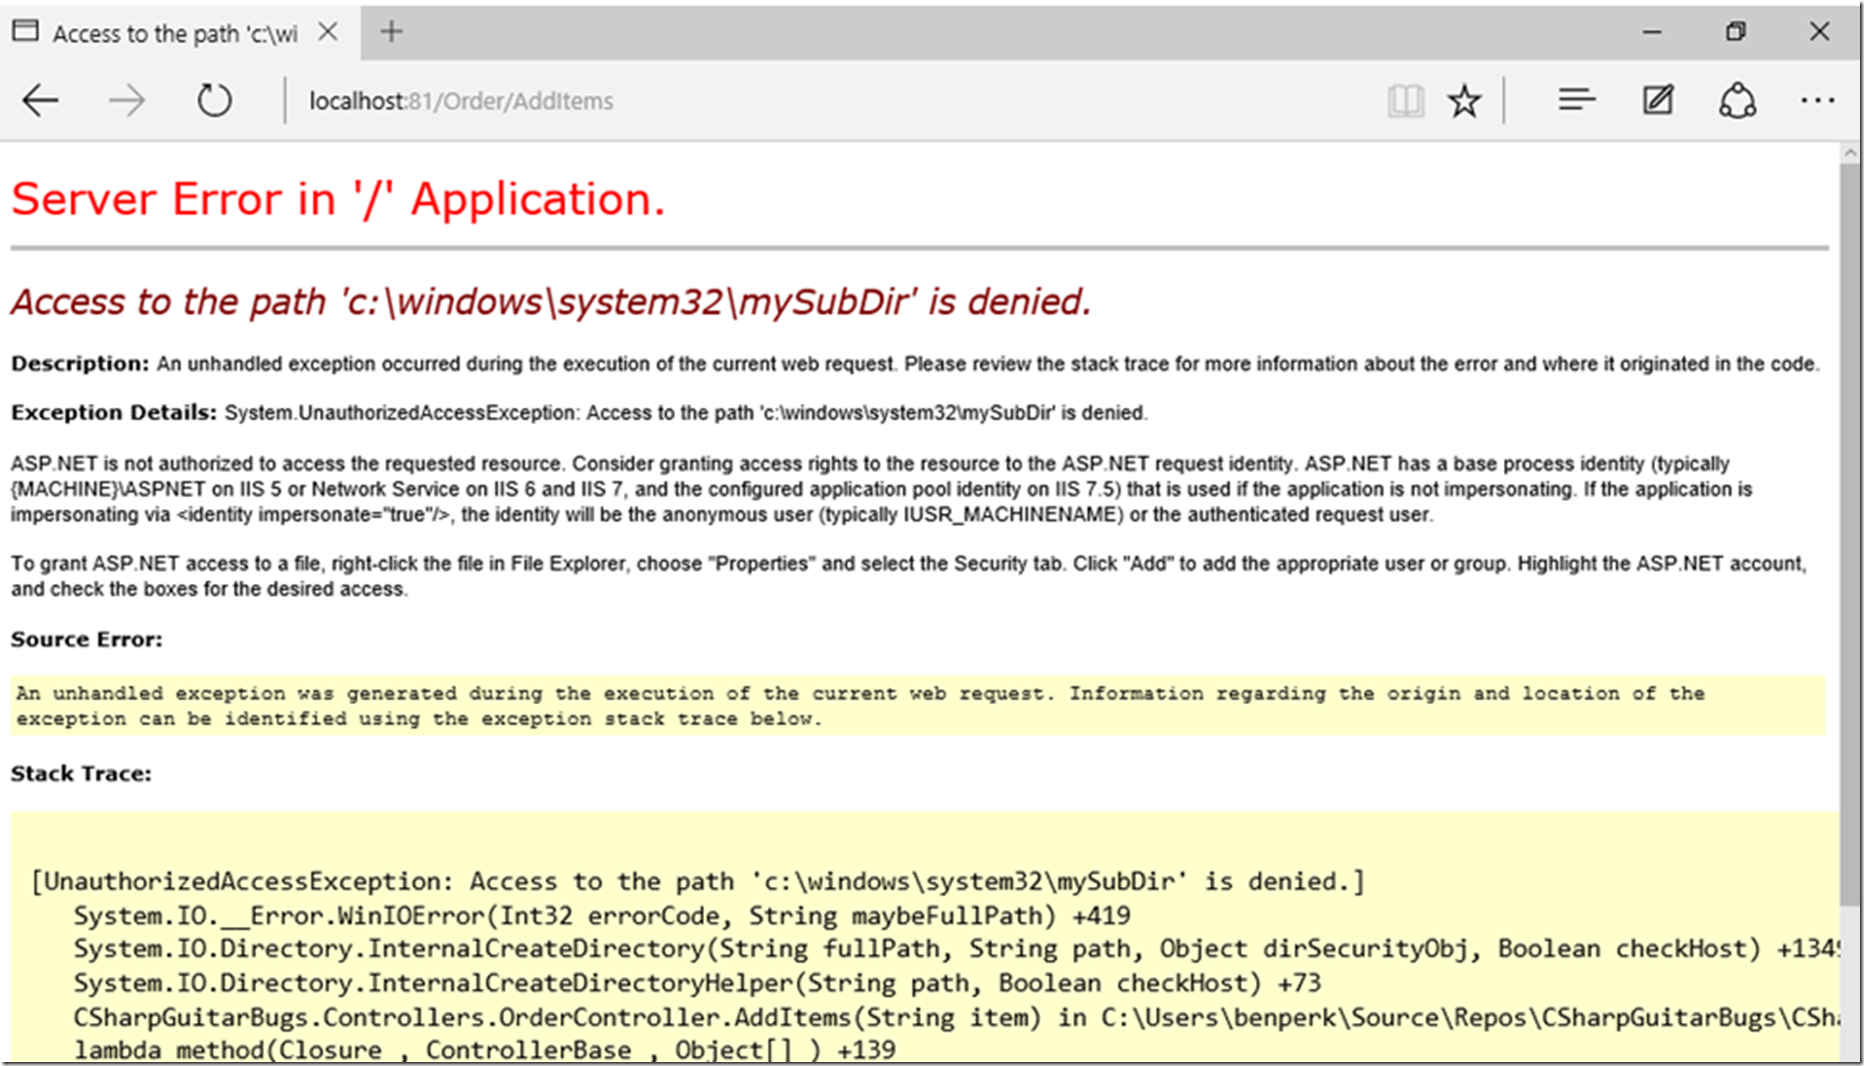
- Create the mySubDir directory within c:\windows\system32 and retry step 1, which will result in the following.
Figure 5, how to change the application pool identity
- Startup Process Monitor to see what is happening, once running, reproduce the issue. You should see the following log entry.
Figure 6, how to change the application pool identity
- The reason you cannot create the file is because the User account which the application pool runs within does not have that permission. You can do 2 things here, you can grant the IIS APPPOOL\CSharpGuitarBugs account permission or create a custom account, grant that account access to the directory.
- Let’s first grant IIS APPPOOL\CSharpGuitarBugs access to the directory…(this is just an example, avoid granting access to anything to this directory…it is just the simple example)
a. You may need to change your User Account Control settings to perform this task (UAC)
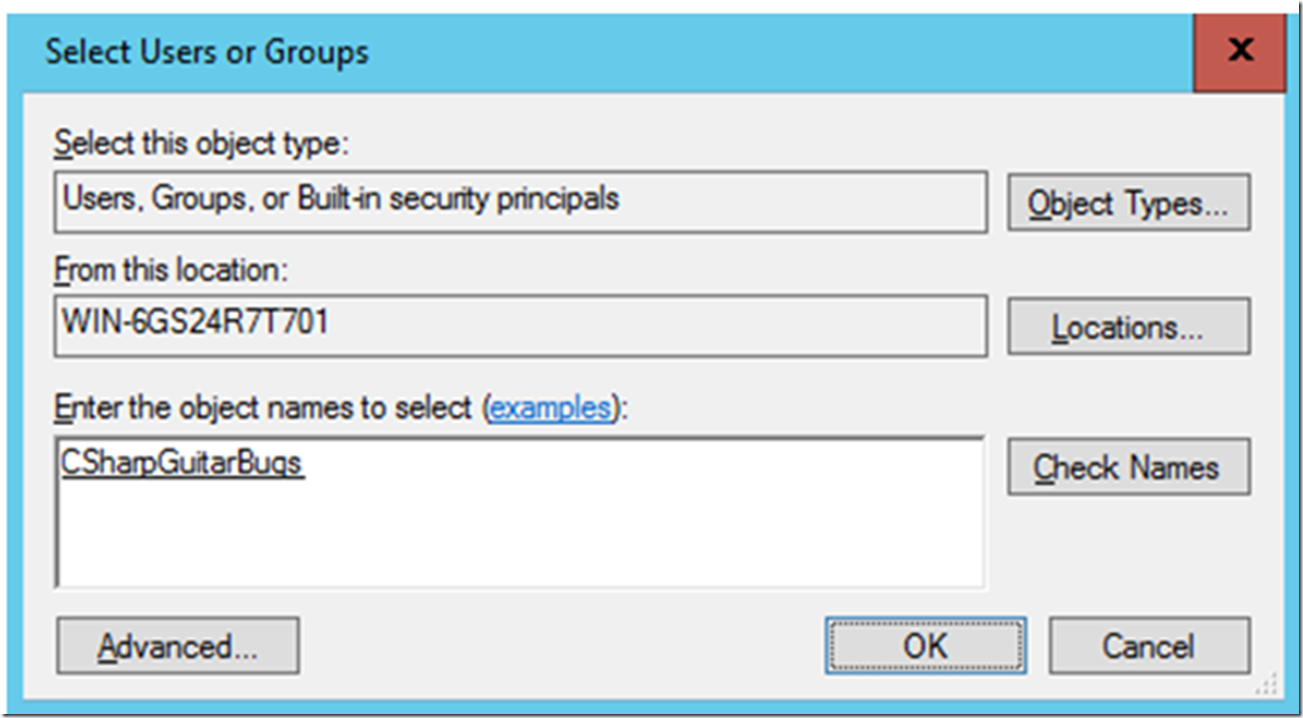
- Right-click on the c:\windows\system32\mySubDir directory, Properties, Security tab, Edit and then Add. Make sure the Locations is set to the local server. Add IIS APPPOOL\CSharpGuitarBugs and click OK.
Figure 7, how to change the application pool identity
- Grant the user Modify permissions, then click OK and OK again.
- Click the ‘Add Item’ button after clicking the ‘Add items to your Shopping Cart’ link again and the file is successfully created
- Remove the permission, test to make sure the error comes back
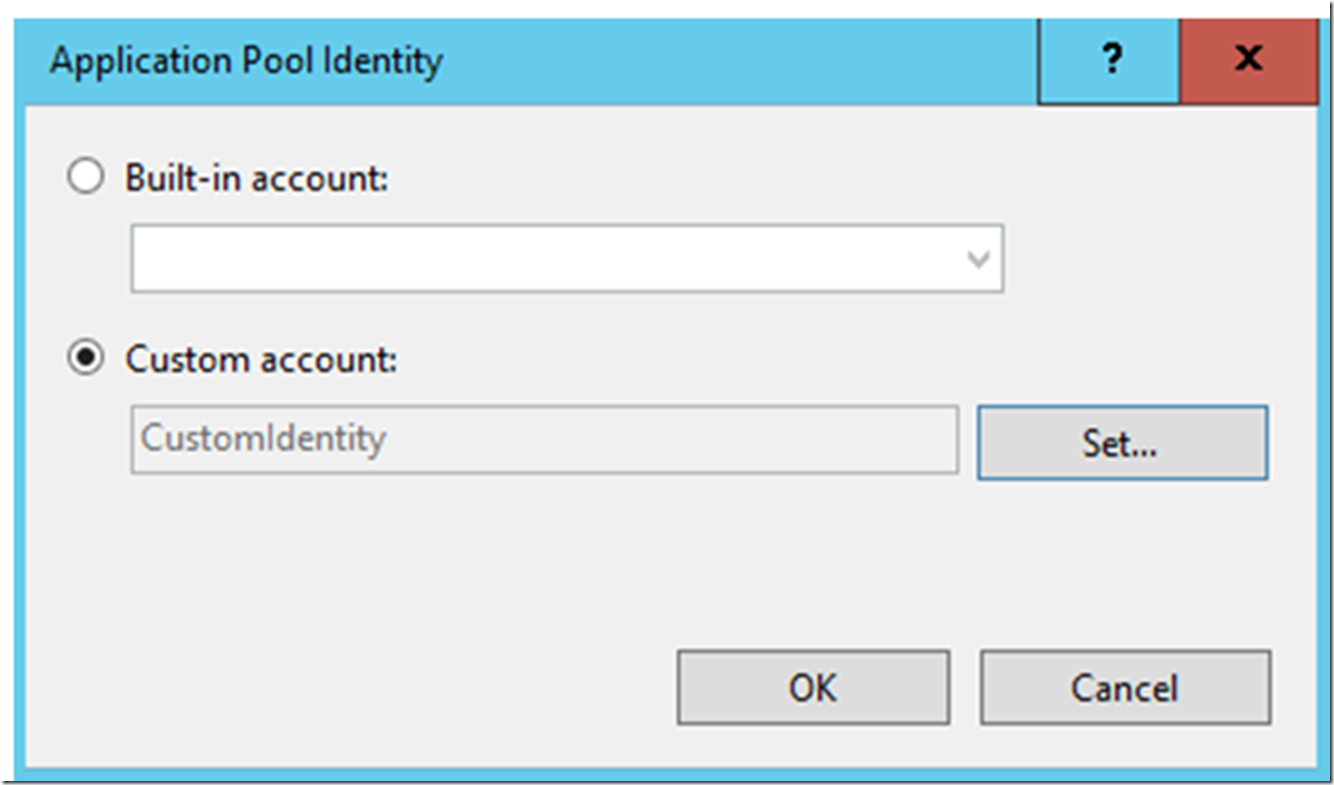
- Open the Advanced Settings… of the CSharpGuitarBugs application pool and change the identity to a custom identity. You can do this using MMC.
Figure 8, how to change the application pool identity
- Access the website and you get a similar Access Denied error. Notice, that the account under which the W3WP process is running is now the custom identity.
Figure 9, how to change the application pool identity
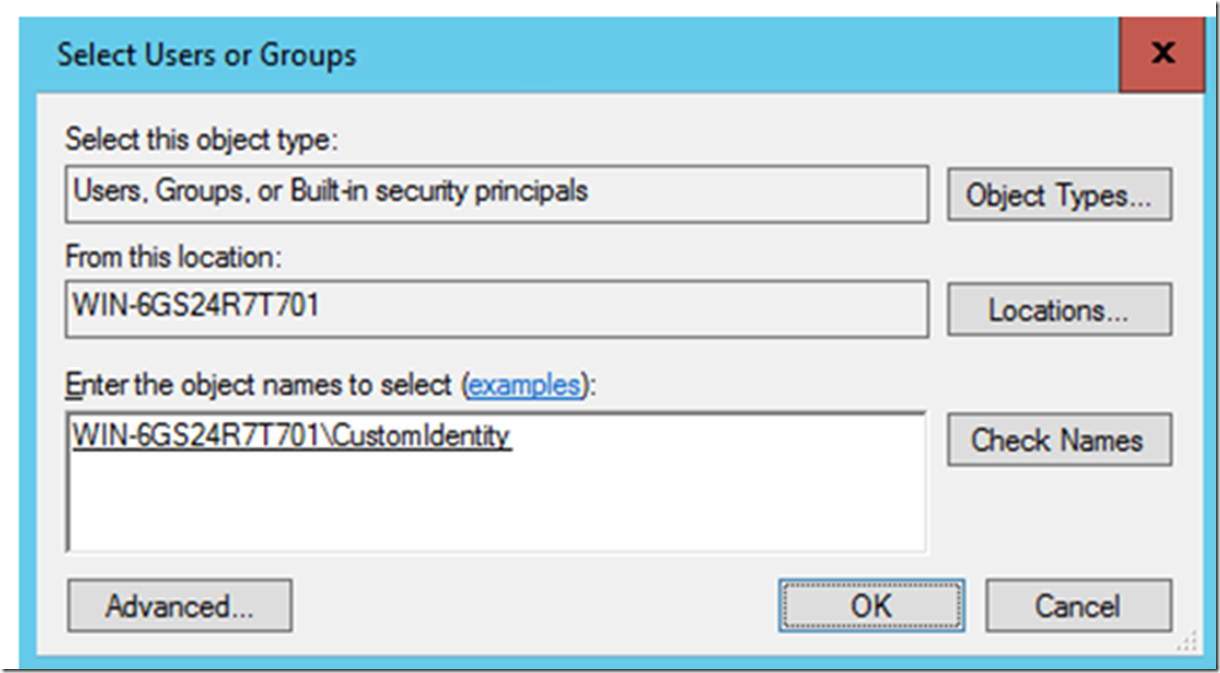
- Grant that account Modify permission on the c:\windows\System32\MySubDir and access the website.
Figure 10, how to change the application pool identity
LAB 5.4 – Orphaning
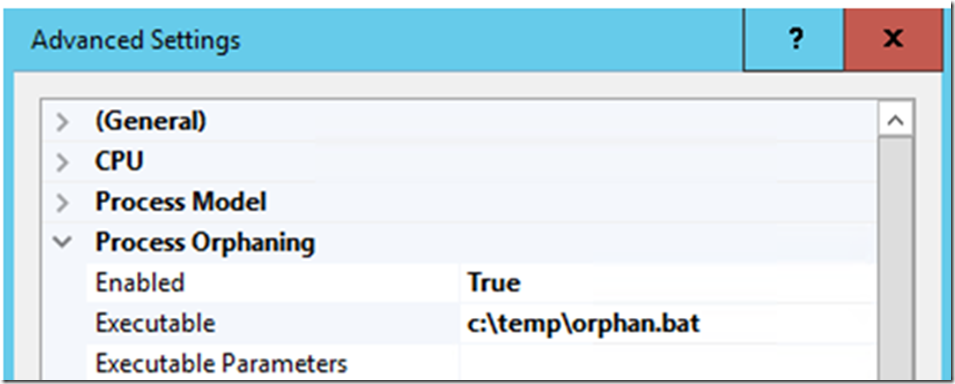
- Place a copy of the Orphan.bat (like the below) file into the C:\temp directory on the IIS web server
setlocal
set TIMESTAMP=%DATE% – %TIME%
set LOG=c:\temp\log.txt
echo %TIMESTAMP% >> %LOG%
endlocal
- Navigate to the advanced settings of the CSharpGuitarBugs application pool.
- Make the following changes:
Figure 11, IIS Orphaning]
- Check what the current PID of the CSharpGuitarBugs worker process is.
Figure 12, IIS Orphaning]
- Access the CSharpGuitarBugs website and click on the ‘Provide some Feedback’ link. Click on the ‘Send Feedback’ button which will cause the application pool to orphan.
- Look in the c:\temp directory and you will see a log.txt file written and in Task Manager you will see that the worker process has a new PID once the site is accessed again (assuming Always On is disabled).
Figure 13, IIS Orphaning]
This works similar to the Rapid-Fail Protection capabilities, perform the same using that feature and determine if there are any differences.
LAB 5.5 – Event Logs
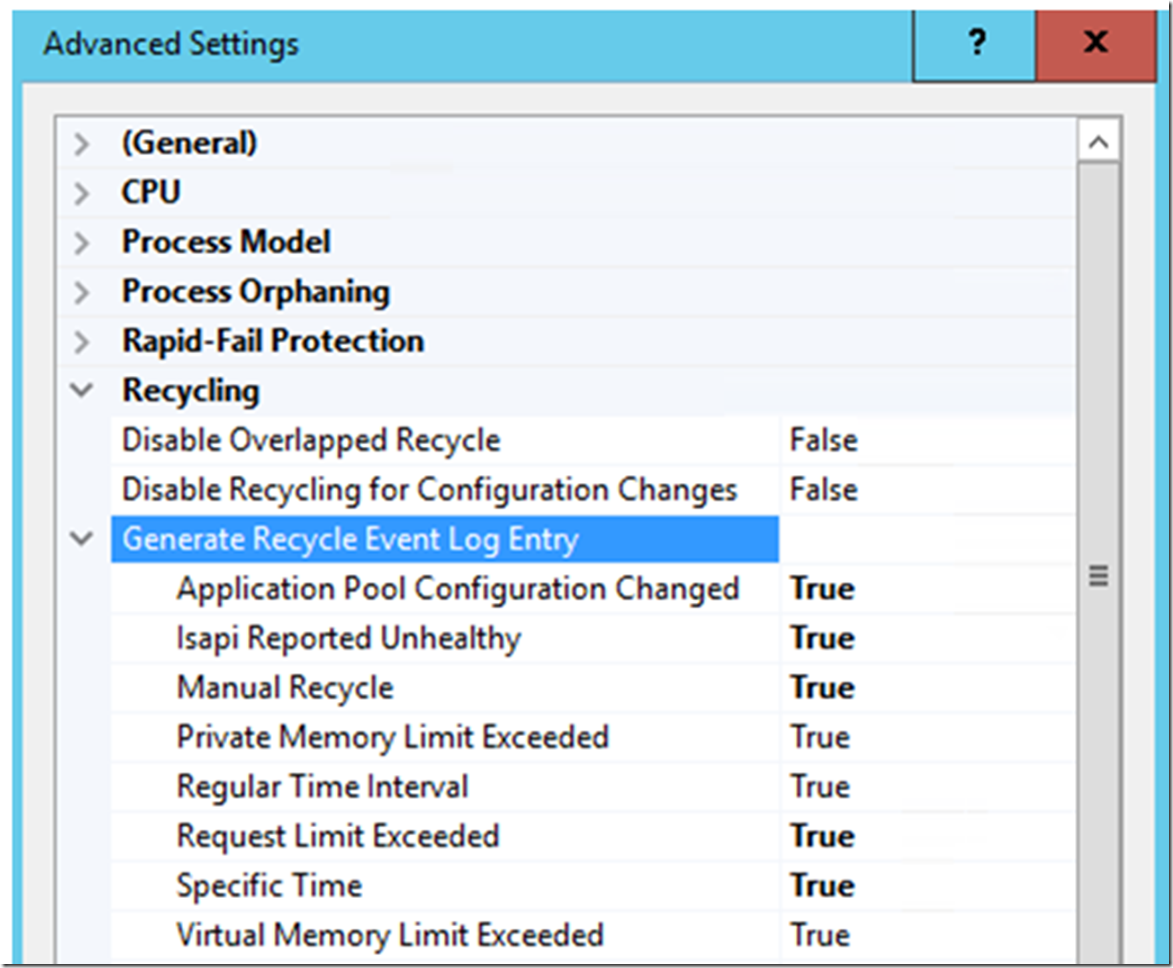
- Modify the Recycling attributes of the CSharpGuitarBugs application pool, as shown below, confirm both Application Pool Configuration Changed and Manual Recycle are set to True.
Figure 14, Application Pool Configuration Changed and Manual Recycle
- Press OK.
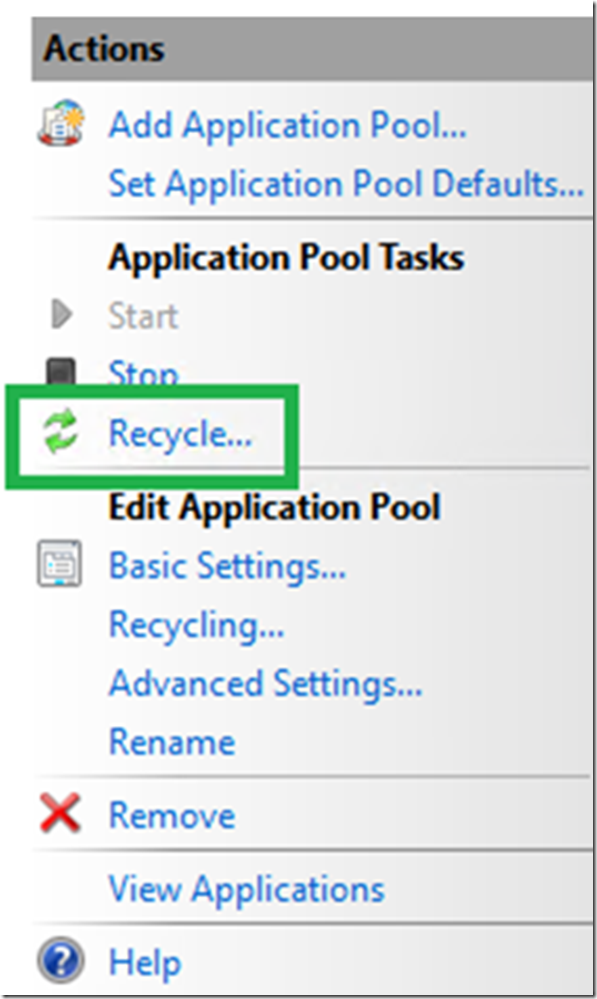
- Manually recycle the worker process, for example:
Figure 15, Application Pool Configuration Changed and Manual Recycle
- Make a configuration change, for example, create a self-signed SSL certificate and bind it to the Default Web Site
- Open the Event Viewer and look for the logs in the System Event Viewer
Figure 16, Application Pool Configuration Changed and Manual Recycle
Using the Configuration Editor to change Application Pools settings
You can change application pool settings from within the configuration editor.
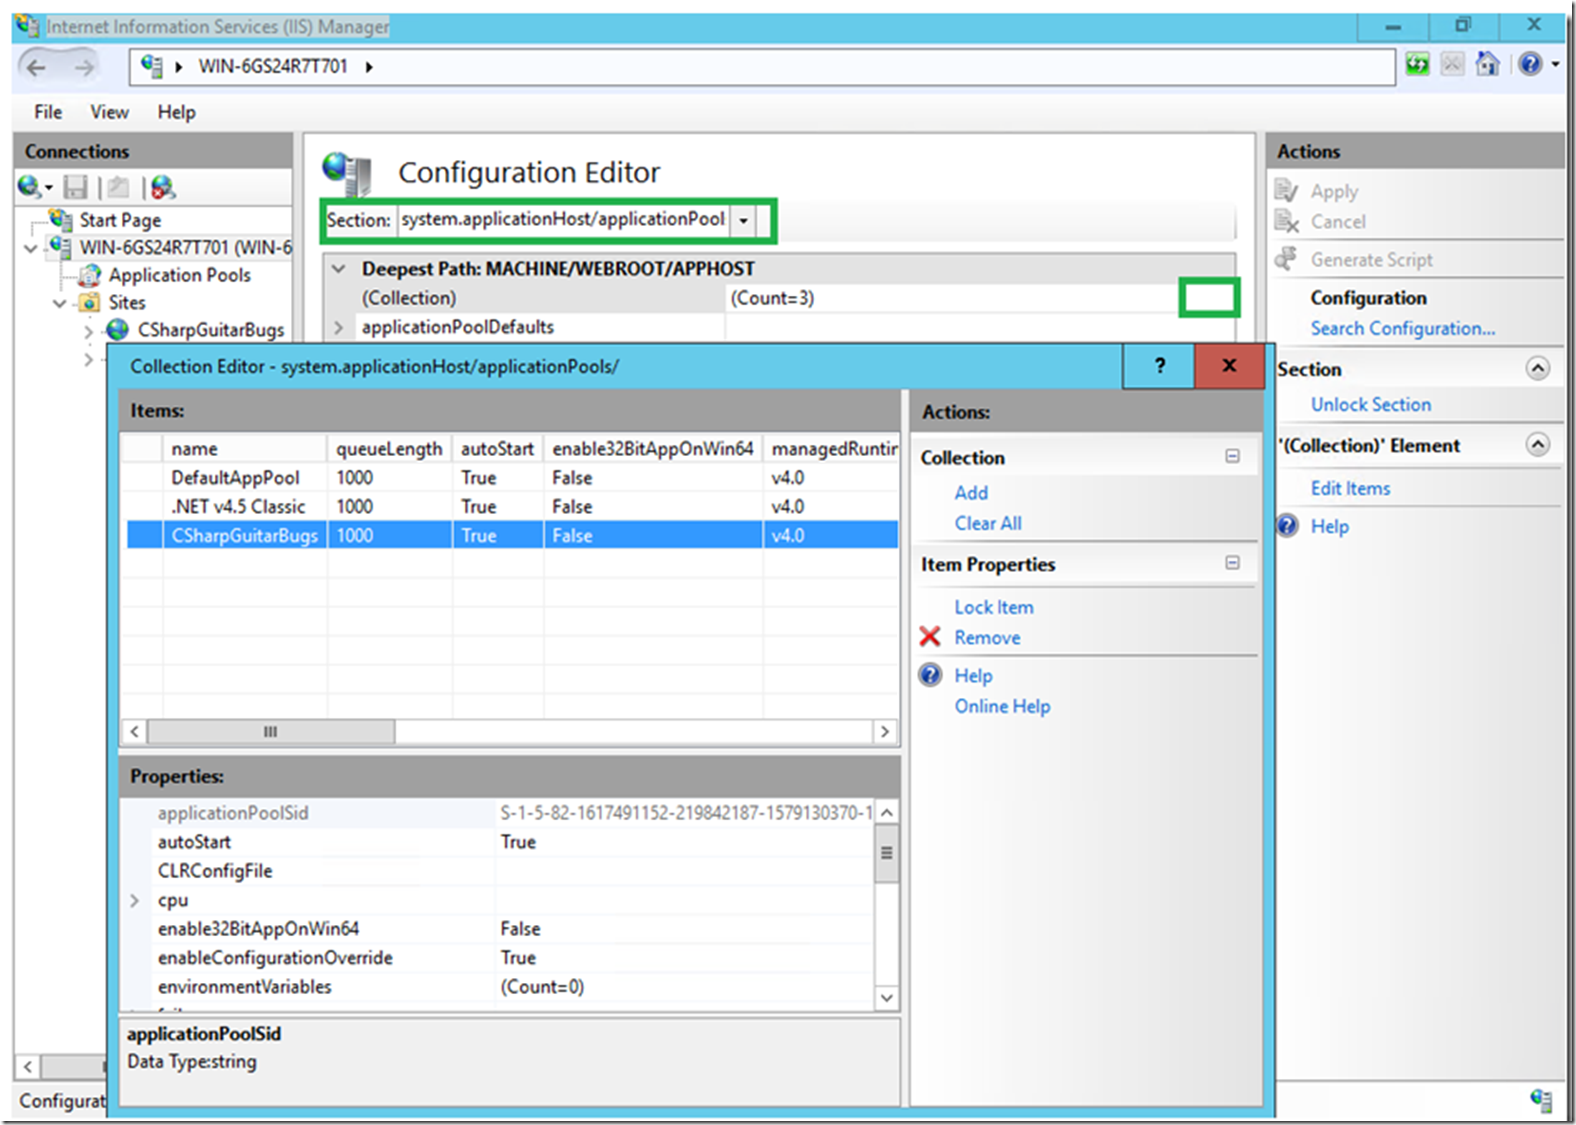
- Click on the Server name, server level (not Sites), in the IIS Management Console and open the Configuration Editor by clicking on the Configuration Editor icon in the feature pane (it is in the Management section towards the bottom of the window, you may need to scroll down)
- Navigate to system.applicationHost/applicationPools
Figure 17, Application Pool Configuration Changed and Manual Recycle
- This provides you with an interface for changing all of the application pool settings.
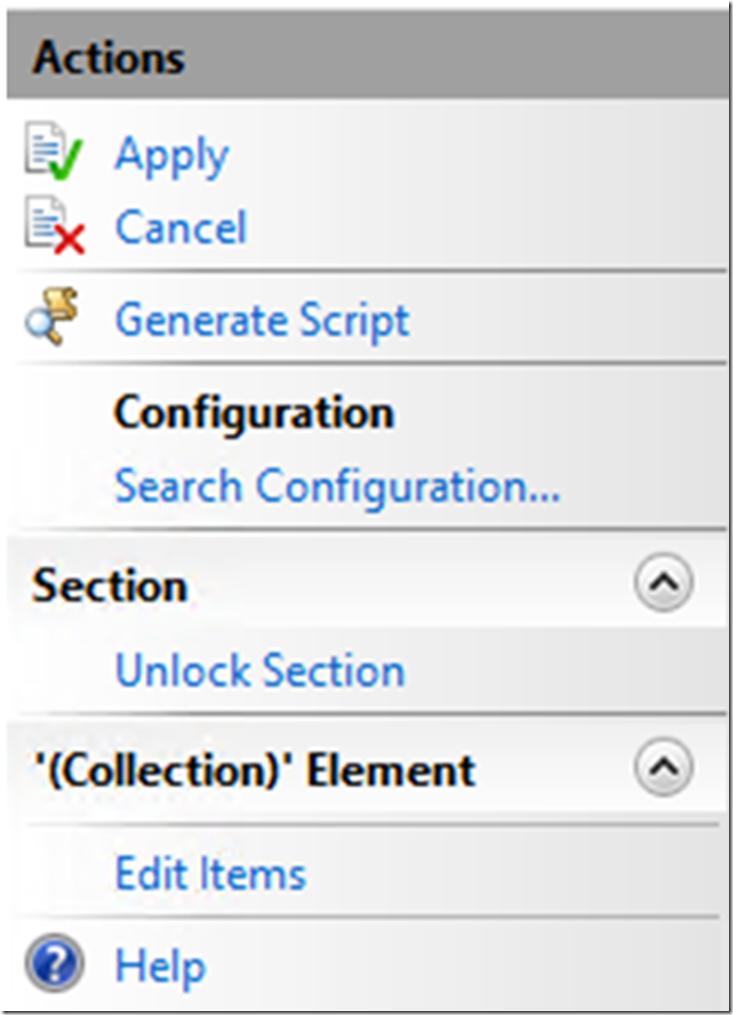
- After you make a change, you can close the window and click the Apply link in the Action pane, wait, before you do that, click on the Generate Script link and you will see how you can do the same using C#, JavaScript, AppCmd and PowerShell. Very nice feature.
Figure 18, Application Pool Configuration Changed and Manual Recycle
