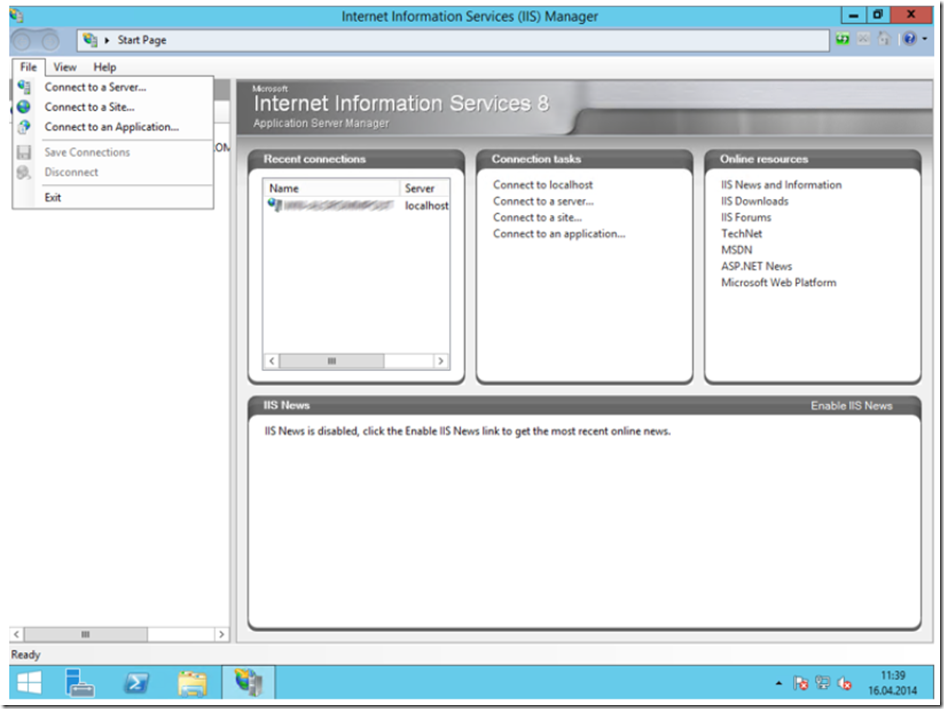
It becomes unexciting when I need to access multiple Internet Information Services (IIS) servers to check configurations and such. Sure, you can use PowerShell, but I am a GUI guy and prefer the nice icons and text boxes over command line. I get a new GUI when a new version of the OS is released and new icons and stuff when new features are installed and/or released, and that adds excitement to my job. The Remote IIS Administration role is something I like to use to administer IIS servers remotely instead of logging into each, one at a time. It is accessible from within the IIS management console by selecting the File menu item and then the item you would like to manage, I.e. a Server, Site or Application, as shown in Figure 1.
Figure 1, Adding a Server, Site or Application for remote IIS management
Not so fast, before you can add them you need to configure the remote management role. Here are some instructions, but, like always I like to walk through them and document my learnings and experiences.
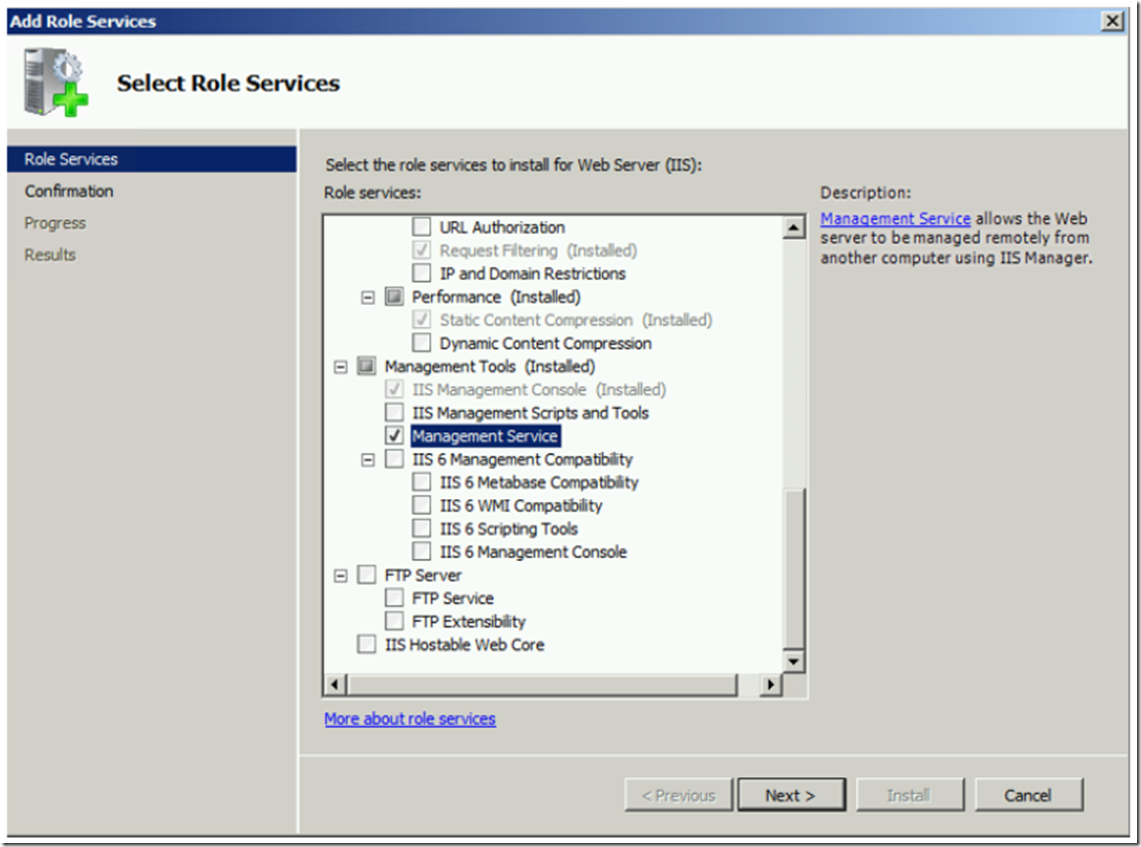
The first step is to add the Management Service Role as shown in Figure 2.
Figure 2, add the Management Service role for Remote Administration
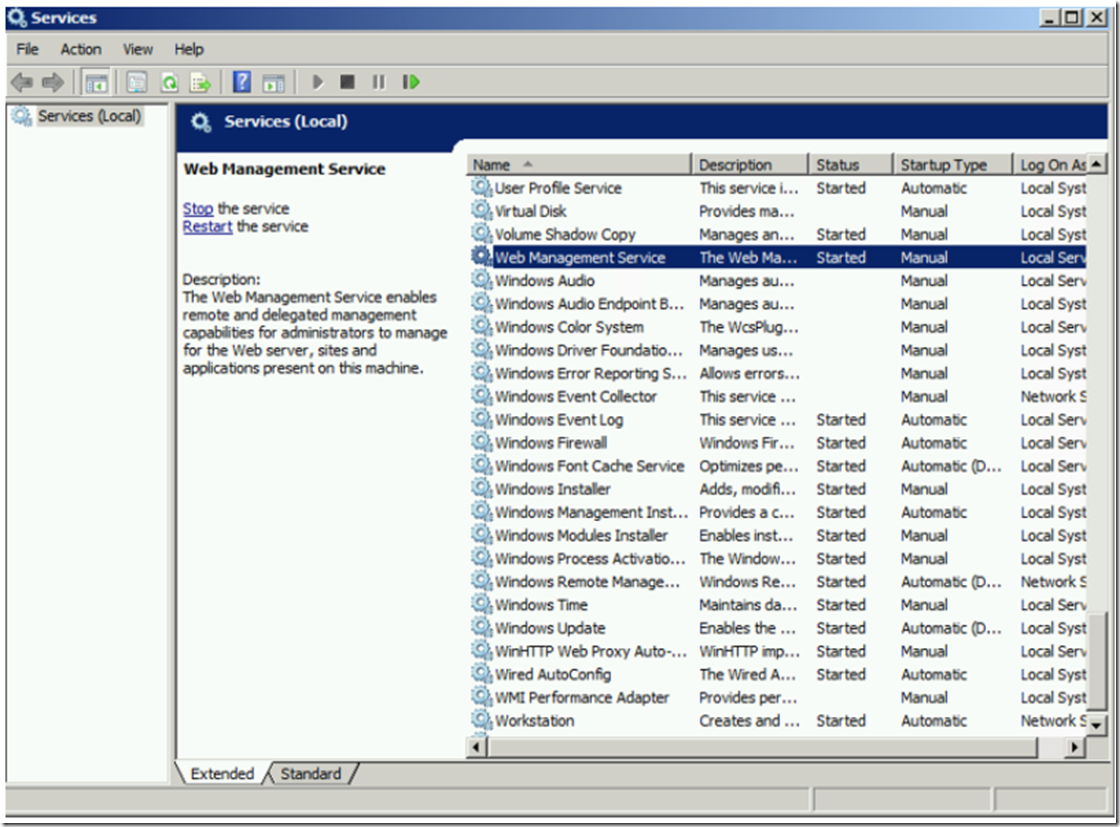
Once installed, you need to start the Web Management Service. It is set to Manual, as shown in Figure 3. Change it to Automatic if you plan on using this feature often.
Figure 3, Start the Web Management Service service to enable Remote Management
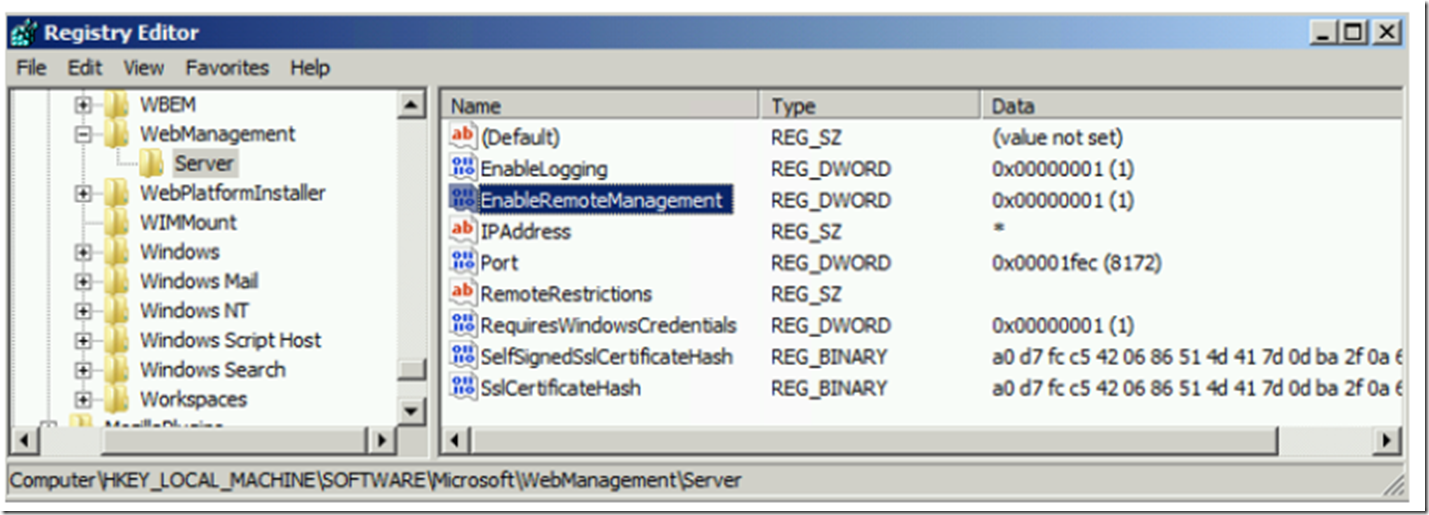
Next, set the EnableRemoteManagement attribute in the Registry to 1, as shown in Figure 4. Please be careful making changes to the registry, some changes can cause serious negative impact. Consider taking a backup of it prior to making any changes, JIC.
Figure 4, Set EnableRemoteManagement to 1
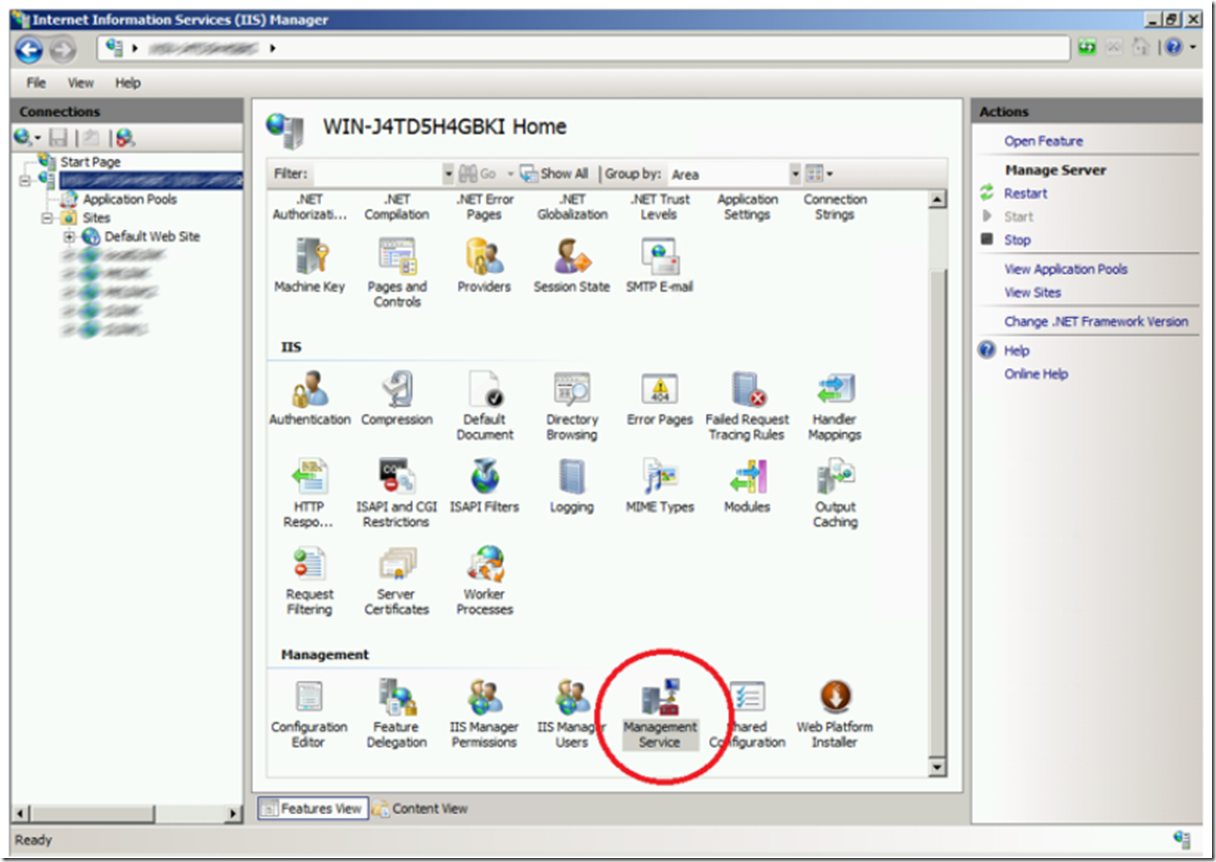
Once the Management Services role is installed, you will notice the Management Service icon within the IIS management console at the server level as shown in Figure 5.
Figure 5, the Management Service role in the IIS management console
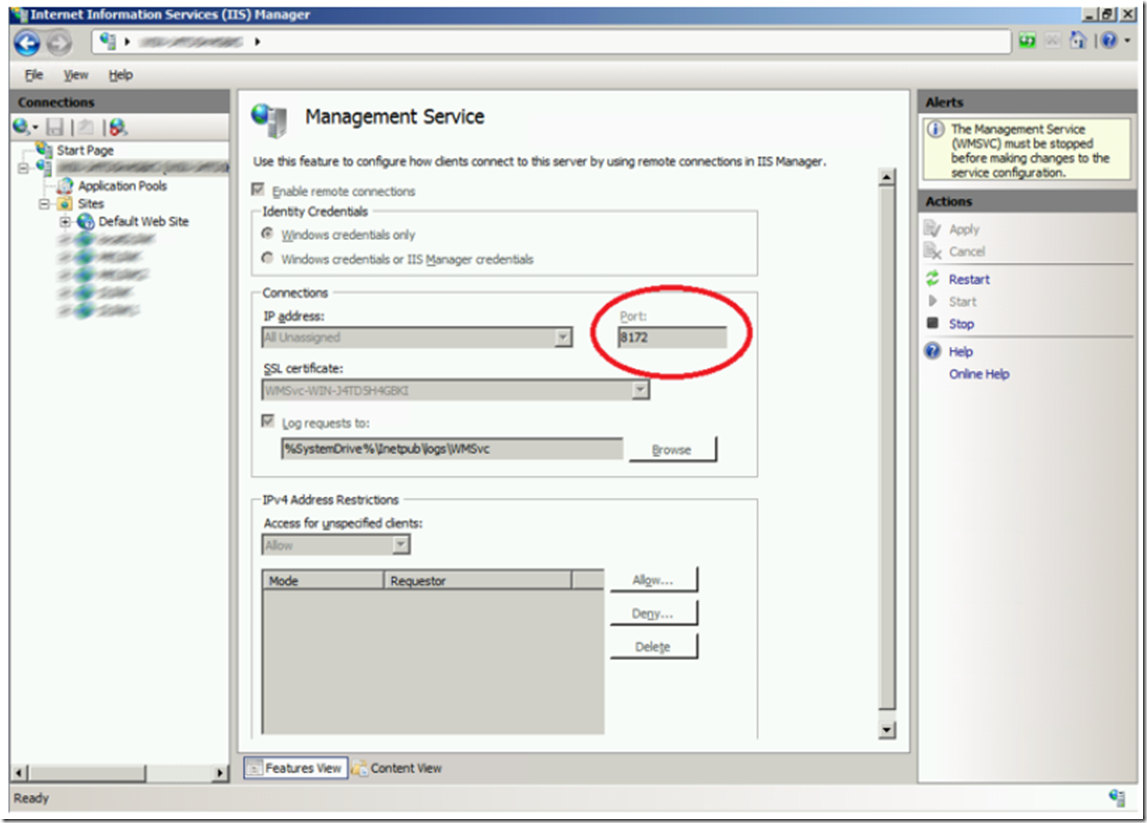
Open the role and take note of the PORT configuration as it is needed when you make the connection from another IIS management console, as shown in Figure 6.
Figure 6, the Management Service role in IIS
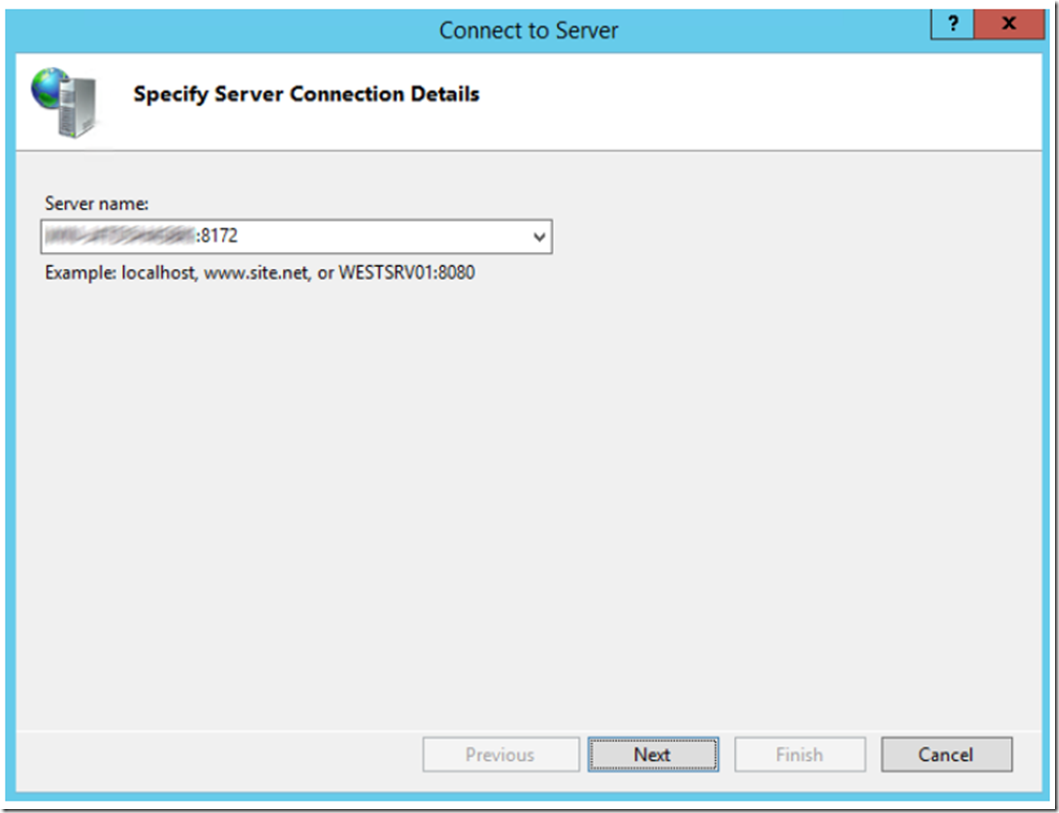
Next, login to the server where you want to remote manage your IIS servers from. Open the IIS management console and click File -> Connect to a Server, as shown previously in Figure 1. Enter the name of the server as show in Figure 7 and click the Next button.
Figure 7, Connect to a Server from IIS management console for remote management
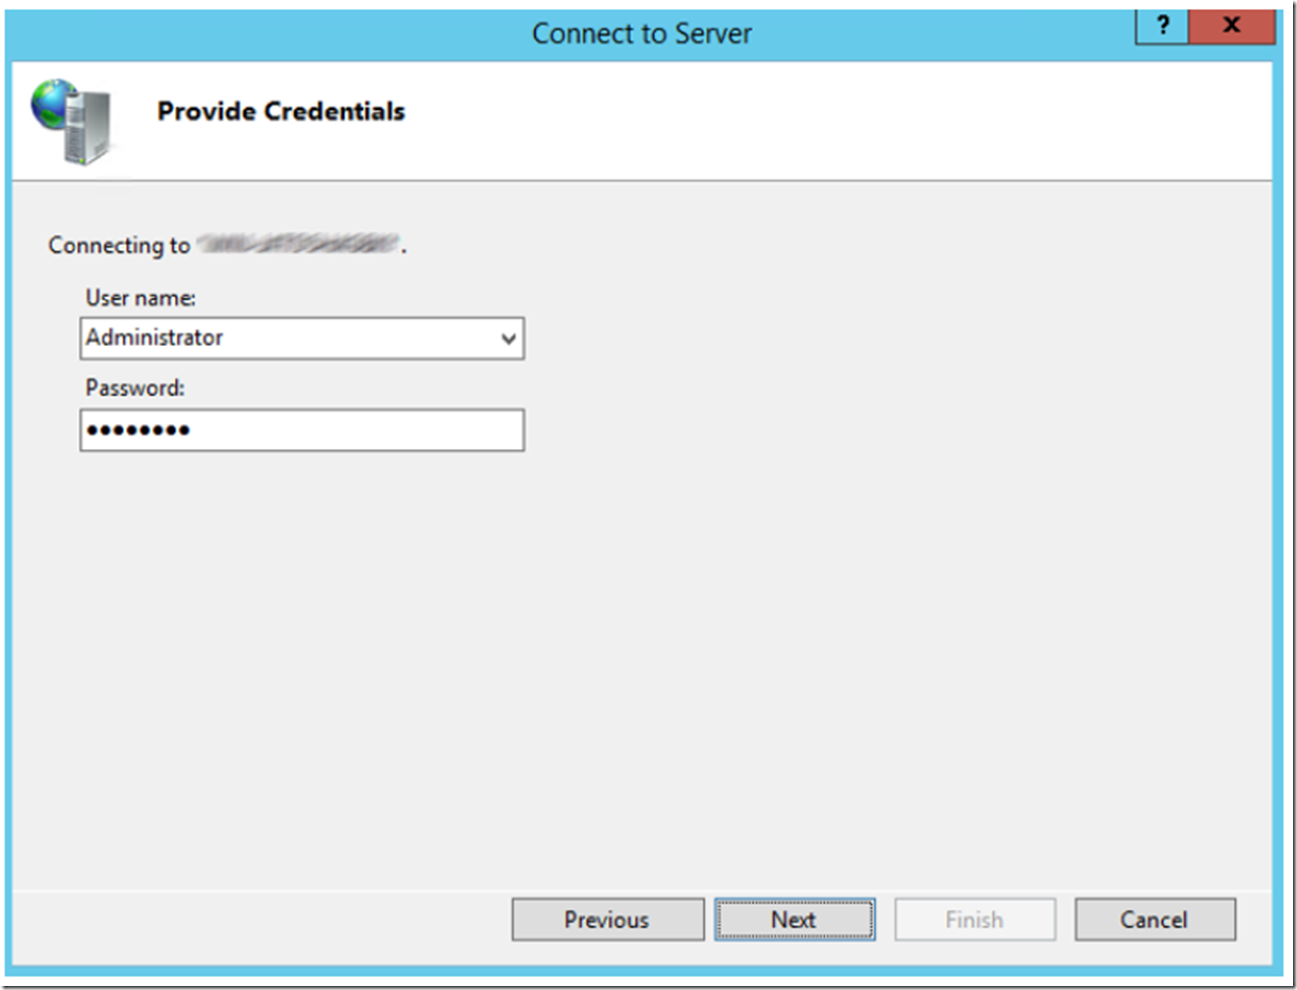
Add the credentials for connecting to the remote IIS server, as shown in Figure 8 and select the Next button.
Figure 8, enter credentials for IIS remote management
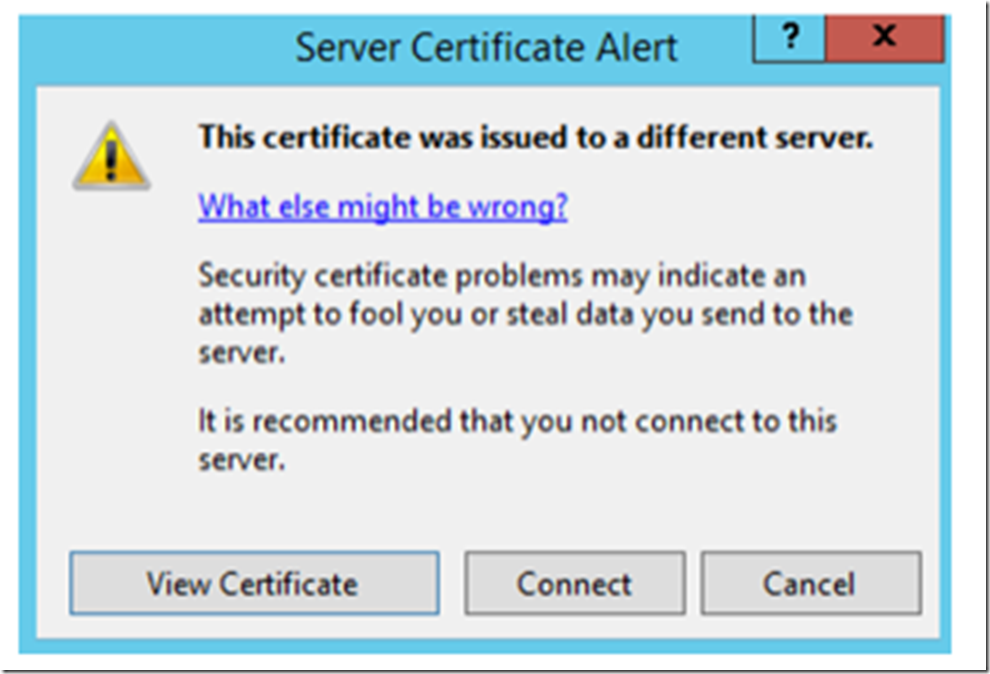
You might get a warning that mentions ‘This certificate was issued to a different server.”. You can either ignore the message and select the Connect button, as shown in Figure 9, or you can configure the certificate to be used to make the connection via the instructions provided previously.
Figure 9, Certificate alert when configuring IIS Remote Management
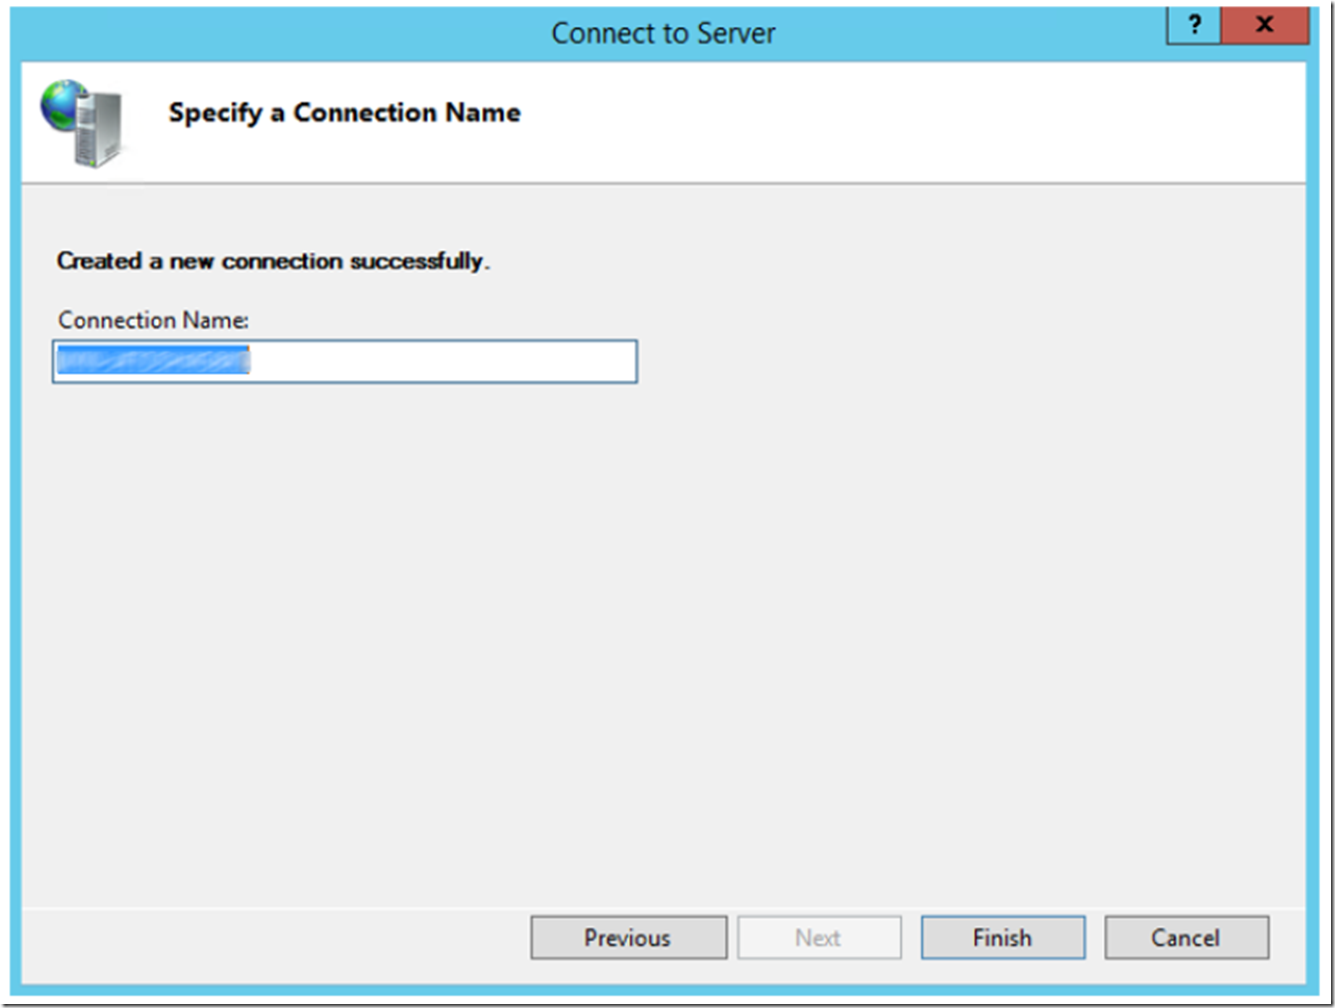
After clicking on the Connect button, give the connection a name and press the Finish button as shown in Figure 10.
Figure 10, naming your remote IIS server connection
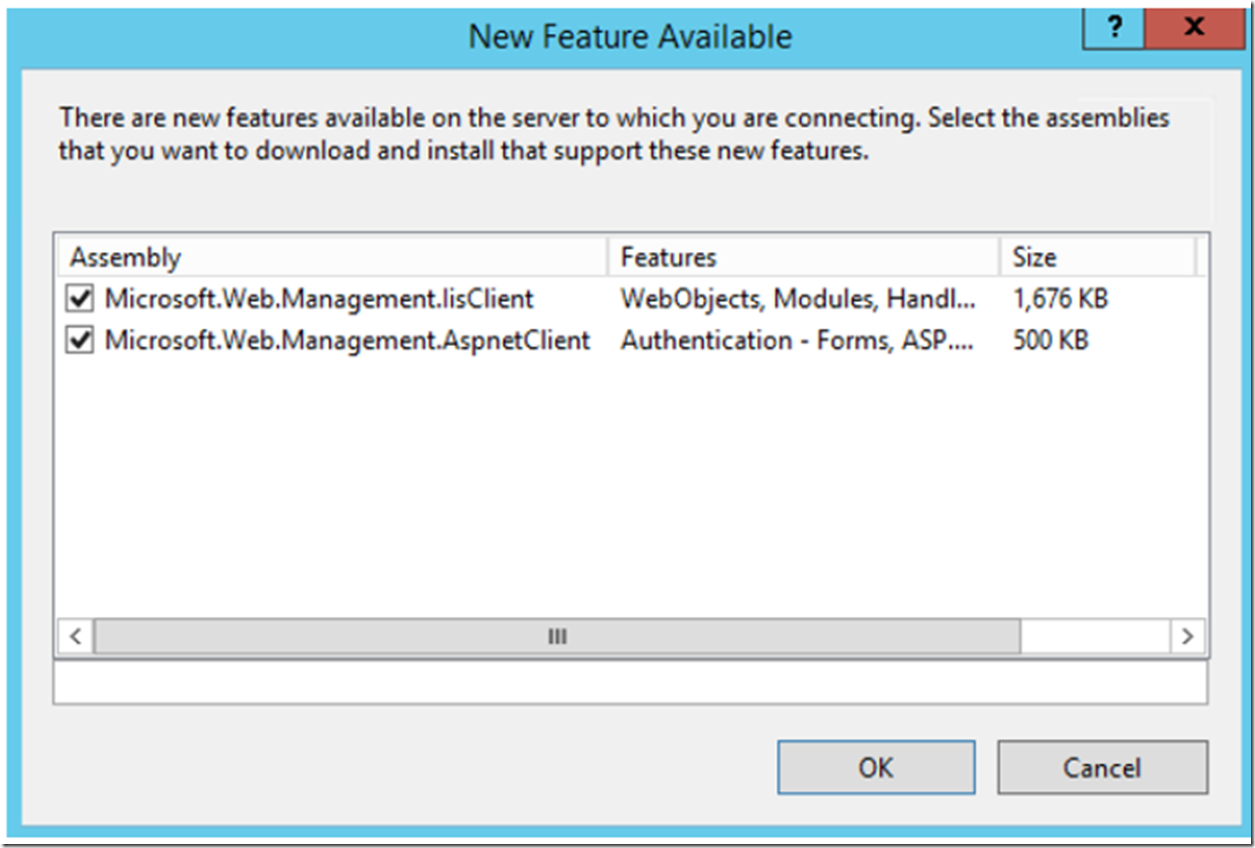
If you are prompted to install some new features, as shown in Figure 11, go ahead and do that.
Figure 11, installing new features to enable IIS Remote Management
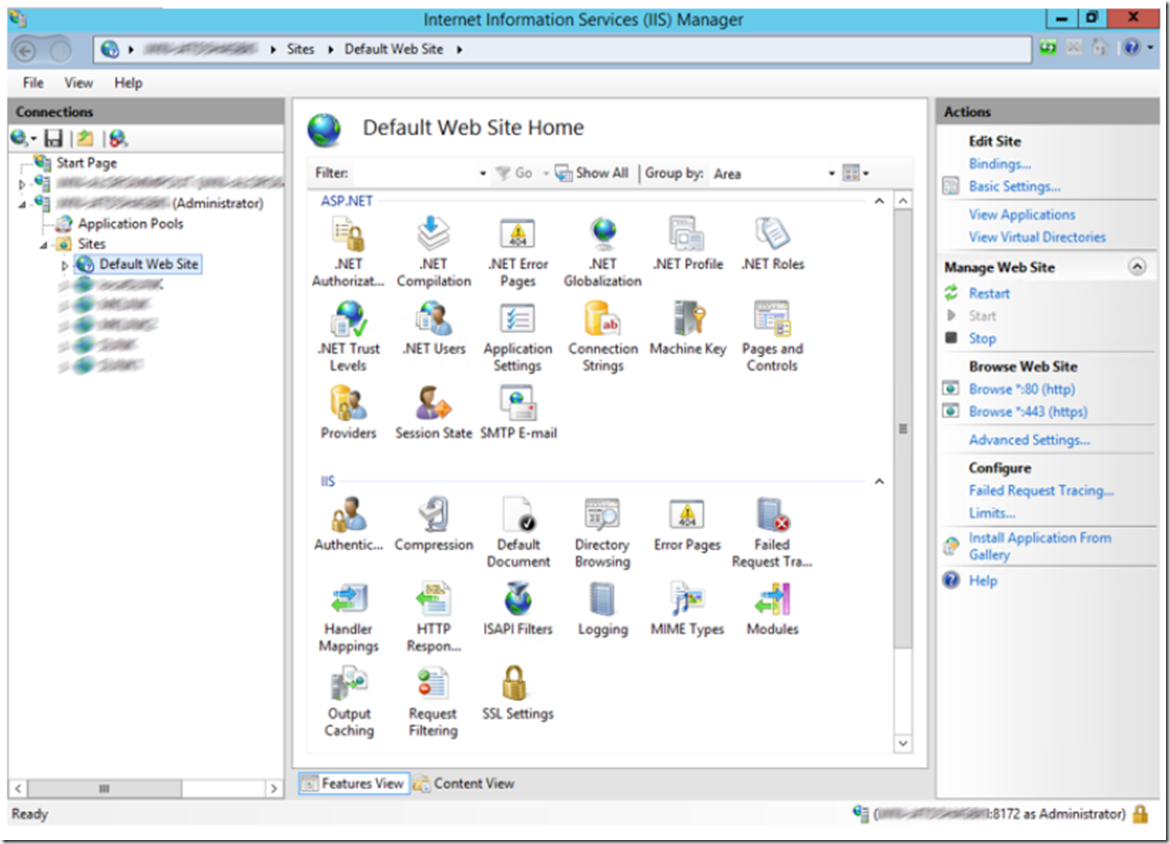
Once complete you can manage the configured server remotely without having to login, as illustrated in Figure 12.
Figure 12, An IIS server which is remotely manageable
I like this feature and I hope you find it useful.
It is also possible to map a Microsoft Azure Web Site using the same feature. Instructions are available here.
