The kind of Client Certificate I use most is stored electronically on a chip located on the back of my id badge. There is a card reader in my PC that can access these certificates, which are protected by a pin and requested when I attempt to access a web site that is configured to require them. I am sure there are other kinds of client certificates, but this is the kind I am thinking about and referring to when writing this blog post.
Like I have often stated, I am a fan of ARR because of so many years supporting a web farm and not really understanding what is happening on that black box load balancer…I never had access to it because it was considered network responsibility, so I had to work with other people when I thought there was a problem with it. ARR is a software based load balancer, and other things, but with ARR I no longer need to the black box and interface with the network team. I can configure and manage a web farm now directly in IIS.
This article discusses how to use Client Certificates when ARR is the load balancer for your web farm. Here is the article I used as a preface for this one. I do assume that you can already setup an ARR web farm, but here are some instructions JIC.
The steps required to configure ARR to support Client Certificates are:
- Create a Self-Signed Certificate on the ARR Server
- Bind the Certificate to the Default Web Site
- Set ARR to require Client Certificates and SSL
- Set the SSL Setting to require Client certificates
Create a Self-Signed Certificate on the ARR Server
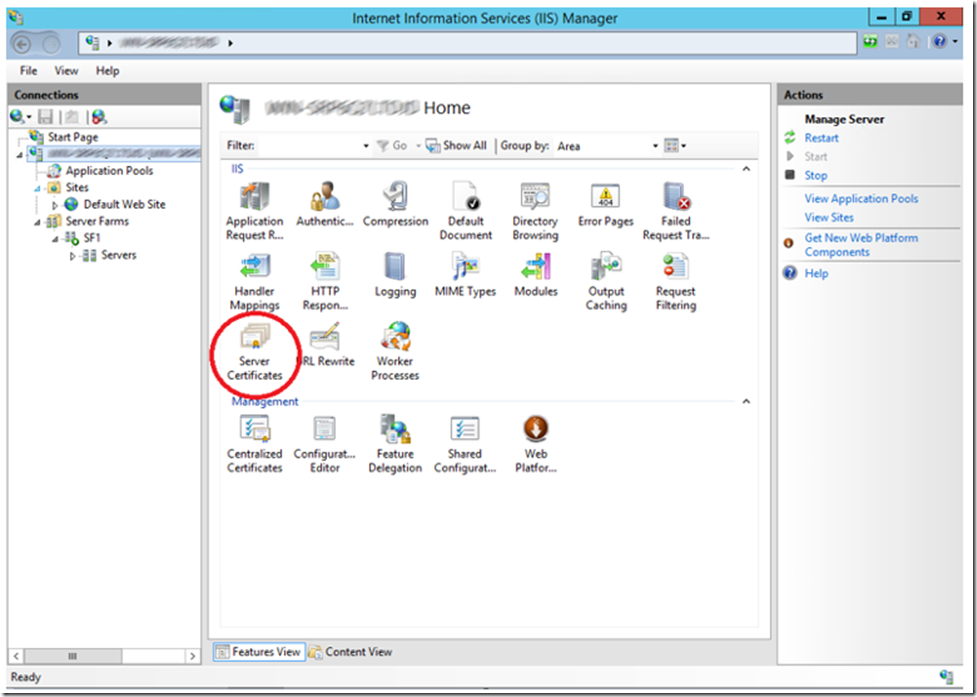
For testing, you can created a self-signed SSL certificate, but if you have purchased one you can use that one too. The reason this is needed is because the default setting for client certificate is set to ignore and this can be changed from the IIS management console when there is an SSL certificate bound to the web site. To create a self-signed SSL certificate, click on Server Certificates as shown in Figure 1.
Figure 1, IIS Server Certificates to create a self-signed SSL certificate
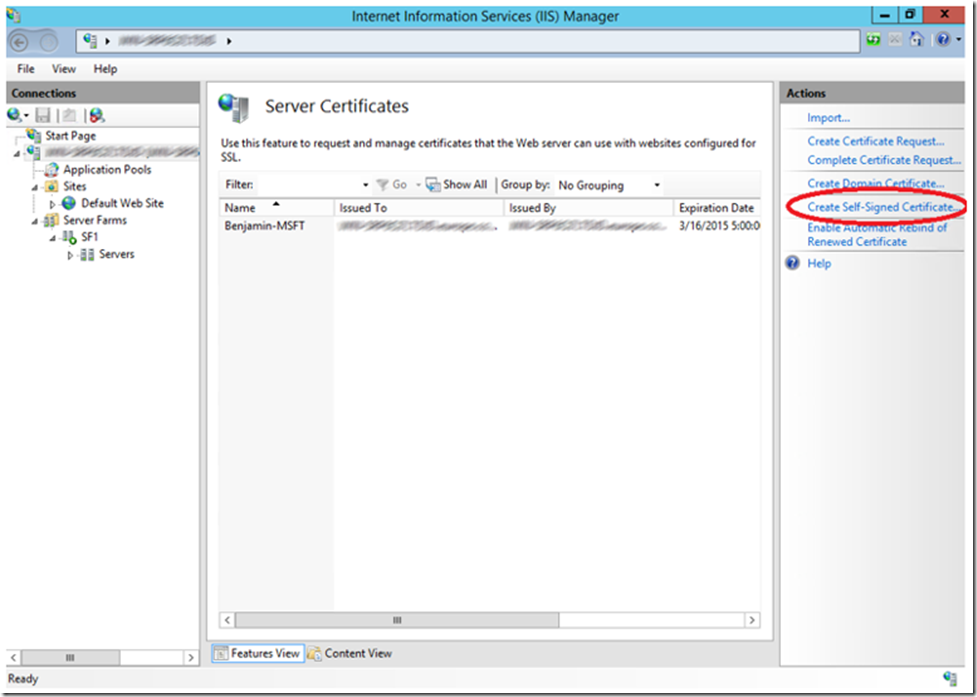
Once opened, click on the Create Self-Signed Certificate link on the Action pane. Enter a friendly name and press the OK button. You will see a result similar to that shown in Figure 2.
Figure 2, creating and viewing the self-signed SSL certificate in the IIS management console
Bind the Certificate to the Default Web Site
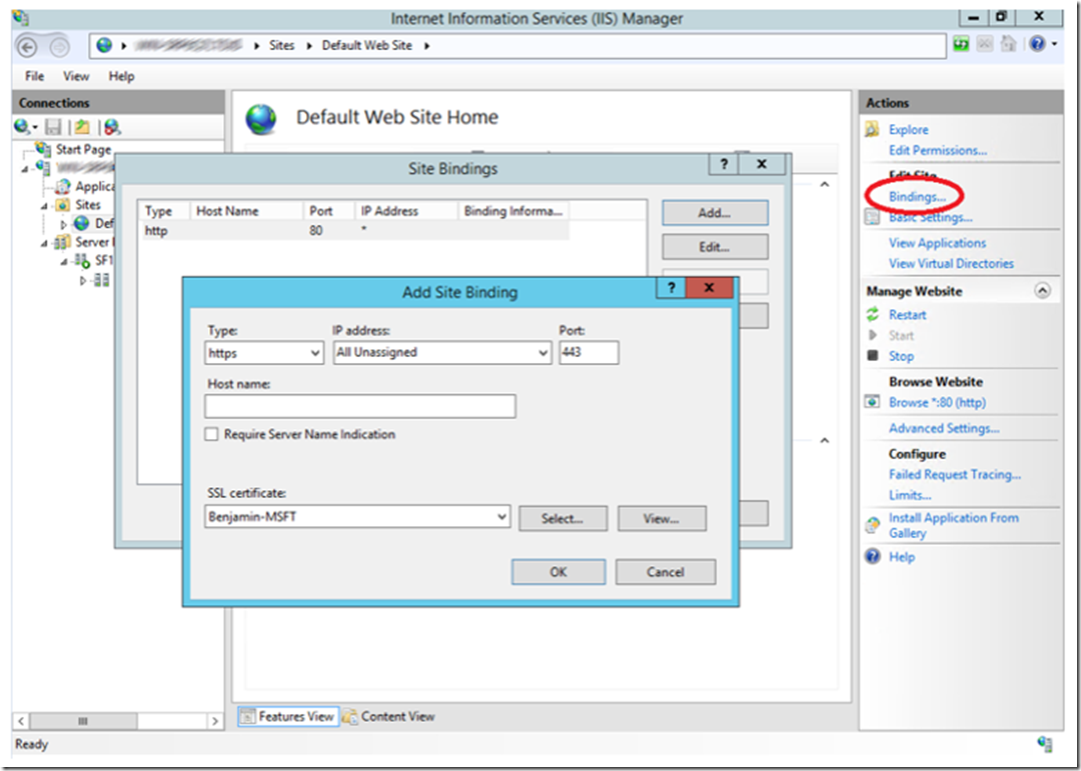
Next, bind the SSL certificate to the Default Web Site by clicking on the Bindings… link on the Actions pane and pressing the Add button. Then add the SSL certificate to the web site as shown in Figure 3.
Figure 3, binding the SSL certificate to a web site
Do a quick test and check that ARR is working as expected. At this point you should already have you web farm configured, so make a request to the ARR server using HTTPS and make sure requests are flowing to the server far as expected. Note that the self-signed certificate is created for the FQDN of the server and when you make a request using LOCALHOST you might get a page stating there was a problem with the certificate. Just be sure to enter the FDQN of the ARR server when using the self-signed certificate or the domain name for which your SSL certificate is create for if using an SSL certificate from a Certificate Authority.
Set ARR to require Client Certificates and SSL
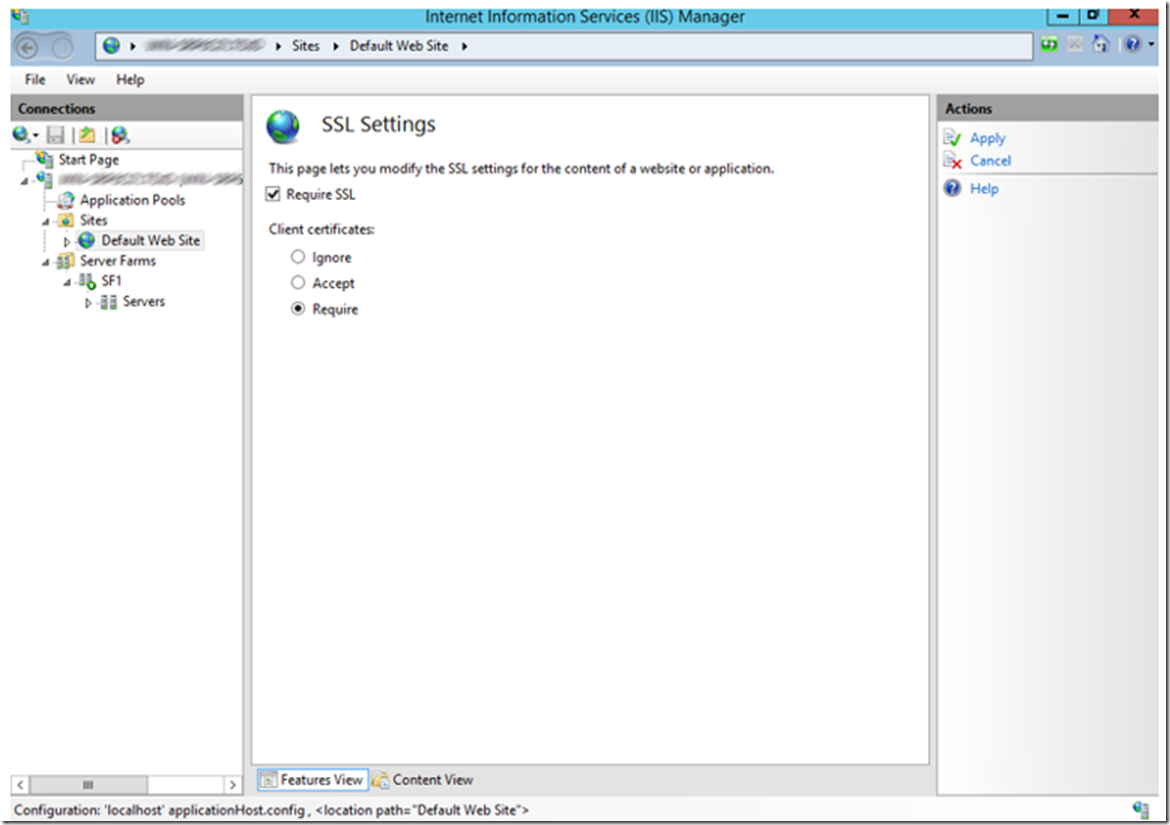
Once you are certain the SSL certificate is working, set the web site to Require SSL and Client certificates by opening the SSL Settings feature and making the changes as shown in Figure 4.
Figure 4, require SSL and client certificates
Click the Apply link in the Action pane so that the configuration is applied. Once applied, test the access from a client machine to the ARR server using the FDQN (NETBIOS name should still work but you would get the certificate error before accessing the web site).
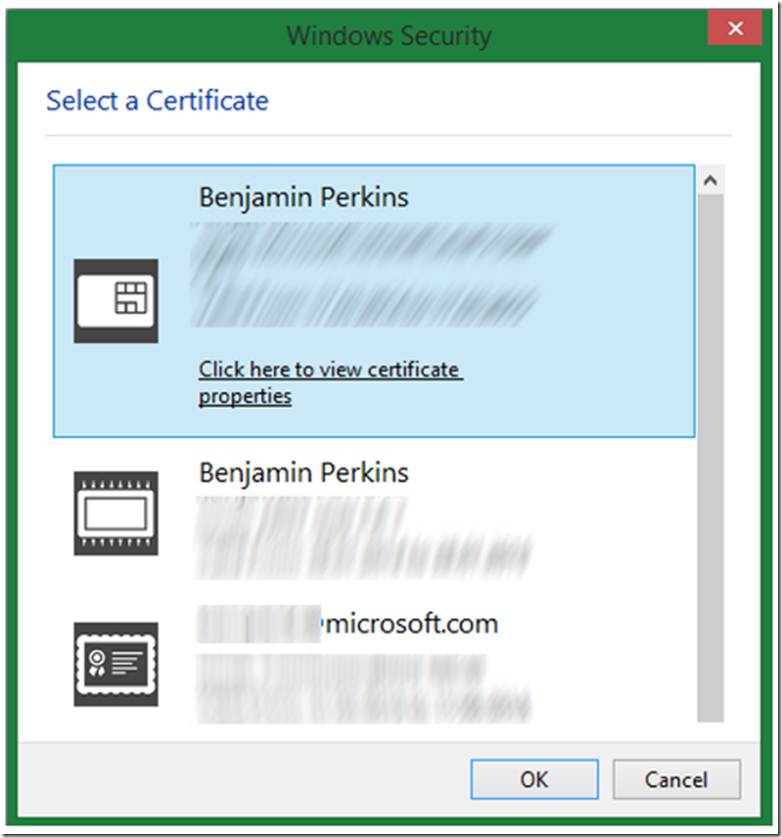
If you have only a single Client Certificate, then that one will be used. There are some group policy settings that can change the behavior so I am explaining what I have seen happening during my testing with my configuration. If you see different behavior, then ask your group policy administrator about it. If you have more than one client certificate you get prompted to select which one you want to use, as illustrated by Figure 5.
Figure 5, client certificate prompt
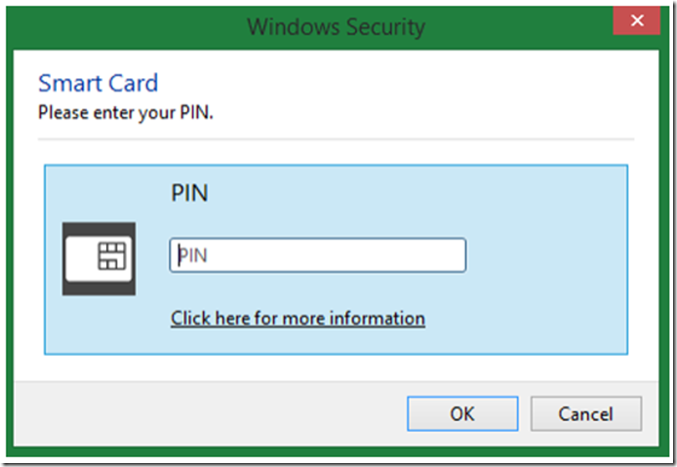
Once you select which certificate to use, you are prompted to enter the PIN you created during the installation of the client certificate onto your PC or chip card. Figure 6 is a representation of this PIN request pop-up window.
Figure 6, client certificate PIN request pop-up
If your request is then successfully redirected to one of the servers in you ARR configured web farm, then that’s it, success. Not that servers in the web farm (backend servers) should not have any SSL settings configured, nothing on port 443 and not requiring or accepting client certificates. All this is managed on the ARR side.
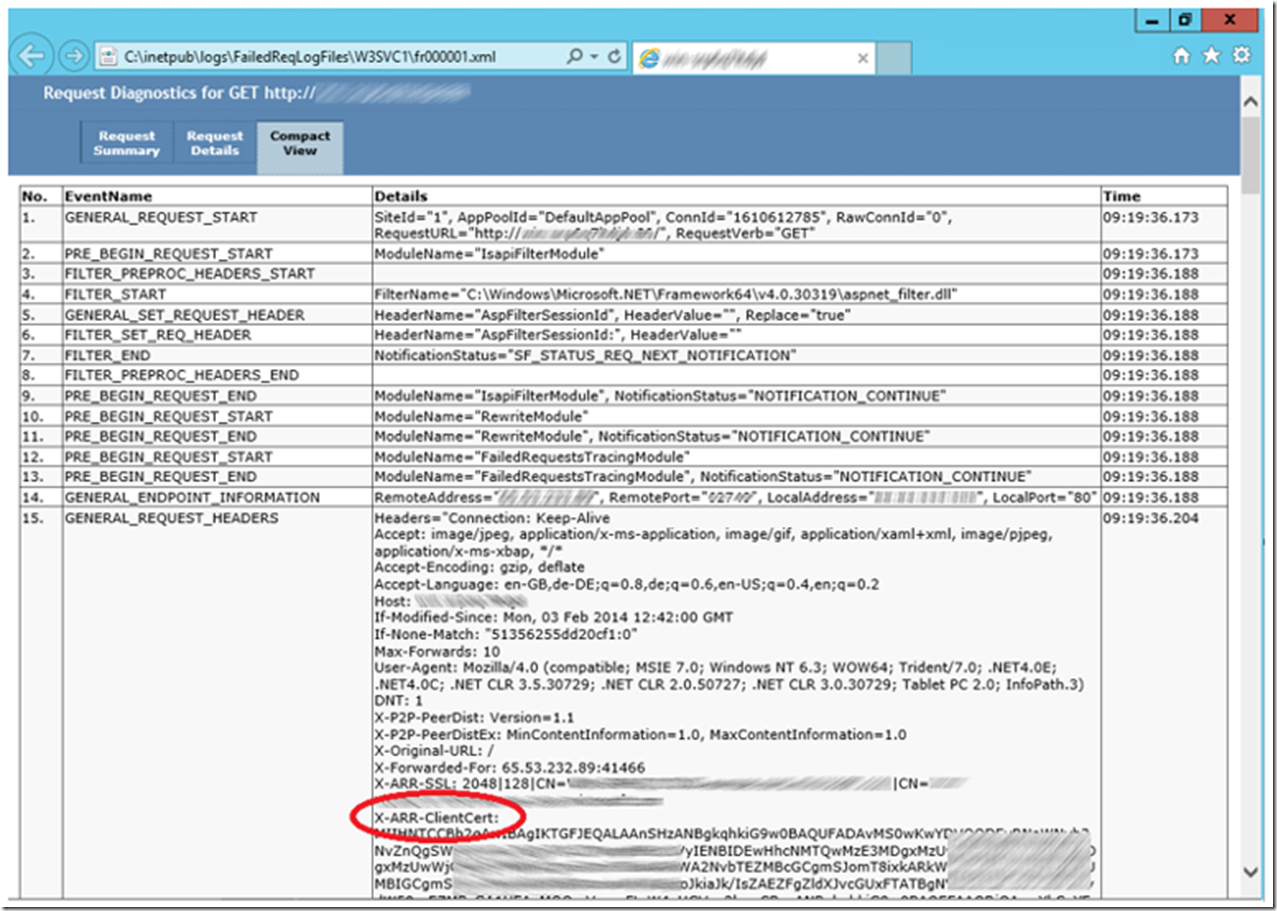
By enabling Failed Request Tracing as described here and viewing the Compact View, you can see that the Client Certificate is passed from ARR to the IIS machine via the X-ARR-ClientCert header. This is discussed here in more detail.
UPDATE 13-JUL-2015: Here is some code that shows how to access and validate the client certificate sent from ARR to the backend IIS Server. I have not tested it, but looks like a good example. Let me know.
