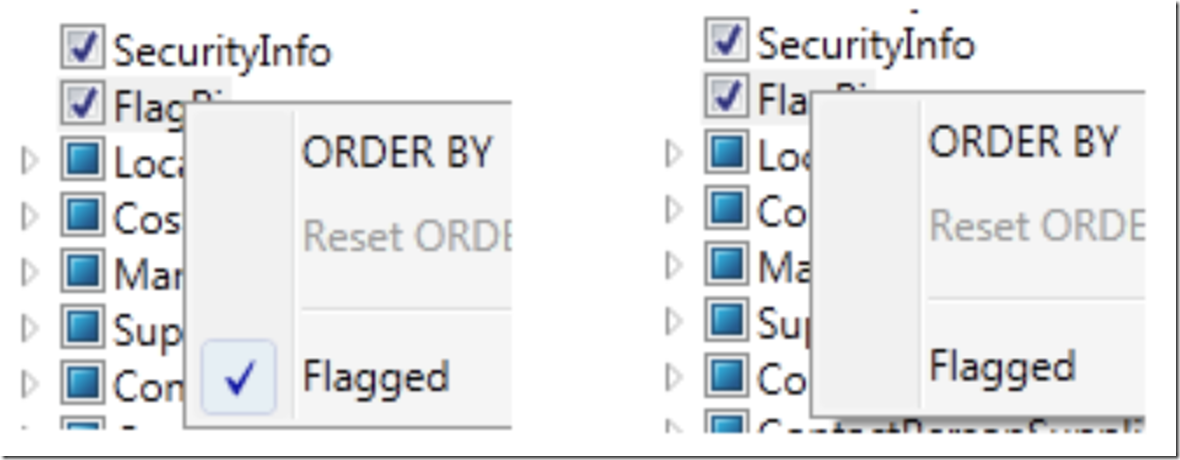
In my previous post I showed you how I added a context menu to a treeview. I had a new requirement that wanted a treeview property to contain a flag that could be turned on or off and that the value be displayed in the context menu.
First I added the menuItem to the XAML.
<MenuItem Name="CMIFlg" Header="Flagged" IsChecked="True" Click="CMItFlg_Click" />
I already had this event within my TreeView open XAML tag.
PreviewMouseRightButtonDown="TreeViewL_PMRBD"
Which called this method.
private void TreeView_PMRBD(object sender, MouseButtonEventArgs e)

{

     TreeViewItem treeViewItem = (TreeViewItem)SearchTreeView<treeviewitem>

        ((DependencyObject)e.OriginalSource);

if (treeViewItem != null)

{

      treeViewItem.IsSelected = true;

      e.Handled = true;

}

      SetCurrentValue();

}
The new addition is the method SetCurrentValue(). This method gets the selected value within the my treeview class, it looks within the class for the selected item to get the value and then makes the changes to the context menu accordingly. It does this before the context menu is rendered, so the user see the actual value for the selected item within the treeview.
private void SetCurrentLuceneVisibility()

{

  TreeViewModel selected = (TreeViewModel)TreeViewHQL.SelectedValue;

  if (selected.Flag)

  {

    CMIFlg.IsChecked = true;

  }

  else

  {

    CMIFlg.IsChecked = false;

  }

}
As you can see from my previous post, setting the value is done within the clicked event for the specific context menu item click.
Right click an item with a treeview and you will get the context menu popup. Select the the Flagged menu item to flag it or unflag it to the flagged variable stored in the class. Right clicking on any item in the treeview will display the current value for that specific item.
