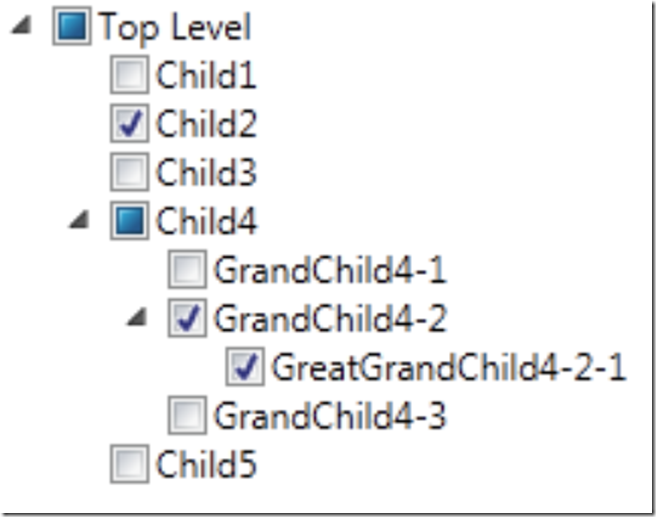
On one of my projects I had to provide treeview selection functionality. I searched the internet and pulled everything I could into a this single resource. I wasn’t able to find 1 post that provided all the details and source code to do what I needed. Now there is one and if you find it, I hope it is what you are looking for. This example will create a treeview like this.
There are 3 parts to focus on to create a Treeview with checkboxes.
- The TreeViewModel which implements the INotifyPropertyChanged interface
- The Get and Set Methods within the TreeViewModel
- Bindin the TreeViewModel to the Window using XAML
The INotifyPropertyChanged interface is part of the System.ComponentModel namespace. I won’t describe what it does in detail here, but simply when implemented and bound to a control, it will trigger an event when the control is changed. If you think about it, it fits well with a checkbox. I mean, each time we change the value of a checkbox, we may want to change something else. I suppose another option would be to use the checked or unchecked events on the control, but I like this approach better. It’s more object oriented…component oriented.
Setting or building your tree hierarchy is done by creating you root instance, then adding children, while you are adding your children, if they have any children, add them and if they have any children add them, etc… A recursive method works here, use one. For this example, however, I will simply hard code the creation of the treeview hierarchy.
List<TreeViewModel> treeView = new List<TreeViewModel>();

TreeViewModel tv = new TreeViewModel(topLevelName);

treeView.Add(tv);

TreeViewModel tvChild4 = new TreeViewModel("Child4");

tv.Children.Add(new TreeViewModel("Child3"));

tv.Children.Add(tvChild4);

tv.Children.Add(new TreeViewModel("Child5"));

tvChild4.Children.Add(new TreeViewModel("GrandChild4-1"));
As mentioned, I created my toplevel node, added some children and then added a grandchild to child4. Getting the selected treeview items is best done using a similar but not identical recursive method. First, create your treeview and initialize it with the contents.
TreeViewModel root = (TreeViewModel)TreeViewControl.Items[0];
Traverse through the root object using a recursive method and perform what you requirements dictate. If the treeview item was selected its’ IsChecked value will be true.
We also need to bind the class to the presentation layer, I.e. in the XAML code. You can view the specifics in the downloadable source. However, the most interesting part it is within the Window.Resources tag.
<CheckBox Focusable="False" IsChecked="{Binding IsChecked}" VerticalAlignment="Center" />
Basically, here we bind the IsChecked property of the checkbox control to the IsChecked property of the TreeViewModel class. The TreeViewModel.IsChecked is defined to call the SetIsChecked method when the state is modified.
public bool? IsChecked

{

   get { return _isChecked; }

   set { SetIsChecked(value, true, true); }

}
The above 2 components are where the magic happens. Clicking on the TreeView contol checkbox will call the SetIsChecked method because we bound it to the IsChecked property of the TreeVIewModel class in the Window.Resources tag within the XAML. Awesome.
Give it try and I hope it helps you. I must mention that I gathered this solution from many websites on the internet, however, I can no longer recollect exactly which ones I got which piece from. So respect goes out to other bloggers who help the C# community!
Download the source
