There are a number of things I want to accomplish with this and a few future articles:
- How to deploy an ASP.NET Core Web API to an Azure App Services Web App
- How to deploy an ASP.NET Core Web API to an Azure VM
Check out some of my other articles I wrote in regards to ASP.NET Core and .Net Core
- How to call an async method from a console app main method
- How to deploy a .NET Core console application to Azure, WebJob
- .NET Core application, where is my EXE, how to publish
- Create a VNET and access an Azure VM hosted within it from an App Services Web App
- Create and deploy an ASP.NET Core Web API to Azure Windows
In some future articles I will reference this article for these purposes:
- Troubleshooting a slow running ASP.NET Core Web API hosted on Azure (Web App)
- Setting up a Point-to-Site (P2S) from an App Service Web App to an Azure VM
This post is setting the baseline for those other 2 future posts which I need to learn and get my head around.
You can download the source code from here.
Let’s first create a simple ASP.NET Core Web API.
Create an ASP.NET Core Web API
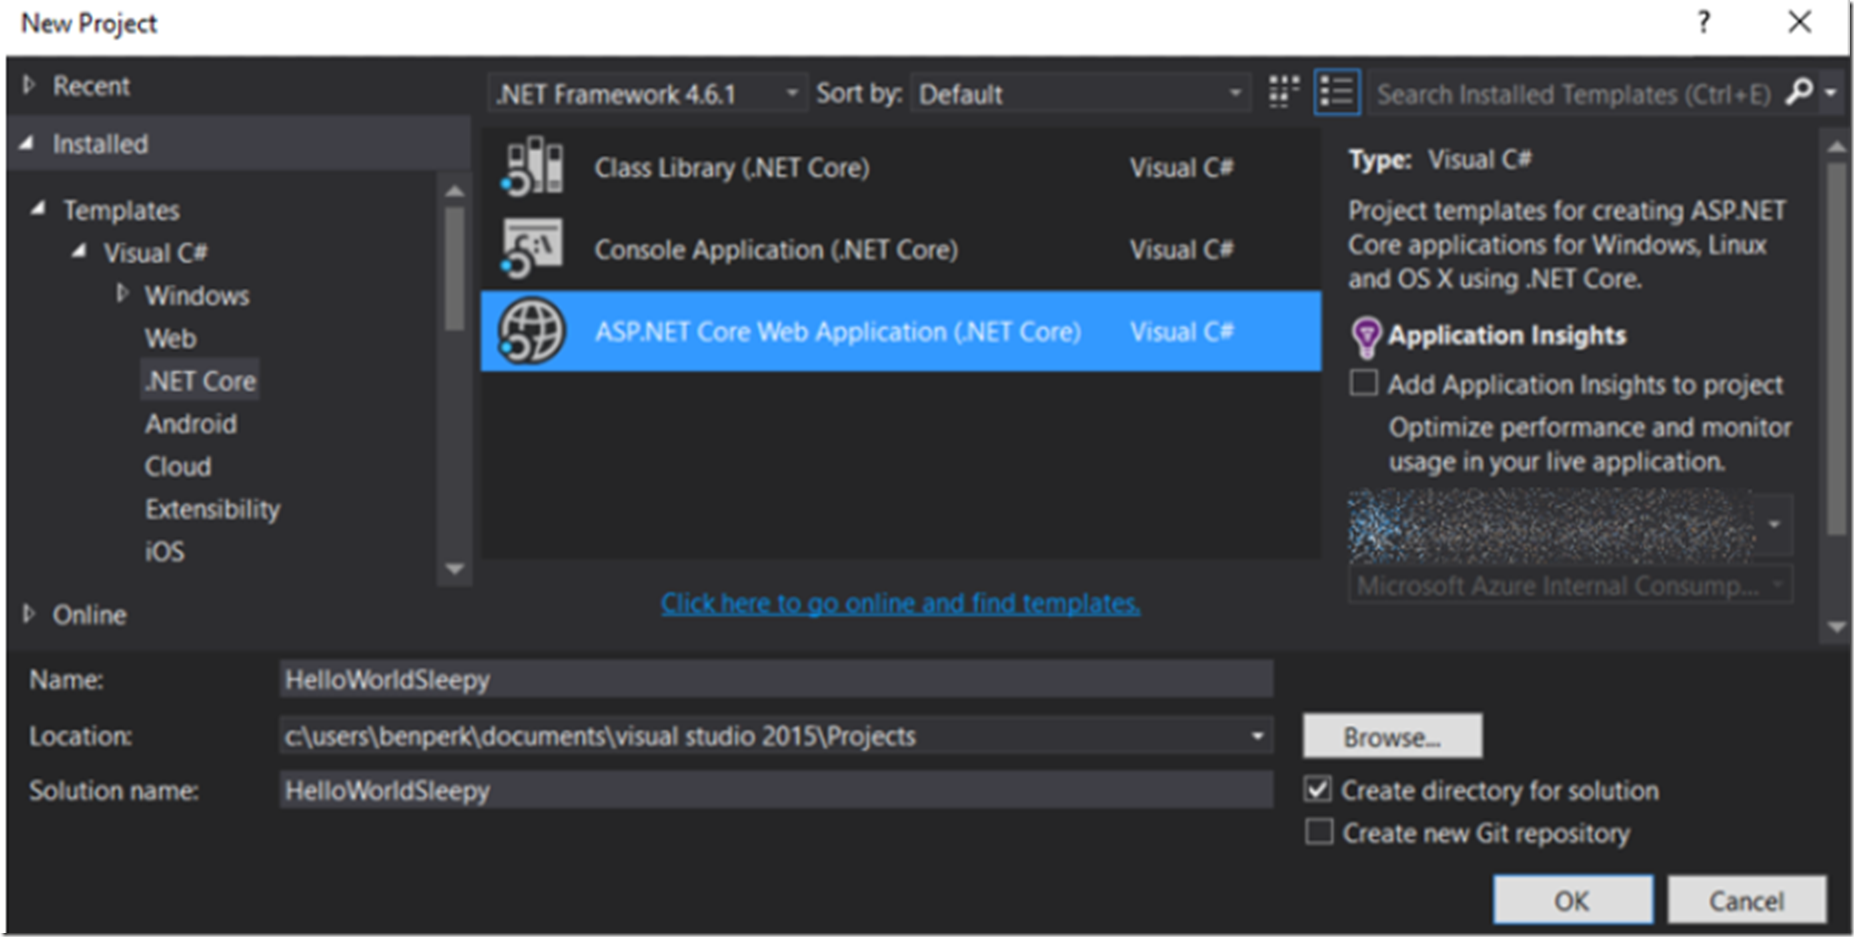
As shown in Figure 1, create a new project in Visual Studio, I am using version 2015 Community.
Figure 1, how to create a hello world ASP.NET Core Web API
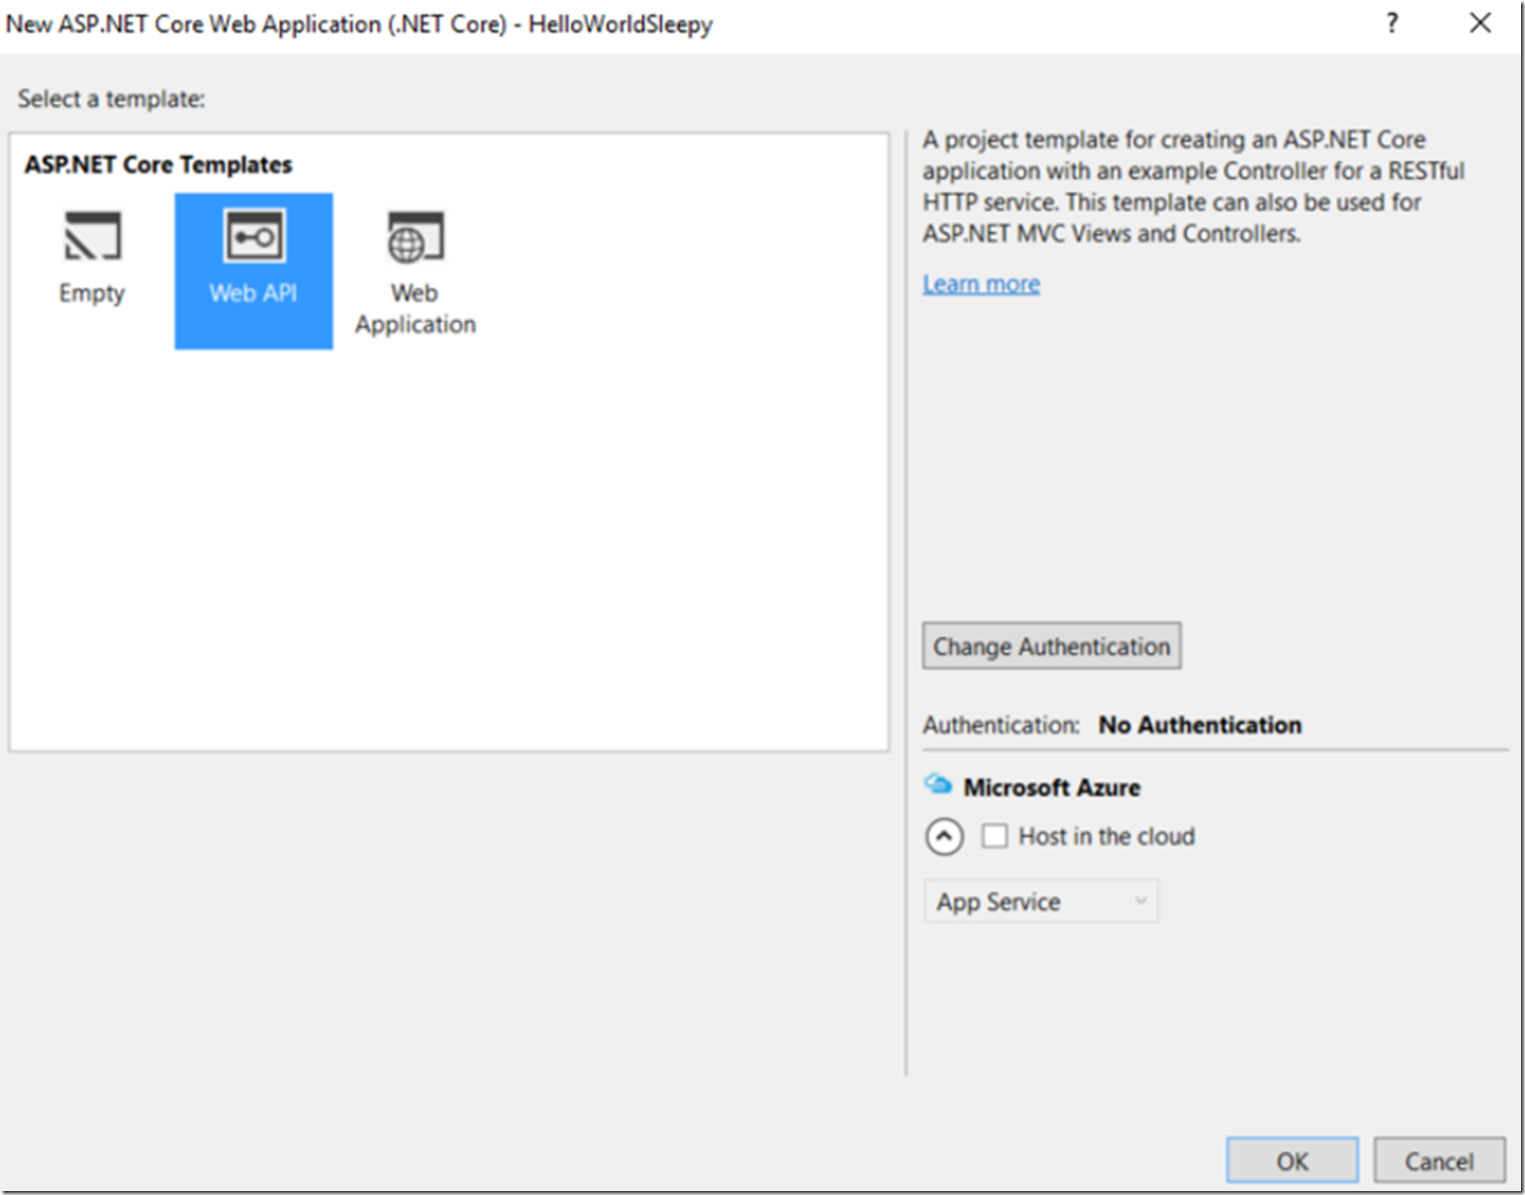
Click the OK button and then select Web API from the next window, as shown in Figure 2.
Figure 2, create an ASP.NET Core Web API for hosting on Azure, hello world, first example
After the project has completed the creation, open the Controllers\ValuesController.cs file and make some the modifications shown below. The Sleep() method simulates some slowness that we will find in some logging later.
namespace HelloWorldSleepy.Controllers

{

     [Route("api/Sleepy")]

     public class ValuesController : Controller

     {

         // GET api/values

         [HttpGet]

         public IEnumerable<string> Get()

         {

             System.Threading.Thread.Sleep(5000);

             return new string[] { "Fender", "Gibson" };

         }
        // GET api/values/5

         [HttpGet("{id}")]

         public string Get(int id)

         {

             System.Threading.Thread.Sleep(6000);

             return $"The value you sent was: {id} ";

         }

     }

}
Publish an ASP.NET Core Web API to an Azure App Services Web App
Finally, publish the ASP.NET Core Web API to an Azure App Services Web App by right-clicking on the project and selecting the Publish pop-up menu item.
Once published you can access the ASP.NET Core Web API using the URL shown in Figure 3. This worked without any additional configuration from the client, code or server.
Figure 3, ASP.NET Core Web API, Azure App Services Web App
You can also check out the process running the ASP.NET Core Web API in KUDU which I have discussed here previously. As shown in Figure 4, you can see that the dotnet.exe is hosted within the W3WP.exe IIS process.
Figure 4, the dotnet.exe process which responds to requests to the ASP.NET Core Web API on Azure
Now I can create a client application and consume it. NOTE to self –> I think it would be completely feasible to protect this ASP.NET Core Web API using Azure Active Directory as I describe here. I’ll need to test that out, but it is amazing how well all these things just seem to link up or fall into sync with each other. I doubt it is by accident. Nonetheless, the ASP.NET Core Web API is deployed to an Azure App Services Web App and can be scaled and used just like any other Web App now. Quick and easy.
Deployed an ASP.NET Core Web API to an Azure VM
I am sure there are cooler ways to deploy, like using GitHub and continuous deployments, but I wanted something quick and simple. It is only for me so working through all the deployment configurations that would be necessary for a company with a development team would be over kill here for me. This is just to test things out.
I will assume you can already create an Azure VM and connect to it. IIS is not installed by default so you will need to install it, I wrote some IIS labs here, check out the first part of Lab 1 where I describe how to install IIS, you do not need to install the CSharpGuitarBugs website, so stop after Figure 3 in Lab 1.
I used these instructions to get the IIS installation prepared for an ASP.NET Core Web API to run on an Azure VM, the instructions are also valid for an stand alone version of IIS.
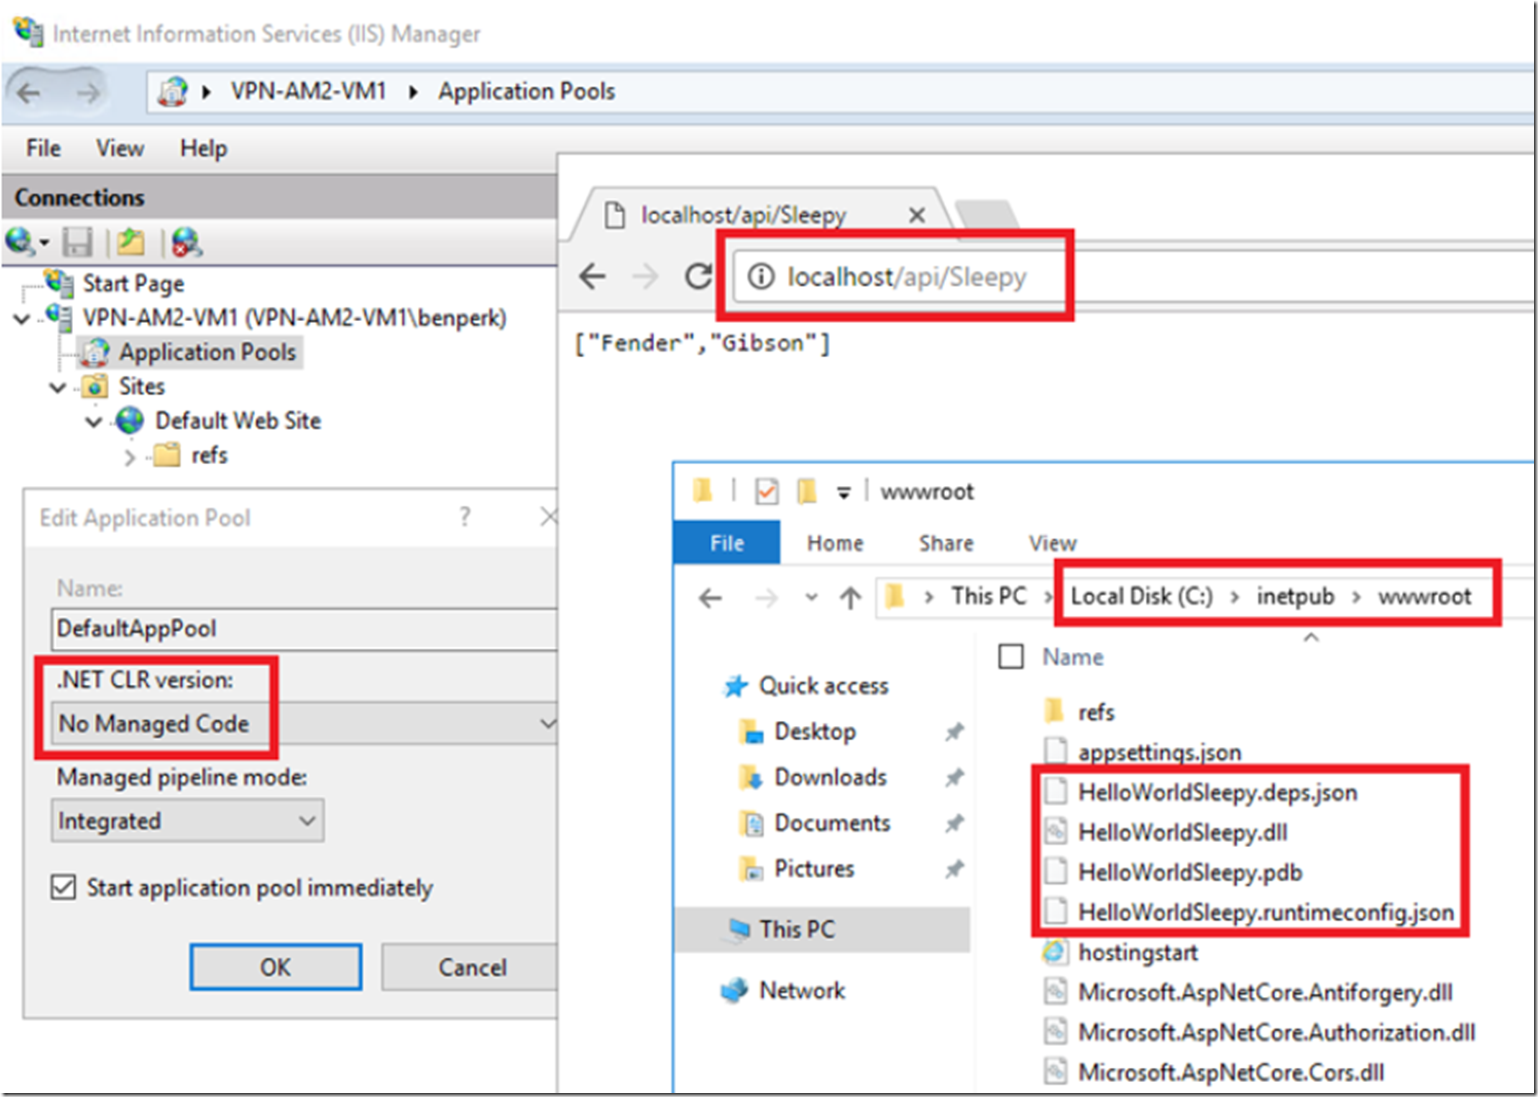
As i didn’t know the structure requirements of an ASP.NET Core Web API nor its dependencies, since I had already deployed it to an App Service first I could look at that as a reference, as shown in Figure 5.
Figure 5, ASP.NET Core Web API structure and deployment pattern
I ended up downloading the wwwroot folder on the Web App and simply places its contents into the wwwroot of the Azure VM and that work without and problem as illustrated on Figure 6.
Figure 6, deploying an ASP.NET Core Web API to an Azure VM for testing with an Azure VNET (P2S)
You can also see that both of the ASP.NET Core Web APIs are accessible from a browser. Figure 7 and Figure 8 show how to reference the Web API and the result of the call.
Figure 7, calling an ASP.NET Core Web API from a browser, display the JSON result
Figure 8, calling an ASP.NET Core Web API from a browser, display the JSON result
Troubleshooting a slow running ASP.NET Core Web API hosted on Azure (Web App) Details will be in a future post, I will start by enabling these logs and see what comes out of it. Also, as I know the process in which the slow response is running, see Figure 4 and I can reproduce the issue, then create a memory dump and see what the code is doing, like a discussed here. Which process are you going to dump? Why? Check back later for the answer and the link to the post.
Setting up a Point-to-Site (P2S) from an App Service Web App to an Azure VM The VM onto which I deployed the ASP.NET Core Web API is contained within a VNET. When I RDP to the Azure VM and run the IPCONFIG I see that the IP address is indeed within the subdomain of the VNET (ex: 10.0.0.0/8). As I create a VNETv2, currently I need to create the P2S using PowerShell and I also need to create the Web App which will call the ASP.NET Core Web API hosted on the Azure VM within the VNET. That will be a fun project with a lot of learning opportunities. I completed that and posted it here.


