Although I use TFS a lot, I thought I would setup a GitHub repository to host a public copy of my IIS, ASP.NET and C# troubleshooting labs located here. Here is how I did it.
- Install the GitHub extension for Visual Studio
- Create your GitHub repo and then login
- Create a GitHub repository
- Create a project for the repository
- Add the source code to GitHub
I wrote another article about installing GitHub on Visual Studio 2017 here. It works the same.
Install GitHub for Visual Studio
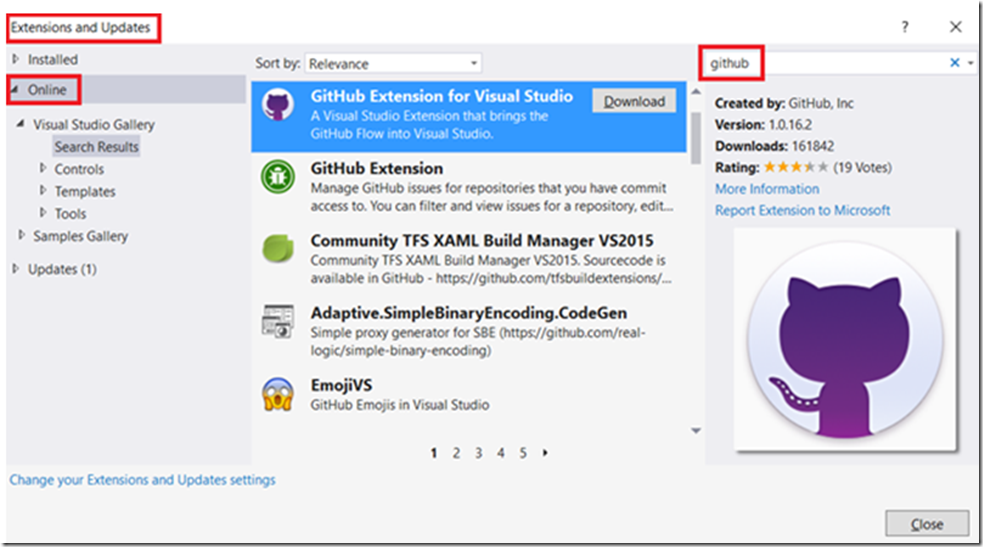
In Visual Studio select Tools -> Extensions and Updates which open the window show in Figure 1. Download and install the extension, a reboot of Visual Studio was required for me.
Figure 1, GitHub for Visual Studio
Create your GitHub repo and login
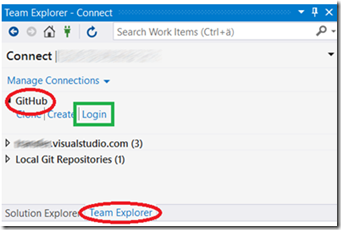
If you do not already have an account on GitHub then you need to create on. Create it and then come back to this point. Once created, use the credentials to login to your GitHub account, as shown in Figure 2.
Figure 2, login to GitHub from Visual Studio
Create a GitHub repository
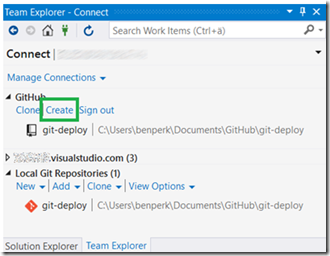
Now create GitHub repository by selecting the Create button on the Team Explorer tab in Visual Studio, as show in Figure 3.
Figure 3, create a GitHub repository from Visual Studio for Visual Studio
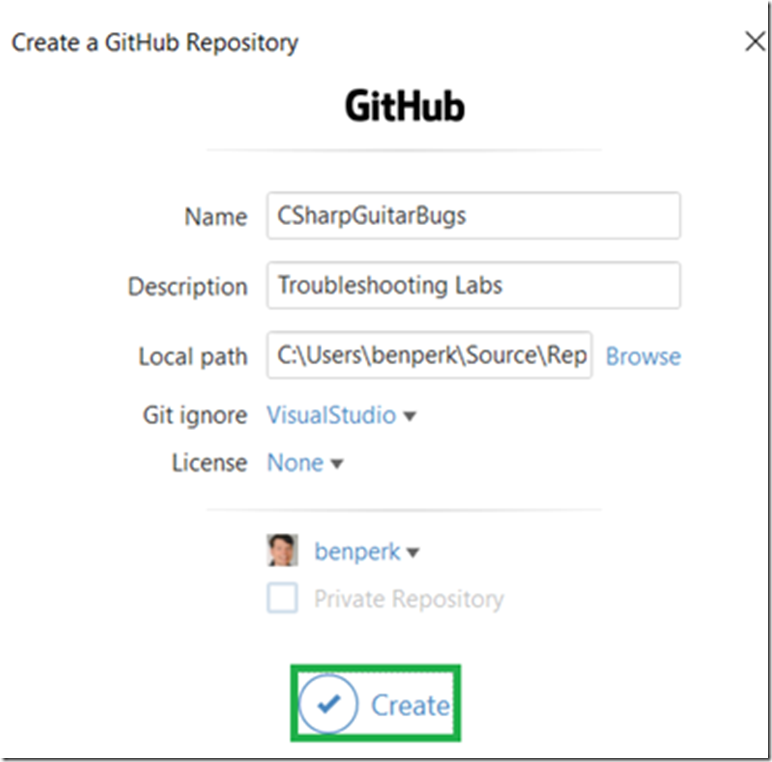
When you click on the Create link, a window similar to that shown in Figure 4 is rendered. Enter the name of the repository, a description and the local location where you would like to store the source code. I use the default.
Figure 4, create a GitHub repo using Visual Studio
Create a project for the repository
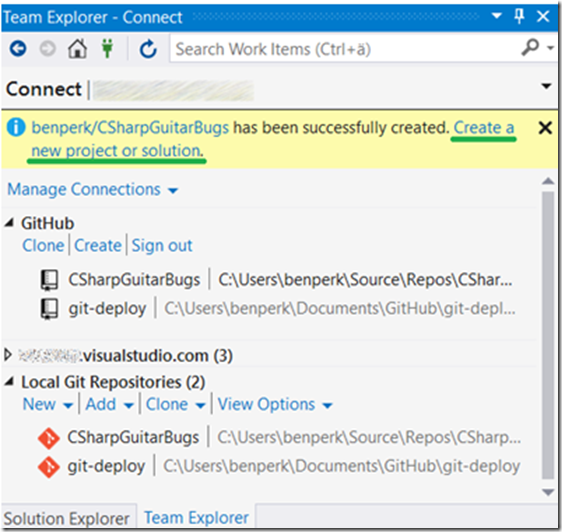
After clicking on the Create button shown in Figure 4 and once the repository is created locally, you are prompted to create a Project to store into it. Similar to that shown in Figure 5.
Figure 5, create a project to store in GitHub from Visual Studio
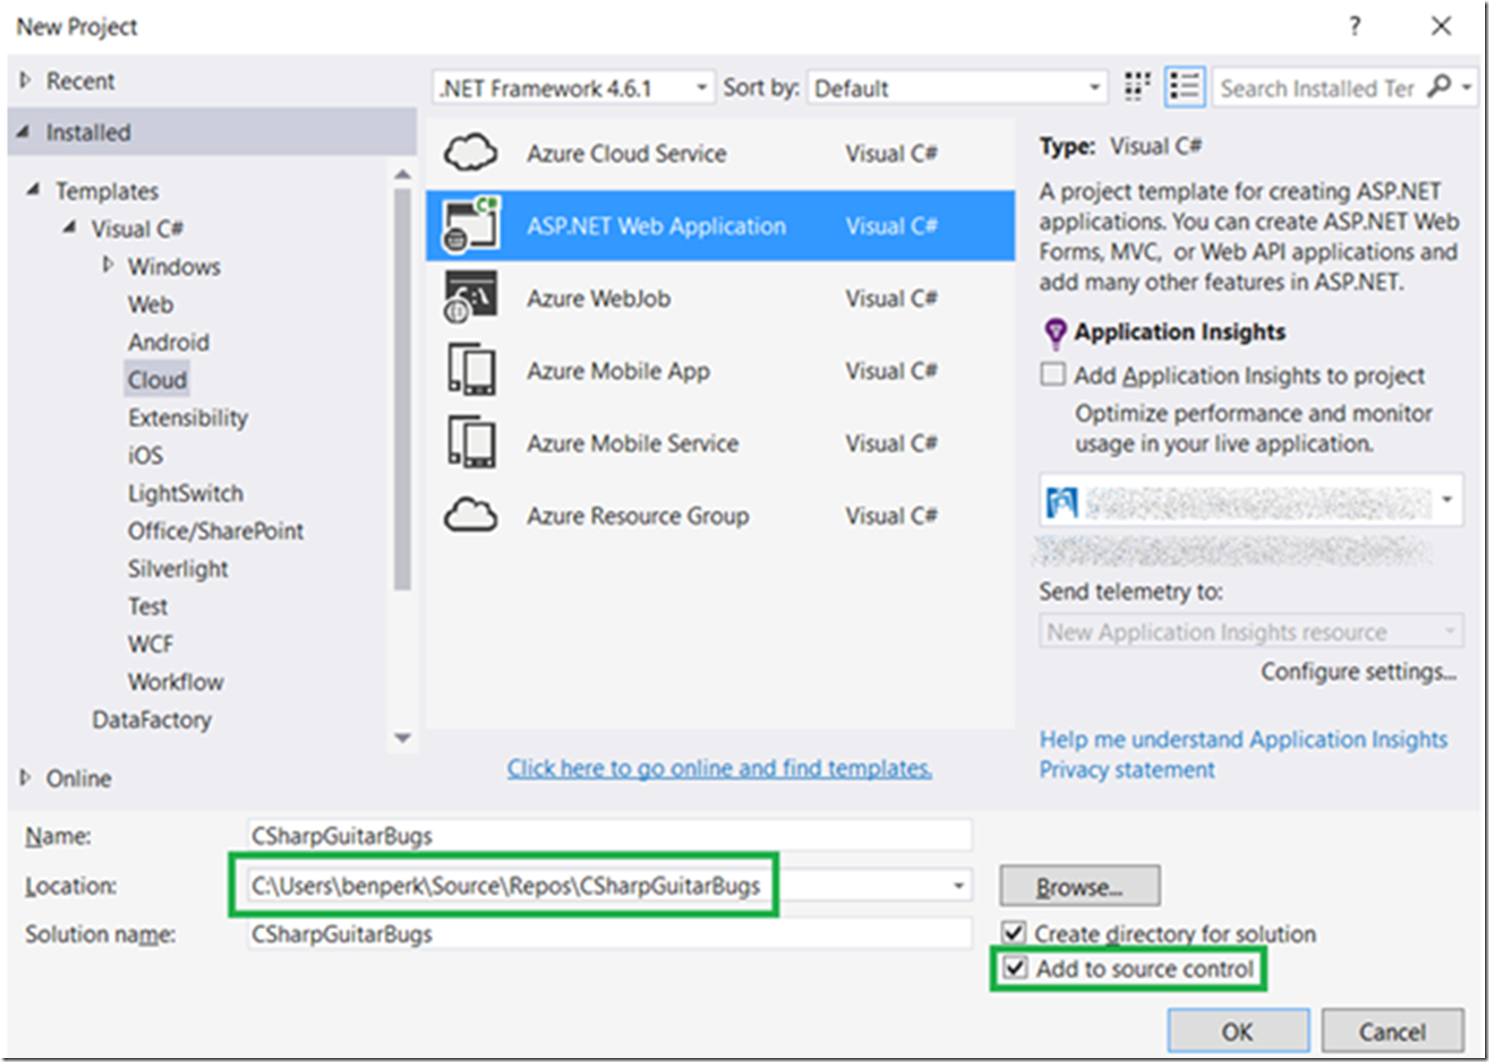
For this example, I am creating an ASP.NET MVC application using .NET 4.6.1 (the newest at the time of this blogs creation) which also supports Web API calls, JIC I decide to add some troubleshooting of WEB APIs later. As seen in Figure 6, I select an ASP.NET Web Application and on the next windows I select MVC and Web API.
Figure 6, create a project for GitHub from Visual Studio
Add the source code to GitHub
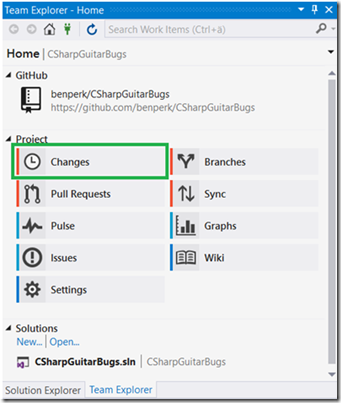
Once the project is created, click on the Team Explorer tab, and expand the Project tree. Click on the Changes button as shown in Figure 7.
Figure 7, commit changes to the GitHub repo using Visual Studio
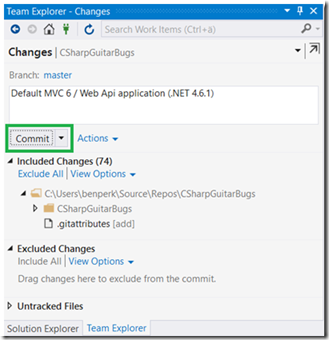
Clicking on the Changes button navigates to the page shown in Figure 8. Enter a description and press the Commit button, as shown in Figure 8.
Figure 8, commit the initial project to GitHub from Visual Studio
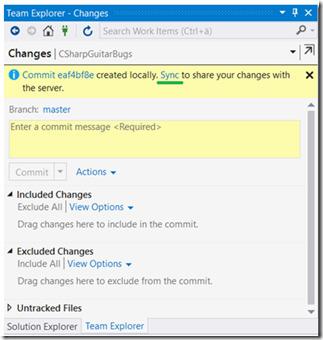
Once committed, synchronize the locally committed source code to the public source hosted on GitHub. As seen in Figure 9, after the commit is complete, you are requested to Sync the changes using the Sync link. You can also Sync them at a later time by clicking the Sync button shown previously in Figure 7.
Figure 9, synchronize code with GitHub from Visual Studio
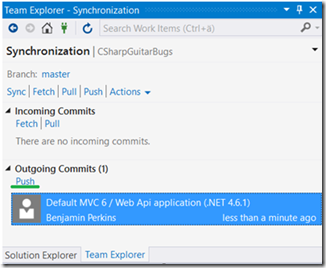
On the Synchronization page, click the Push link to synchronize the changes, as shown in Figure 10.
Figure 10, Push the code from a local GitHub to a public GitHub using Visual Studio
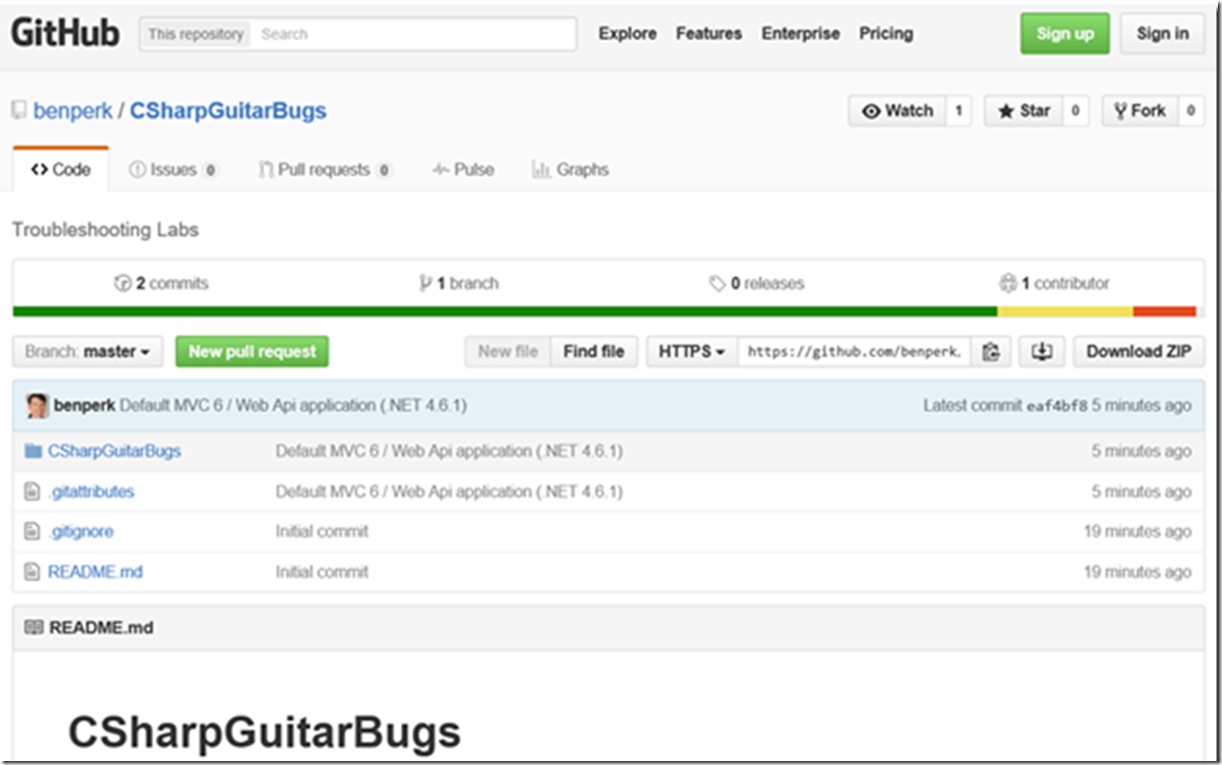
Once complete, you can see the code is public on the GitHub site using a browser, as seen in Figure 11.
Figure 11, viewing the source on GitHub
Now, anyone who wants to work through the troubleshooting labs can download the code and hopefully improve their troubleshooting skills.
