I wrote an article here that explained how I got an HTTPS request to work from my Gadgeteer. This was one of the steps I took during the process of achieving my ultimate goal of storing an image, taken from a camera and placing it into an Azure Blob container. Sure, taking a picture and sending it via email, saving it to an SD Card or even uploading it to a share someplace might have been easier, but I wanted to this specifically. The steps I took to make this happen were:
- Create an Azure Blog storage account and container
- Create a Visual Studio 2012 Gadgeteer project
- Connected my Gadgeteer to the network
- Configured my Gadgeteer to take a picture
- Uploaded the image to the Azure Blob container
- Get and Set the UTC time on the Gadgeteer
- Create the REST API for uploading to an Azure Blob
Create an Azure Blog storage account and container
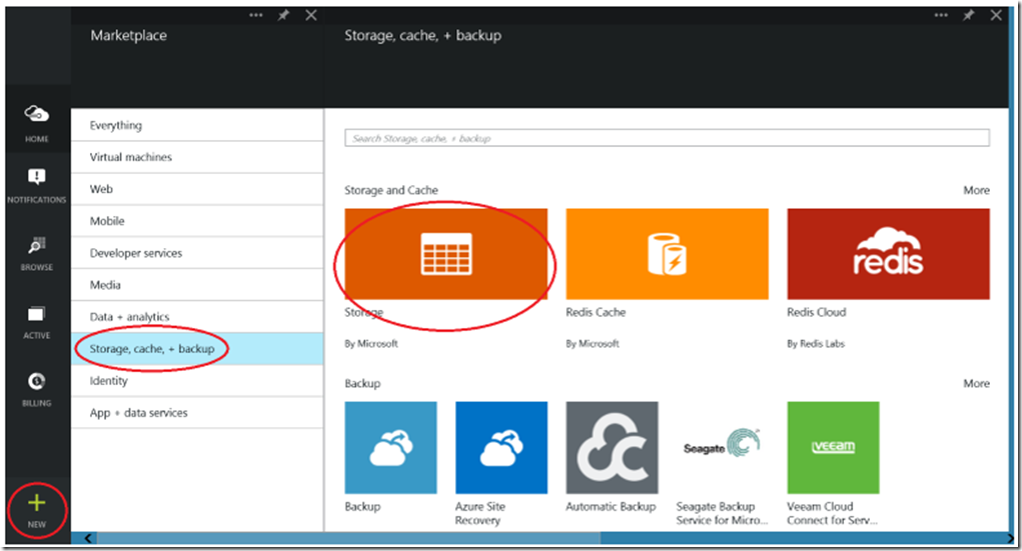
To create a storage account navigate to the storage feature and select the +NEW link on the bottom left of the web page, then the ‘Everything’ link and then Storage, cache, +backup. Create a storage account as shown, similar to that shown in Figure 1, I chose to call my storage account ‘put001’.
Figure 1, create storage account in Azure to store a Blob
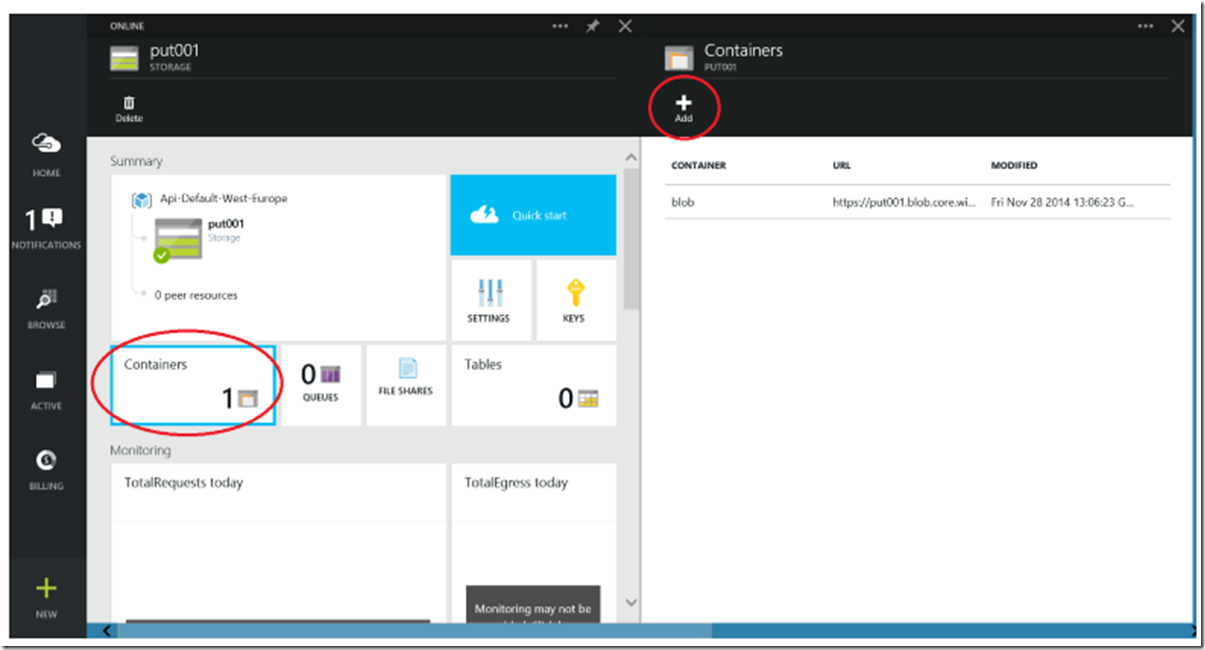
After the storage account is created, you need to create a container to store the blob in. Click on the Containers tile then when the Containers blade opens select the Add button and create a container. I chose to call it ‘blob’, as you can see in Figure 2.
Figure 2, create a container to store a blob in an Azure storage account
Later when we start coding the REST API call to store the image into the container, the names ‘put001’ and ‘blob’ are revisited. Make note of this as I will refer to it again.
Create a Visual Studio 2012 Gadgeteer project
At the moment, the Gadgeteer only works with Visual Studio 2012. I hear work is happening to support newer versions. Nonetheless, Visual Studio 2012 is still very valid and works just fine.
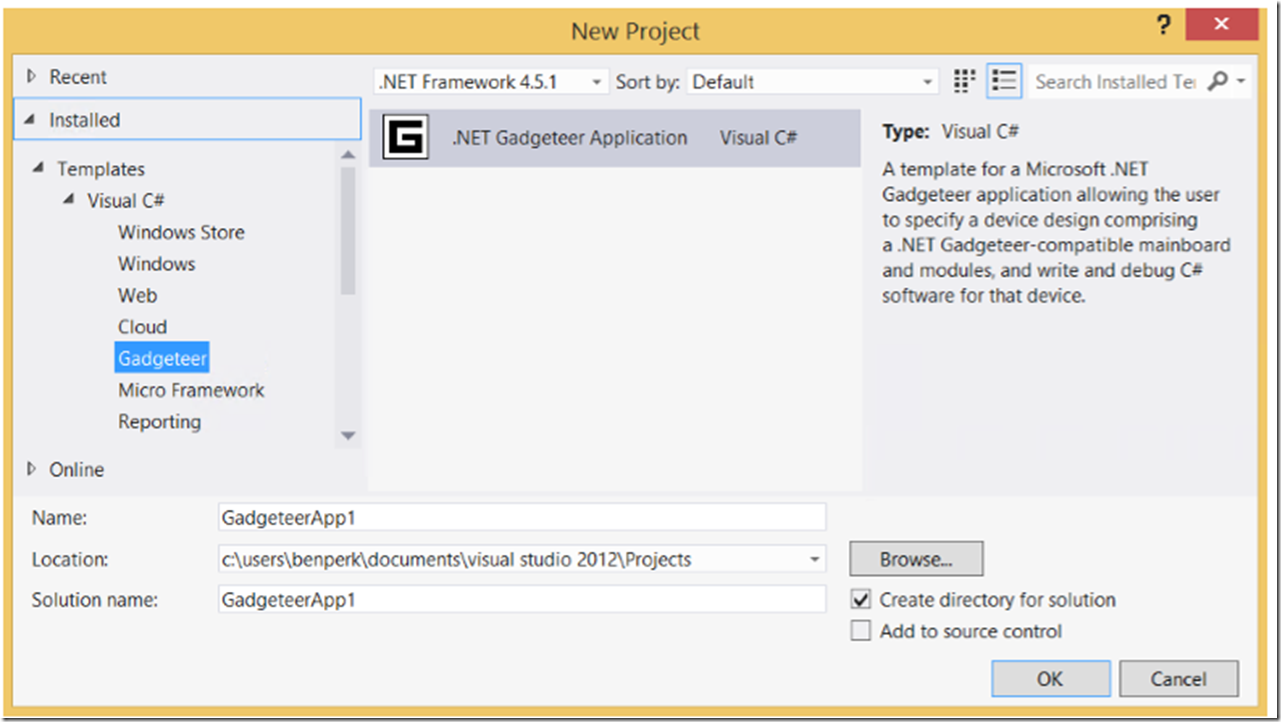
One you have installed the .NET Gadgeteer library, the .NET MF 4.3 and a GHI Gadgeteer package, when you create a new project, you will find Gadgeteer as an option as shown in Figure 3.
Figure 3, creating a Gadgeteer project
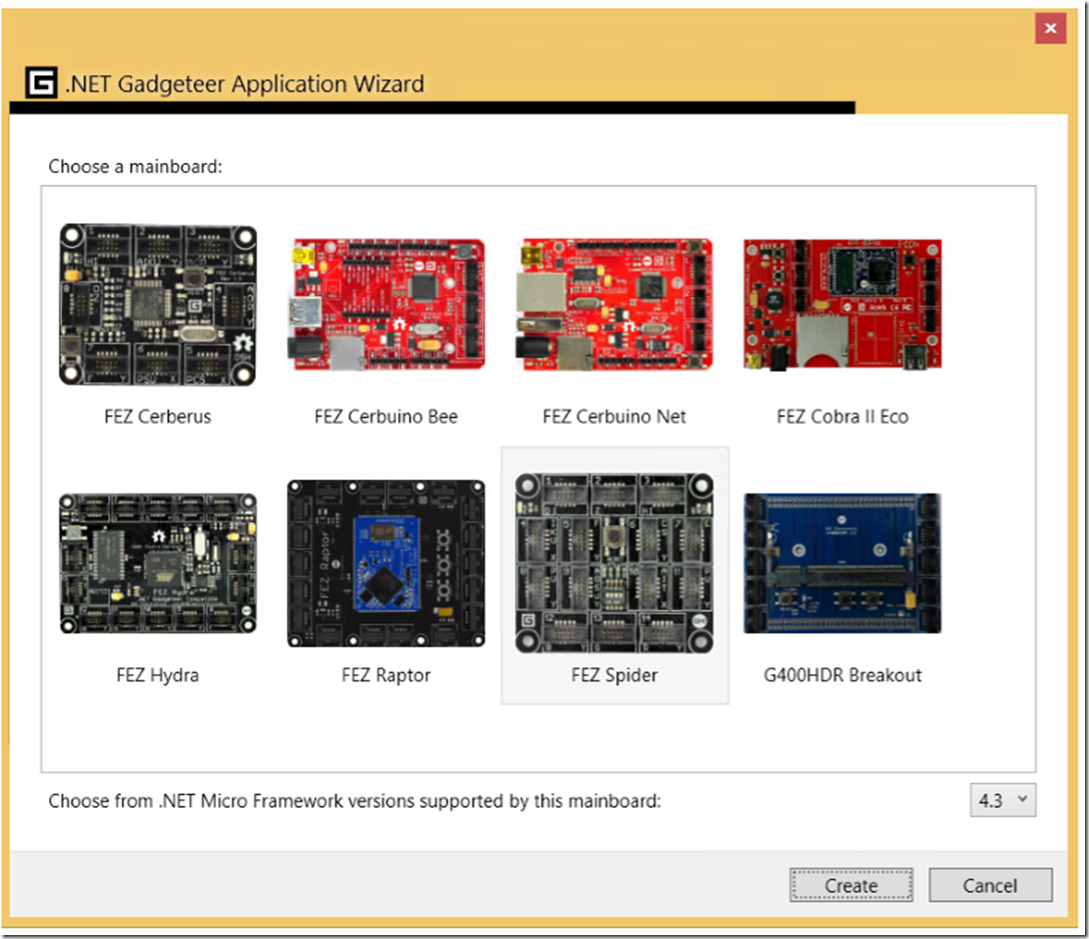
You will then be prompted to select the mainboard, as shown in Figure 4. In my project, I used the FEZ spider and selected to use the .NET Micro Framework version 4.3.
Figure 4, selecting the mainboard for the Azure Blob REST API Gadgeteer
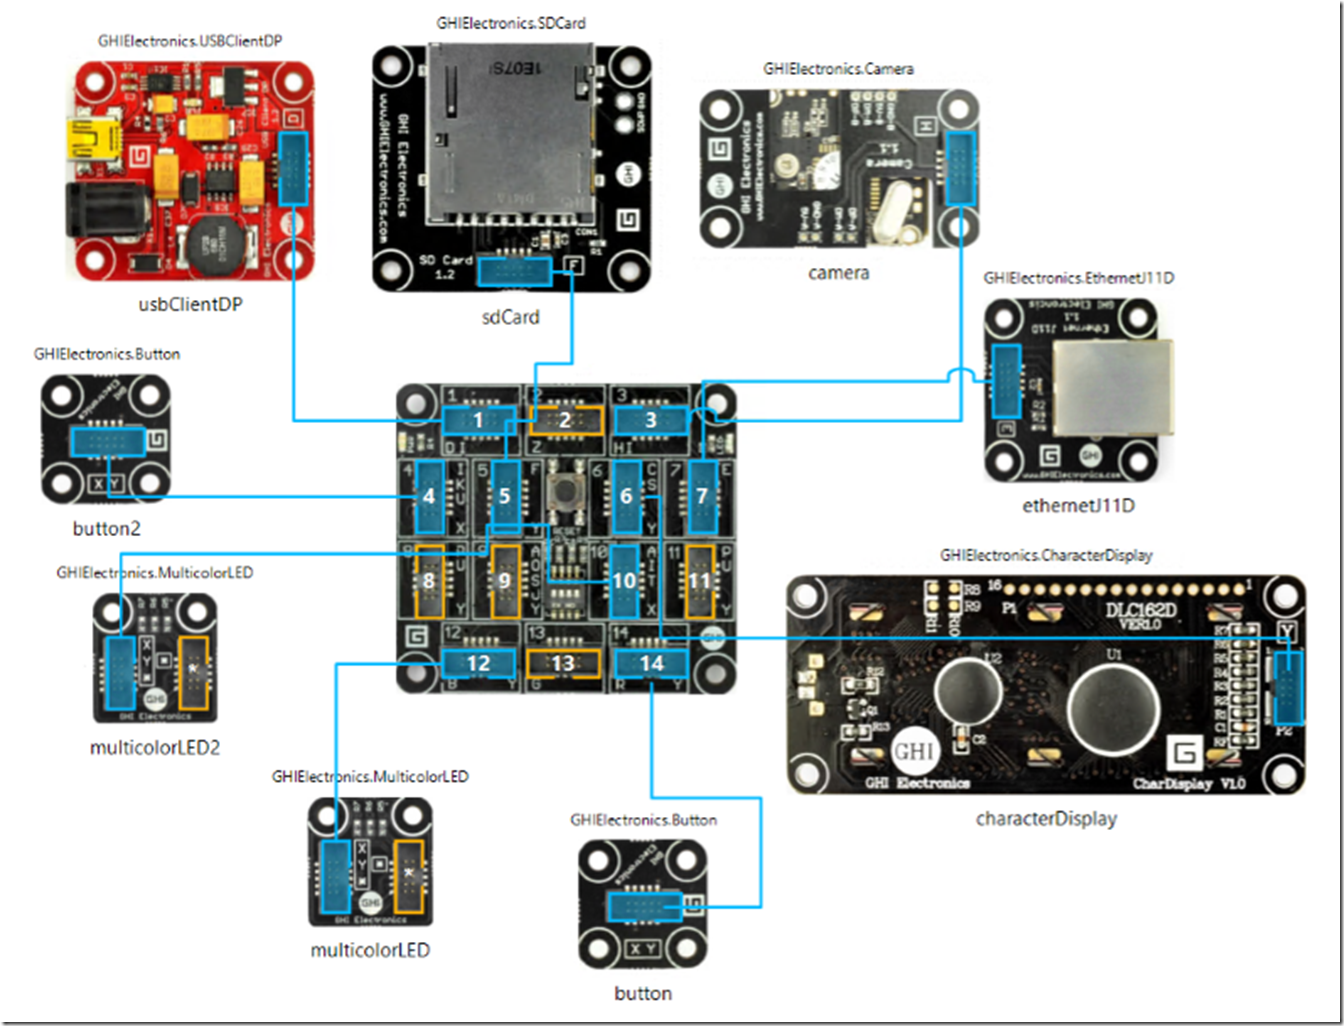
Once the wizard opens, you can drag and drop your modules onto the canvas from the Toolbox. Once you have a module or all the modules, right-click one of them, select the Connect all modules menu item and the wizard shows you which socket to connect the module to. My configuration ended up looking like this, as illustrated in Figure 5.
Figure 5, Gadgeteer configuration for uploading an image into an Azure Blob container
I did add a few extra module like lights, buttons and an SD Card, but they really are not required, but they did help me with troubleshooting as you can code the LED to be a certain color when errors happen, have a button execute the REST API call or store some data. The modules you actually need are:
- FEZ Spider mainboard
- USB Client DP, or any module that can supply power to the device
- Camera
- EhternetJ11D, I am sure any of the Ethernet or Wi-Fi modules would work too
Once I got all the modules configured, it was time to code.
Connected my Gadgeteer to the network
The first action I took was to get the Gadgeteer to connect to the network. As you can see from my previous blog, initially I used a simple HttpWebRequest to check that I was indeed connected and able to access the internet. Listing 1 is the code I used to make the network connection.
Listing 1, connecting the Gadgeteer to a Network using ethernetJ11D
void initializeNetwork()

{

  try

  {

   ethernetJ11D.NetworkInterface.Open();

   ethernetJ11D.NetworkSettings.EnableDhcp();

   ethernetJ11D.NetworkSettings.EnableDynamicDns();

   ethernetJ11D.UseStaticIP("192.168.1.222", "255.255.254.0", "192.168.1.1");

   ethernetJ11D.UseDHCP();

   while (ethernetJ11D.NetworkSettings.IPAddress == "192.168.1.222")

   {

    Debug.Print("Waiting for DHCP");

    Thread.Sleep(250);

   }

  }

  catch (Exception ex)

  {

   Debug.Print(ex.Message);

  }

}
This was a challenge because I could not get the DHCP server to give me an IP address in the beginning. I could only get the IP address when I called the UseStaticIP() method before the UseDHCP() method. Doing that is no problem, but finding that out was an effort.
Configured my Gadgeteer to take a picture
There are many examples on how to get this done, so I won’t go through this part in detail. Here is a good example, as well, I suggest you do that one too. It is surprisingly very easy to take a picture with the Gadgeteer.
The tip I can give here is that when the picture is taken, it is stored in type GT.Picture which is exactly the kind we need to pass to the container. Therefore, in your camera_PictureCaptured() method, pass the picture.PictureData to the method which needs it to send to Azure. Keep reading, this will be clear later on.
Continue reading to Part 2 and download the source code.
